Recipe: Banana Raspberry Wine Muffins

I promised to have this recipe posted today, so please forgive my tardiness.  Here’s a yummy way to use up some of those browning bananas that we all seem to have from time to time.  This recipe is loosely based on one that I found on a Food TV recipe app, but their recipe called for a few ingredients that I either didn’t have or didn’t want to use.  I hope you’ll try it and see what works best for you.   I loved the lightly pale pink color but if you want to make them a touch more vibrant, I would suggest using some extra food coloring.  The taste was delicate… nothing was exceptionally strong (other than the banana), so it would be a fun addition to a luncheon or “afternoon tea” sort of thing.  I thought they were terrific… and since it started with a ‘real” recipe, you’re going to get it in “real” recipe form, complete with exact ingredients.  Score!

Ingredients:

  • 1/3 cup butter/margarine
  • 4 medium bananas, very ripe20140228-133053.jpg
  • 3/4 cup sugar
  • 1 tsp vanilla extract
  • 1/4 cup fat free egg substitute
  • 2 Tbs raspberry syrup
  • 2 Tbs white wine (I used James River Chardonel)
  • 1 tsp baking soda
  • 1 Tbs chia seeds
  • 1/8 tsp salt

Directions:

  1. Preheat oven to 350 degrees
  2. Melt butter/margarine and then mash bananas into butter
  3. Add sugar, egg, vanilla, raspberry syrup, and wine into the banana mixture
  4. Fold in remaining ingredients until just incorporated
  5. Spoon into 24 mini-muffin tins and bake in pre-heated 350 degree oven for 20-25 minutes.

I like to add a little sanding or raw sugar on top for decoration, but it’s not necessary.

I shared these with some random people at a recent event and they were highly complimentary of the taste and texture.  You can make these into 12 individual muffins, if you prefer, but this full recipe made a perfect set of 24 mini-muffins.  Great for sharing and just enough of a snack at only 102 calories per mini-muffin… yes?  Enjoy!

Leftover Recipe: Turkey Leftover Braid

This recipe was inspired by a lunch we had with our cousin Ann last month and I’ve been excited about trying it ever since.  I altered things somewhat (is that really a surprise to anyone who knows me??) but it turned out extremely well.

Here’s the basic recipe I used:TurkeyLeftoverBraid

  • 1/2 package shredded Monterey Jack cheese
  • 2 cups of leftover turkey, diced
  • 2 stalks of celery, with tops, diced fine
  • 1 large spoon of dijon mustard
  • 3 large spoons of mayo (I used 2 large spoons of nonfat plain Greek yogurt and 1 spoon of Miracle Whip Light)
  • 1/4 cup James River Cellars Chardonel (could have used Chardonnay but I had Chardonel available)
  • 1/2 package of craisins
  • 3 strips of cooked bacon, diced
  • salt and pepper to taste
  • 2 packages of crescent dough (sheets work best, but rolls work as well)
  1. Mix the turkey salad together and allow the flavors to meld for a bit – you can certainly make it and put it right into the braid, but the flavors intensify if you can let it sit in the fridge a little bit.
  2. On a large sheet pan covered in foil (or sprayed with cooking spray… I just don’t like the mess otherwise), lay out both packages of crescent dough side-to-side so you have a long rectangle of dough.  Smoosh any openings in the dough so everything is flat and uniform.
  3. Spread the turkey mixture evenly down the center of the rectangle of dough.
  4. Make slits along each side, doing your best to keep them at even intervals from each other on each side.
  5. NOTE: Here’s the “fancy” part.  Turn the pan so that the rectangle has a “top” and a “bottom.  Starting from one end, and working down to the other, you’re now going to make a “braid” to keep the salad inside.  Lift the left and right top strips, bring them to together, twist once, and lay them back down.  Continue with all remaining strips until it looks like a braided package in front of you.  Pinch the edges closed and tuck under each end.
  6. Bake braid in a preheated 375 degree oven for 30 minutes and then serve with or without a salad.  This meal should serve 4-5 people (or 3 very hungry people who forgot to eat lunch).

You could also add toasted almonds if you want more crunch but we find that the celery gives it just the right bite.  I’ve used this method for a few different meals (especially the Wine Taco Braid post on this blog) so feel free to incorporate any changes or flavors you want.  After all, who knows your family’s tastes better than you!  Have fun!

Recipe: Chicken Chardonel Cassoulet

I truly love having an afternoon when I have time to make a hearty, warming, delicious dinner.  I love to start with a few ingredients and turn them into something that just screams “Fall” to me and my family.  This was just such a meal. I make a lot of cassoulets, but this one turned out really well… so well that I wish I had doubled the recipe so I could have it for another few meals.

Tradition dictates that a “Cassoulet” is a French dish made with meat and beans.  It’s actually named after the slanted-side earthenware bowl (called a Cassolein which it is to be cooked.  I don’t own such a cooking vessel, so I use a large heavy stockpot that will stand up to some good old-fashioned cooking.  I don’t subscribe to the notion that you have to purchase a ton of different individual utensils to make a good meal.  It’s not necessarily about the final presentation… it’s about the care and love that goes into anything you make.  I realize that this can sound pretty hokey, but it’s honestly how I approach cooking in general.

This recipe was fairly simple and came together extremely well.  I used the following ingredients:  olive oil, one package of boneless, skinless chicken thighs, one thin slice of ham steak (thinly diced),  2 cans of cannellini beans (I used one can of pinto beans and one can of cannellini beans, because that’s what I had on hand), well-chopped Mirepoix (a mixture of carrots, celery, and onion…. don’t let the “big word” bother you), 2 bay leaves, salt/pepper, a can of chicken broth, a can of James River Cellars’ Chardonel, 2 Tablespoons of pumpkin puree, and 1/4 cup of non-fat plain Greek yogurt.

NOTE:  As you may know (if you read this blog at all), I cook using “The Force”.  I look at my fridge and pantry when cooking and adjust my ingredients based on what I have available or what might look good to me at any given moment.  This was one of those recipes.  If you’re starting with a recipe (especially one of *my* recipes), feel free to add or subtract ingredients to tailor the meal to your family’s taste preference or pantry contents.ChickenChardonelCassoulet

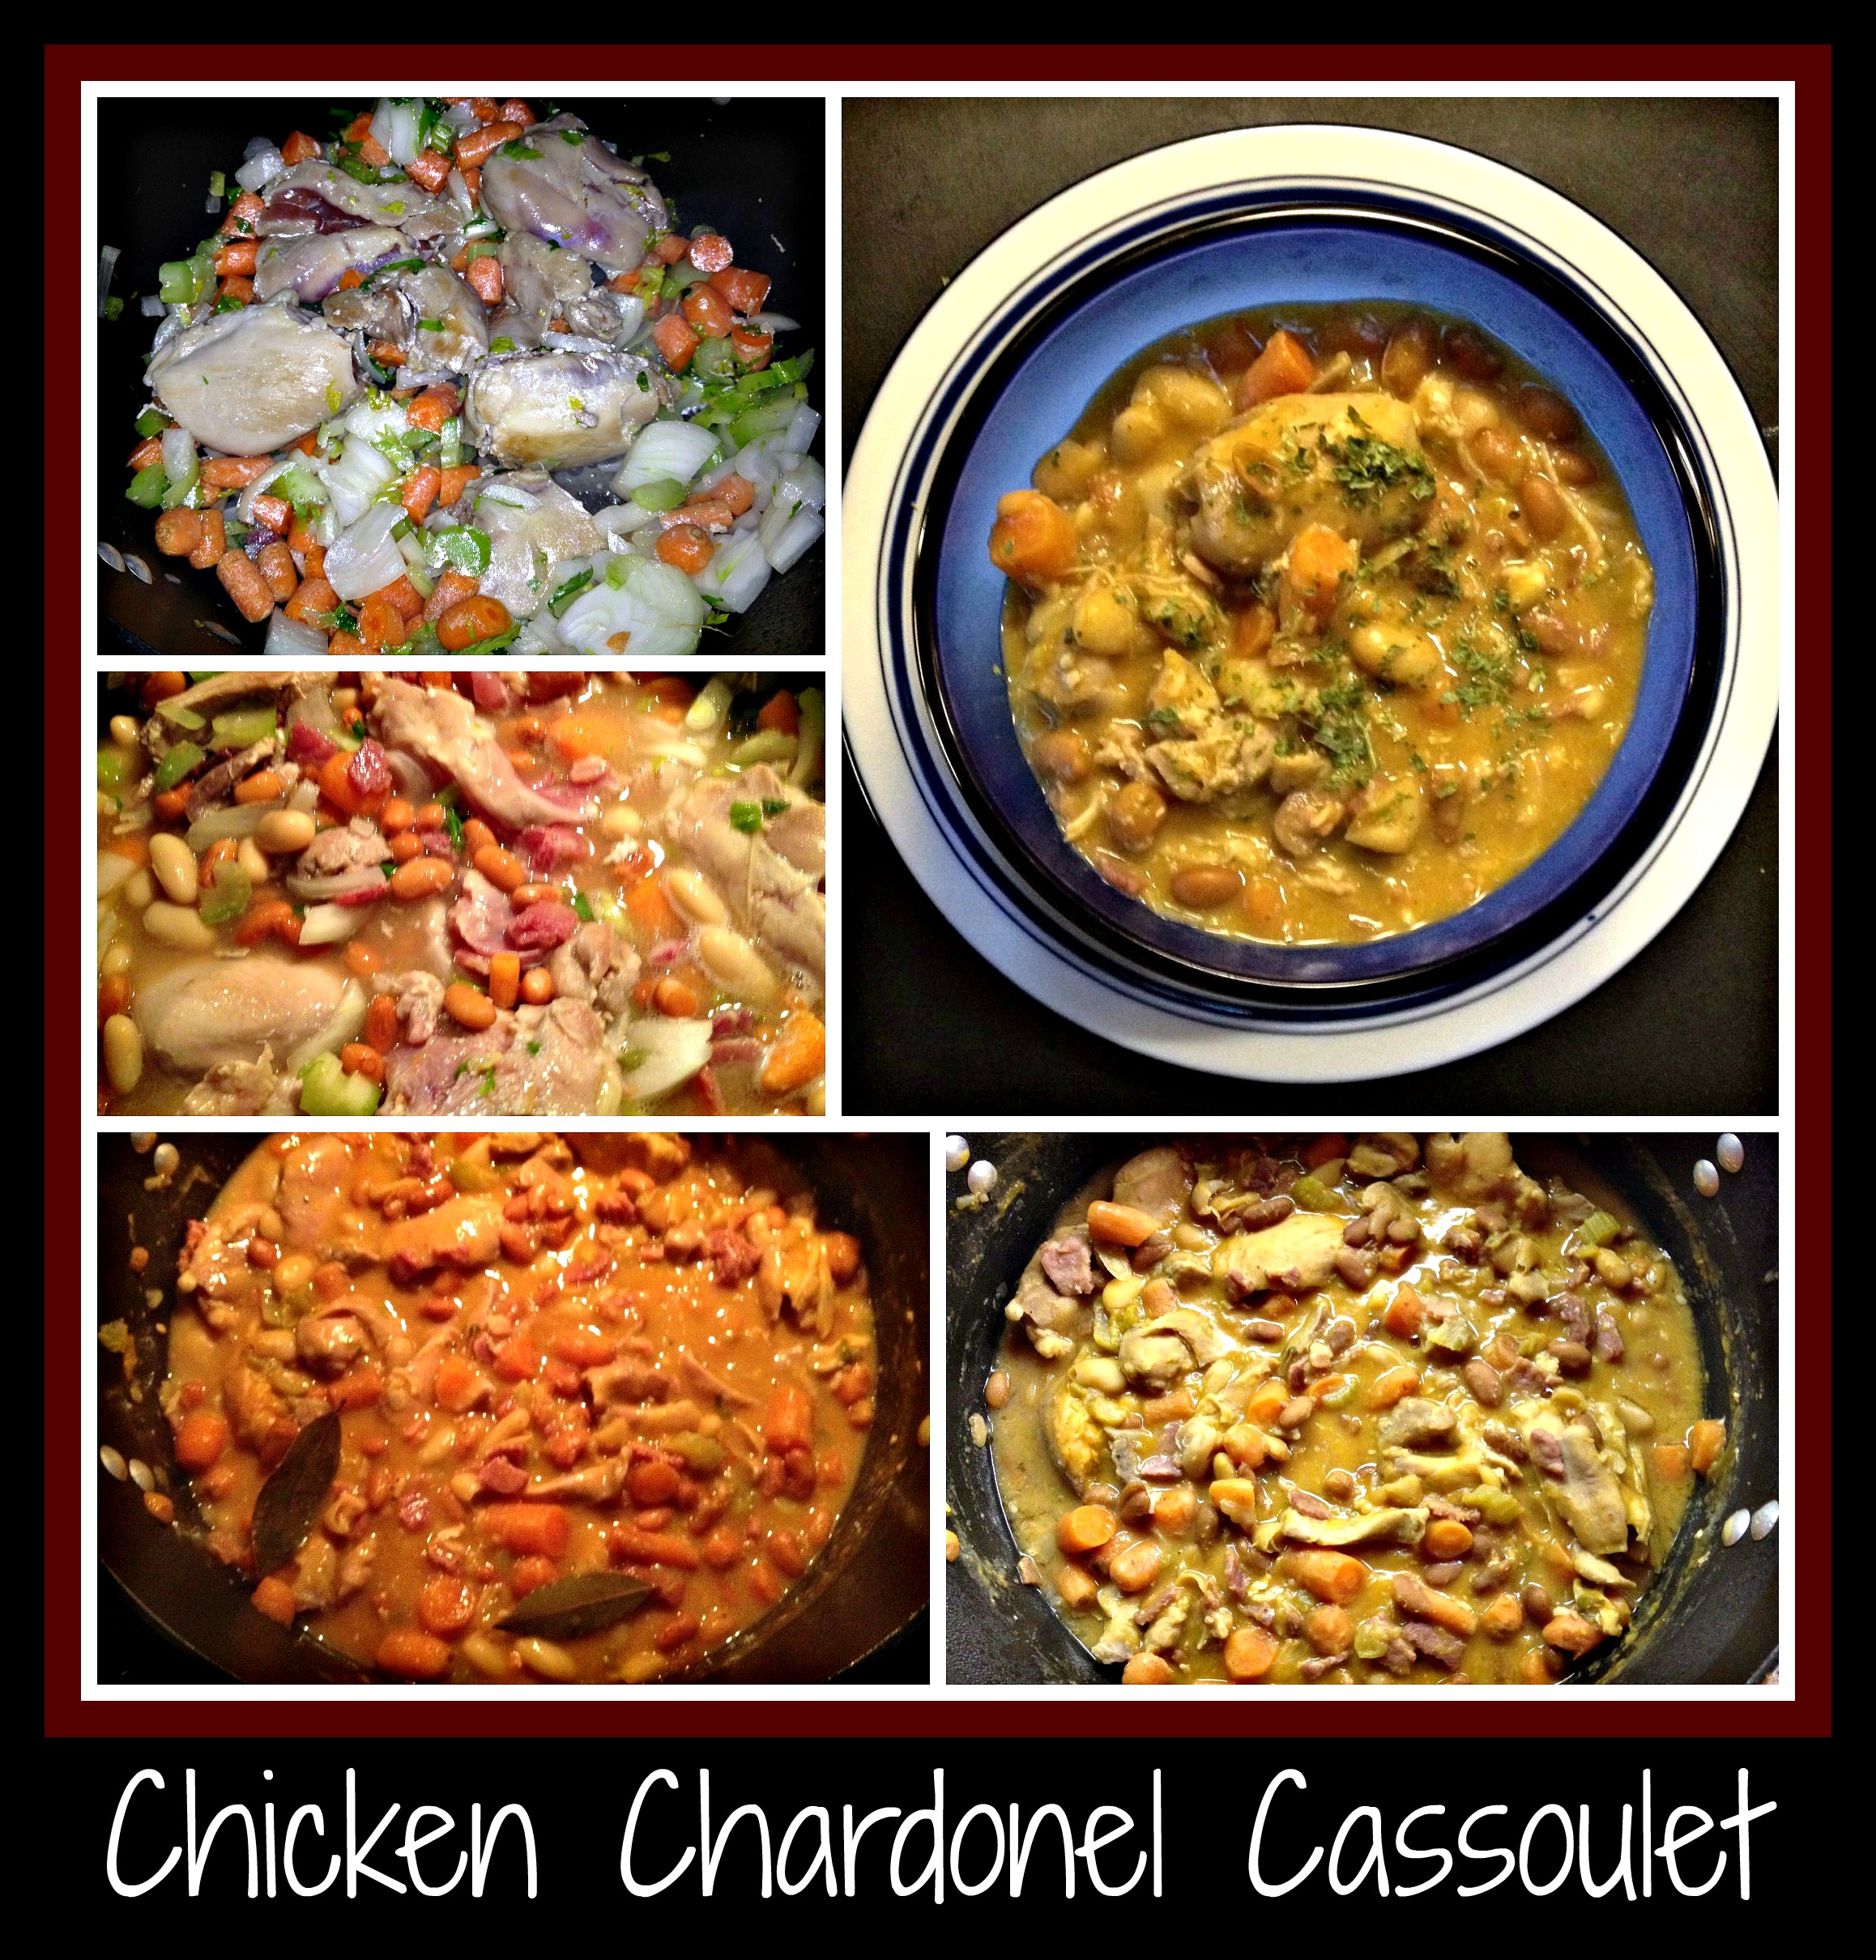
I started with a heavy, rounded stockpot.  I added some olive oil and sauteed the diced ham until it was fairly crispy and the fat had rendered out of the ham.  Using a slotted spoon, I removed the ham and added the mirepoix to saute and soften for a few minutes before popping in the chicken thighs and allowing them to brown a bit.  The meat is going to cook for an hour or two, so don’t worry about whether it’s browned long enough… you simply want the color on the meat before adding in the rest of the ingredients.  Once the chicken and veggies were sauteed (see top left hand photo), I replaced the ham into this mixture and started layering everything into the pot.

The middle photo on the left shows the cassoulet after I added the can of pinto beans (WITH liquid), can of cannellini beans (WITH liquid), can of white wine (James River Cellars’ Chardonel), can of broth, and seasonings.  I put the lid on the pot and allowed everything to cook together for an hour before starting to adjust seasonings.

The bottom photos show the cassoulet after I added a bit of pumpkin puree.  I realize that this is a strange ingredient to add to a cassoulet, but (as I keep saying) it was in my fridge and I knew that this small amount would thicken the sauce a bit without changing the flavor significantly.  I could have made a roux (butter and flour) and slowly added it to thicken the sauce, but I really felt that would have thickened the cassoulet too much.  It’s really up to you as to how you thicken (or not thicken) your meal… that’s the glory that *is* cooking… make it your own!  My final addition was a huge spoonful (about 1/4 cup) of non-fat plain Greek yogurt.  I could easily have used sour cream, but I try to always have Greek yogurt on hand for just such an occasion.   I absolutely could have left the yogurt out at this point, but adding that light touch really finished the cassoulet and made it special.

That’s a cassoulet, in a nutshell.  Not too hard, right?  This recipe is something that can provide you and your family with a filling, one-pot meal that only needs some crusty bread on the side to complete your dinner.  I hope you’ll try your hand at making this recipe… and making it your own… you may even find a new family favorite!


Recipe: Mango Risotto

OK, I know this sounds really weird, but this side dish was the perfect accompaniment to dinner recently.  As you can see by the photo, I was making tilapia (not using the recipe for Ali’s Rock Star Tilapia… just wanted to saute’ the fillets with some paprika) and I decided to make a side dish that would utilize the mangos that I picked up at Sam’s Club recently.

MangoRisotto

My younger son is a huge fan of the mango fruit, so I decided to attempt a spicy/sweet risotto that would include this yummy ingredient.  I peeled and chopped two mangos and popped them into a saucepan with 1 cup of white wine (I used Potomac Point Viognier this time… could just as easily have used James River Cellars’ Chardonel or Vidal Blanc) and 1 cup of water.  I brought the liquid to a low simmer and cooked the fruit until I could mash it easily with a potato masher.

I added 3/4 cup arborio rice and seasoned with a little chicken consomme powdersalt & pepper  before allowing the rice to cook and soak up all the yummy flavors.  Simmering the rice took about a half hour, but I was watching to see if I needed to add any more liquid.  Note:  the liquid absorbed faster than I expected, so I added a touch of James River Cellars’ Hanover White Wine, to stay with the sweet/spicy theme.

Once the liquid was absorbed and the rice was tender, I added a handful of parmesan cheese and a heavy dash of paprika to taste.  This side dish ended up having a tasty blend of mango and spice that paired really well with the sautee’d fish.

Nothing like having something go over well when you’re totally winging it, right?  I was definitely a fan and will work this dish into the “meal rotation” going forward…  YUM!

Recipe: Shrimp with Lemon/Chardonel Sauce

Wow…. Even *I* was blown away by how yummy tonight’s dinner turned out.  Shrimp with Lemon_Chardonel SauceThis dinner was an incredibly simple and amazingly flavorful meal… worthy of a blog post and definitely worth writing down so that others can make something like this for dinner sometime soon!

I started with a thawed pound of jumbo shrimp that I had already peeled.  Our local grocery store advertises deals on bags of frozen shrimp every week, a “buy one and get one free” sort of deal that I try and take advantage of every chance I get.  Shrimp is a big favorite of 3/4 of my family (and the older one, who isn’t a fan, is now in grad school and not being fed here) so I really like to have shrimp on hand for quick go-to meals.

I popped 2T of butter and two turns of the pan of olive oil into a large skillet and let it heat until the butter was browned and smelled slightly nutty.  I dropped the shrimp into the pan and gave the pan time to sear each side of the shrimp until both sides were toasty.  Since I knew this was going to be a simple dinner, I grabbed a bag of green beans and put them into the microwave for 5 minutes to cook.

Once both sides of the shrimp were browned and nicely seared, I added the juice and zest of 1 lemon to the sauce and did two turns of the pan with James River Cellars’ Chardonel white wine.  Honestly, I could have used a Chardonnay or another white wine that I liked, but I had a bottle of Chardonel open in the fridge and it was just calling to me for this dinner.  For this recipe, feel free to use/try your own favorite white wine for the sauce.  Something that is light with some tropical fruit notes should fit the bill nicely.  Just always make sure to cook with a wine that you’d want to drink.

I allowed the shrimp to simmer in the lemon/wine sauce while I pulled the green beans out of the microwave and popped in a bag of Uncle Ben’s Brown Basmati Rice for the 90 seconds, as directed.  Once the sauce had thickened and the rice was done, I plated the meal and it was done… the meal was finished and dinner was complete.  This one was totally yummy and worthy of sharing with you all.

Note:  The next time I make this dinner, I’ll probably make pasta, instead of rice, to go along with the shrimp… that will allow me to use a bit of pasta water to stretch the sauce a bit.  That’s the only real change I’d make to this dinner… otherwise, it’s just fabulous!

I hope you’ll consider trying this recipe.  It’s easy… it’s incredibly flavorful… and it made everyone smile.  That, in my book, makes this recipe a huge winner!