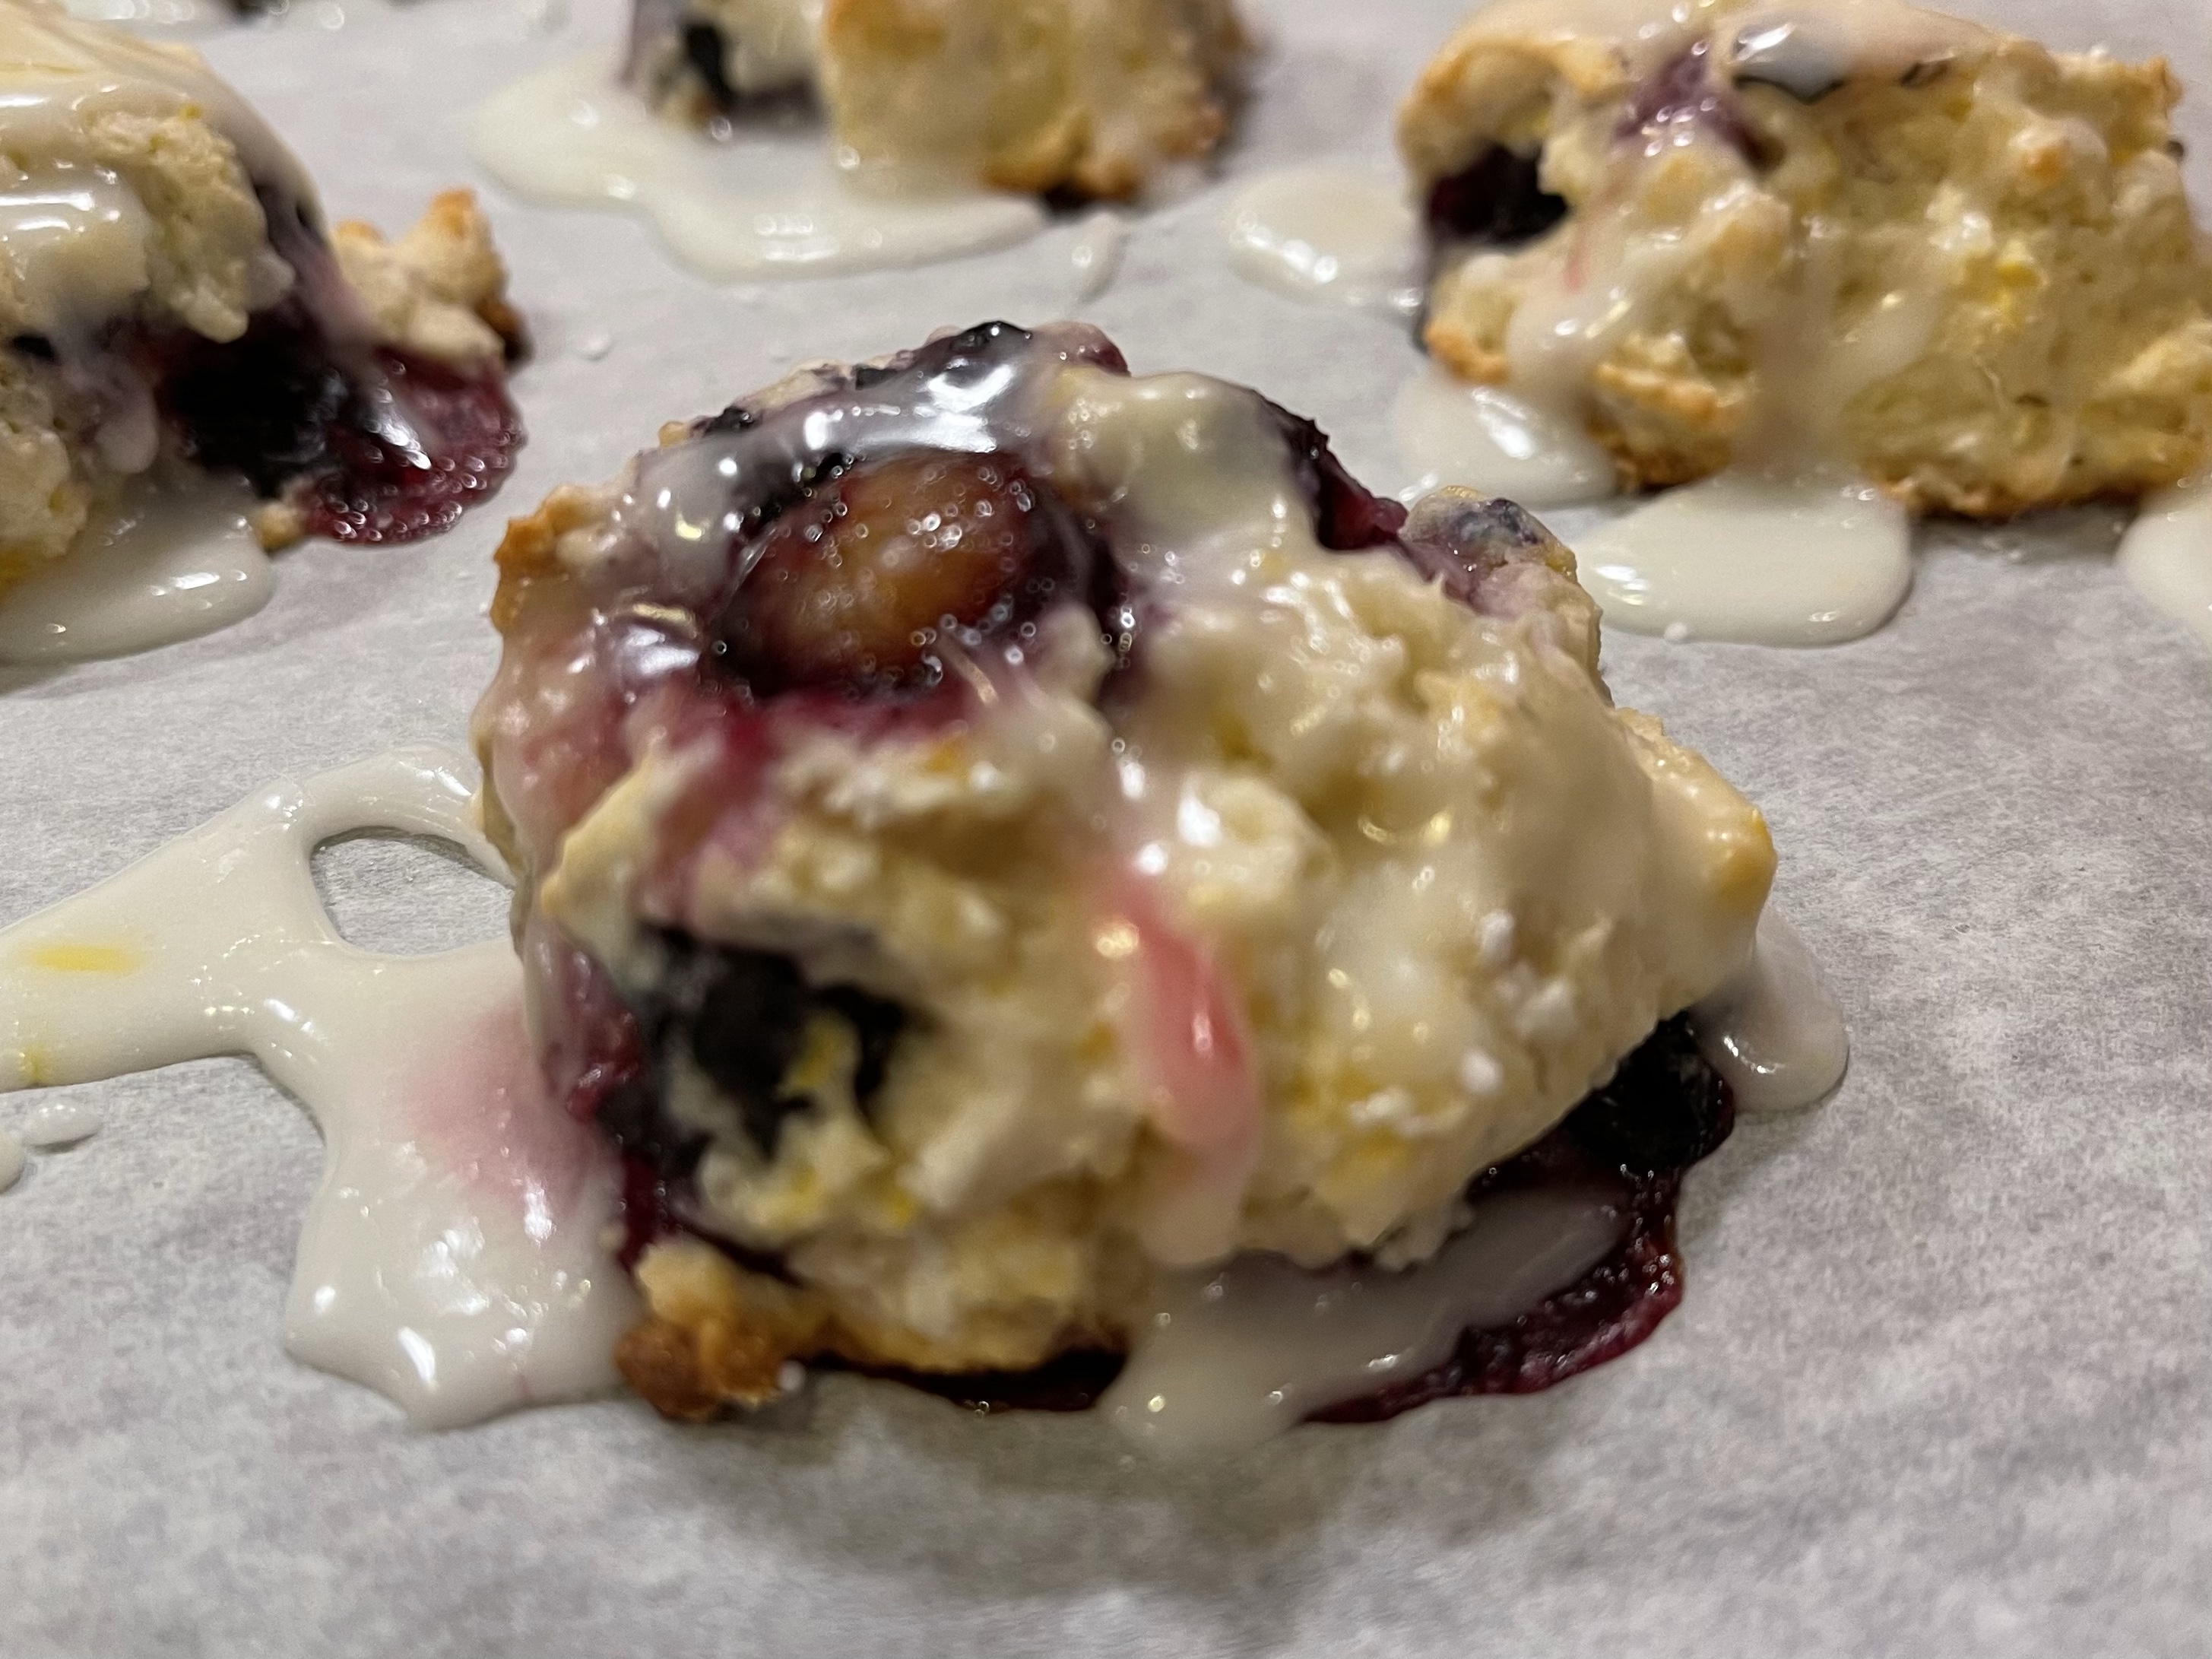
Blueberry Lemon Scones

I got to play in the kitchen today…. and chose to experiment with a scone recipe that uses my favorite @JiffyMixes baking mix. Jiffy mix has been made by the Chelsea Milling Company, a family-owned business started in 1901. Since we lived in Chelsea, MI for a number of years, I love to use this product for biscuits, scones, pancakes, or even fried chicken… it’s so versatile. Here’s a photo of the box – look for it in the baking aisle of your local grocery store.

INGREDIENTS:

  • 1 1/2 cups Jiffy Mix
  • 3 TBSP sugar
  • 1 1/4 tsp lemon zest (I use the zest of one lemon)
  • 1/2 heaping cup blueberries, if using frozen, don’t thaw (I use 1 handful of blueberries)
  • 1 egg
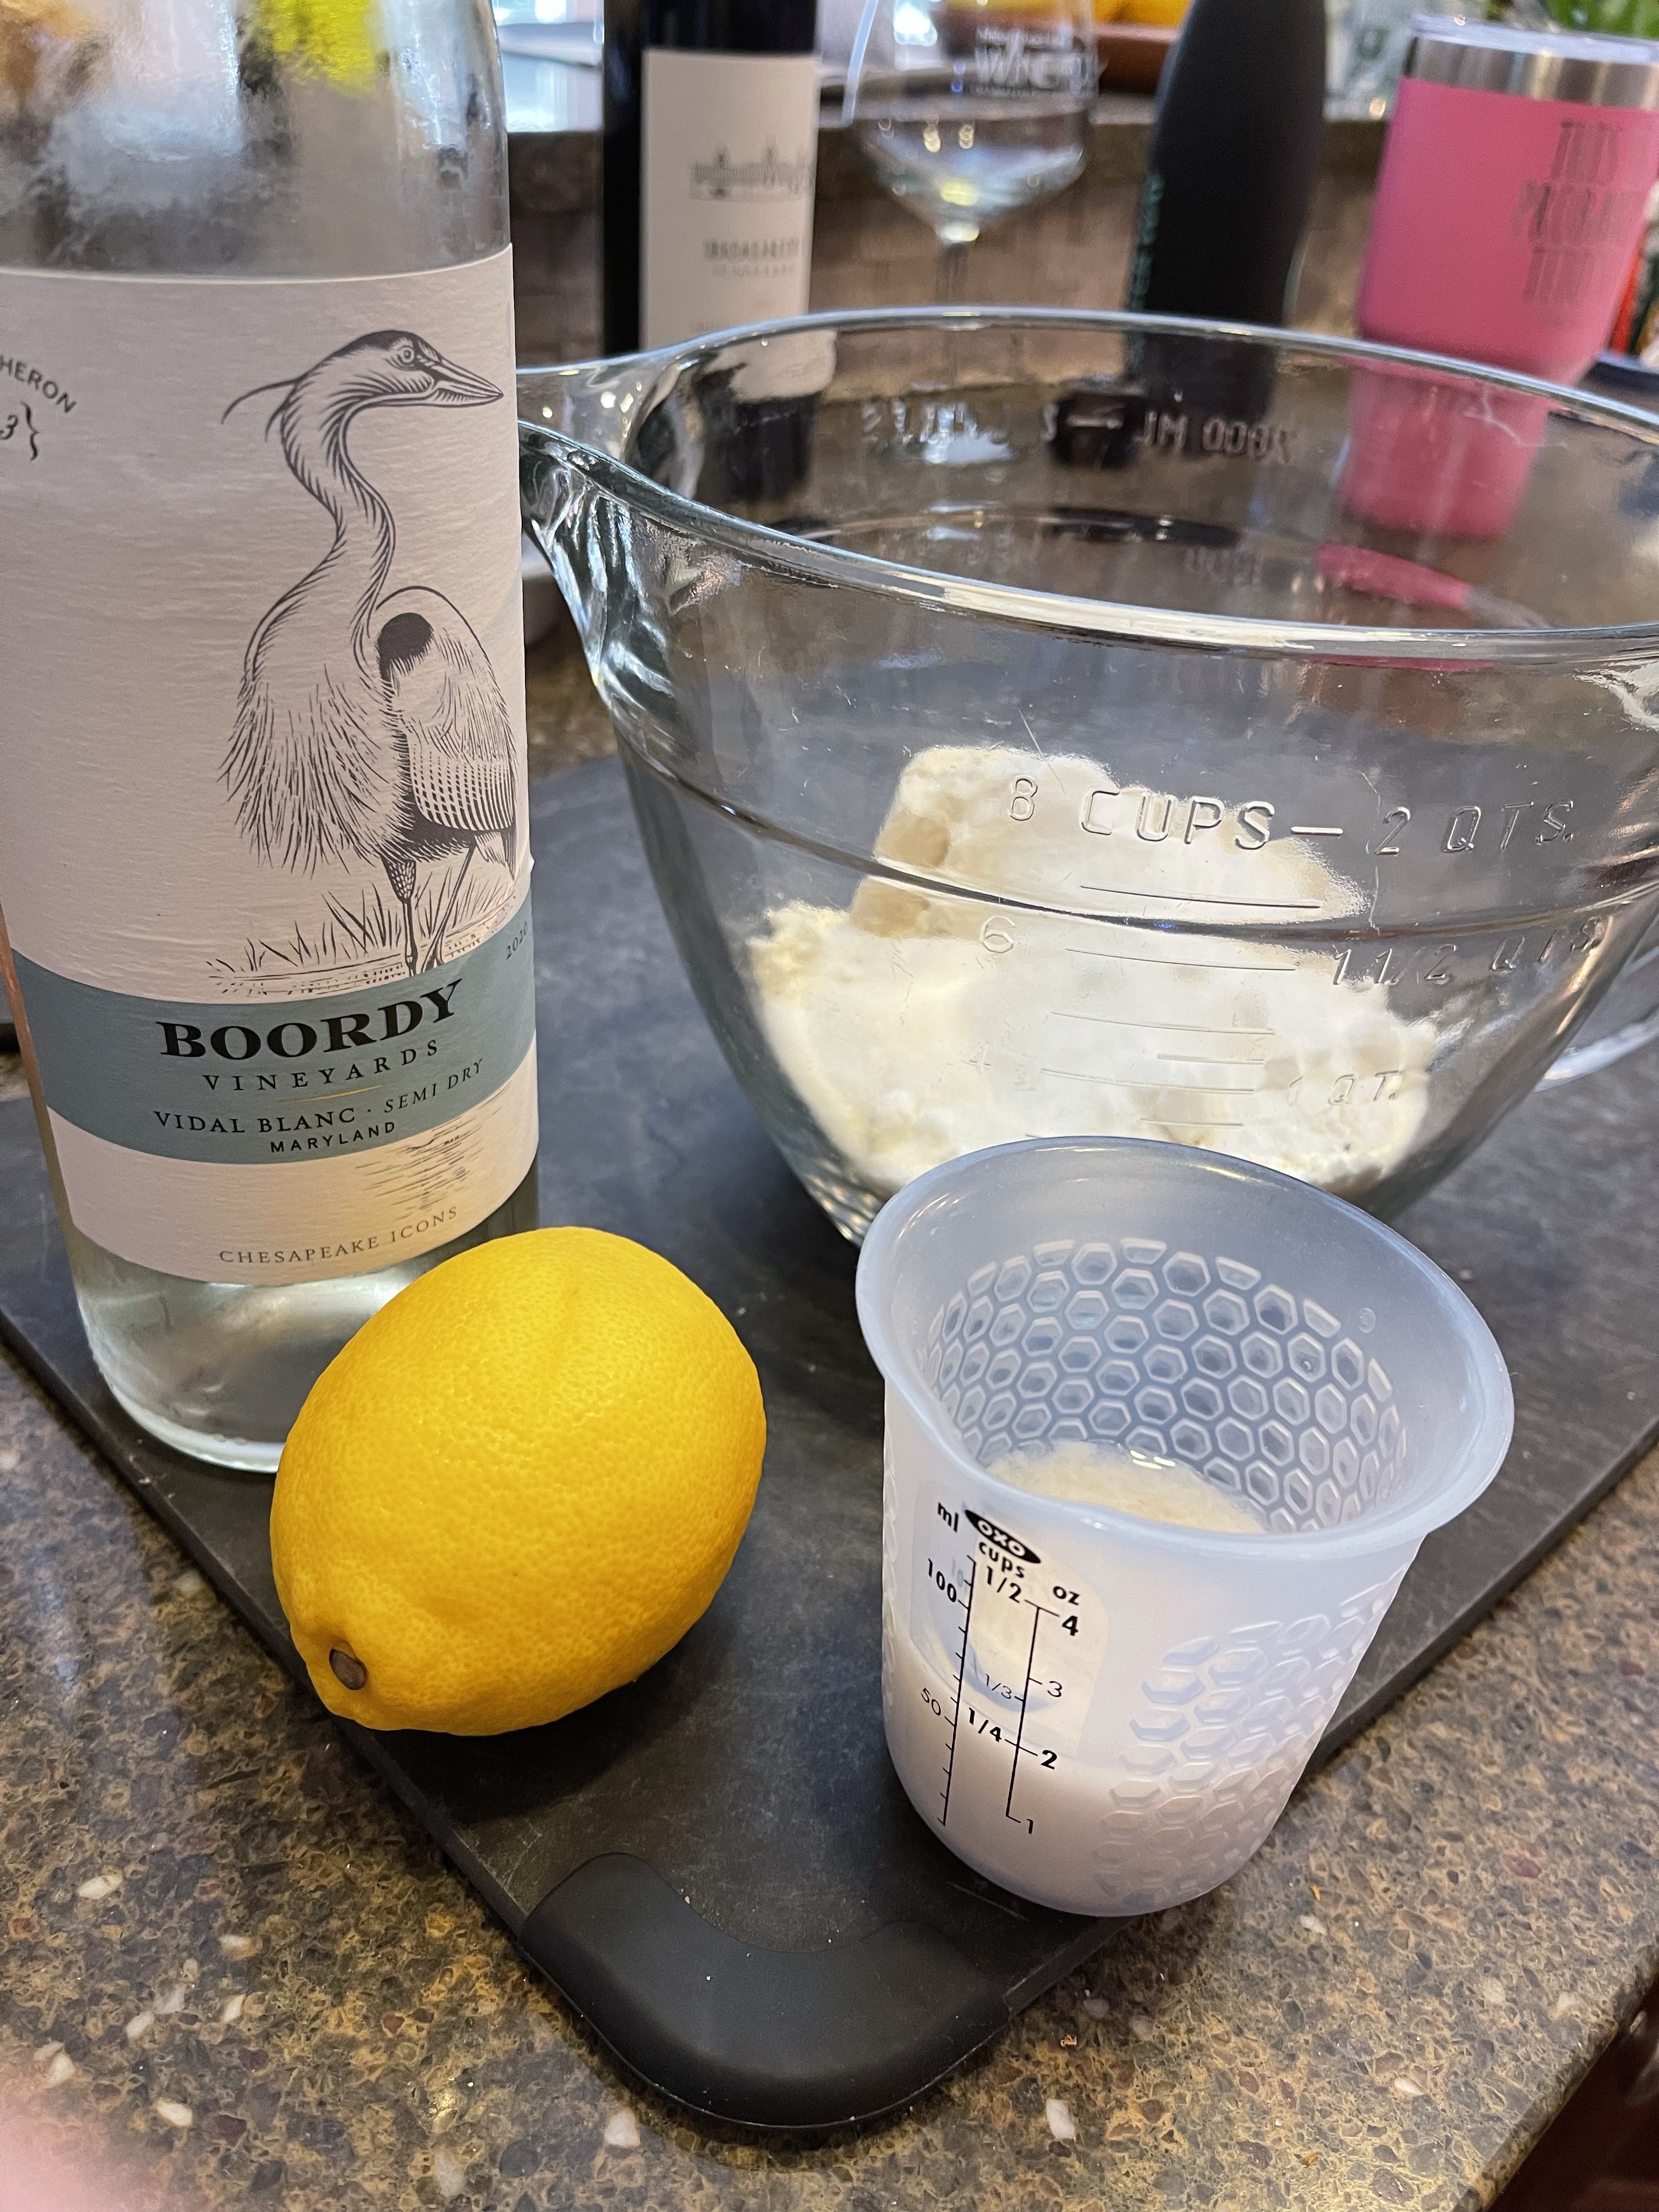
  • 3 TBSP liquid (I used a mixture of half almond milk, half @BoordyVineyards white wine)
  • 1/2 tsp vanilla extract

DIRECTIONS:

  • Preheat oven to 375* F
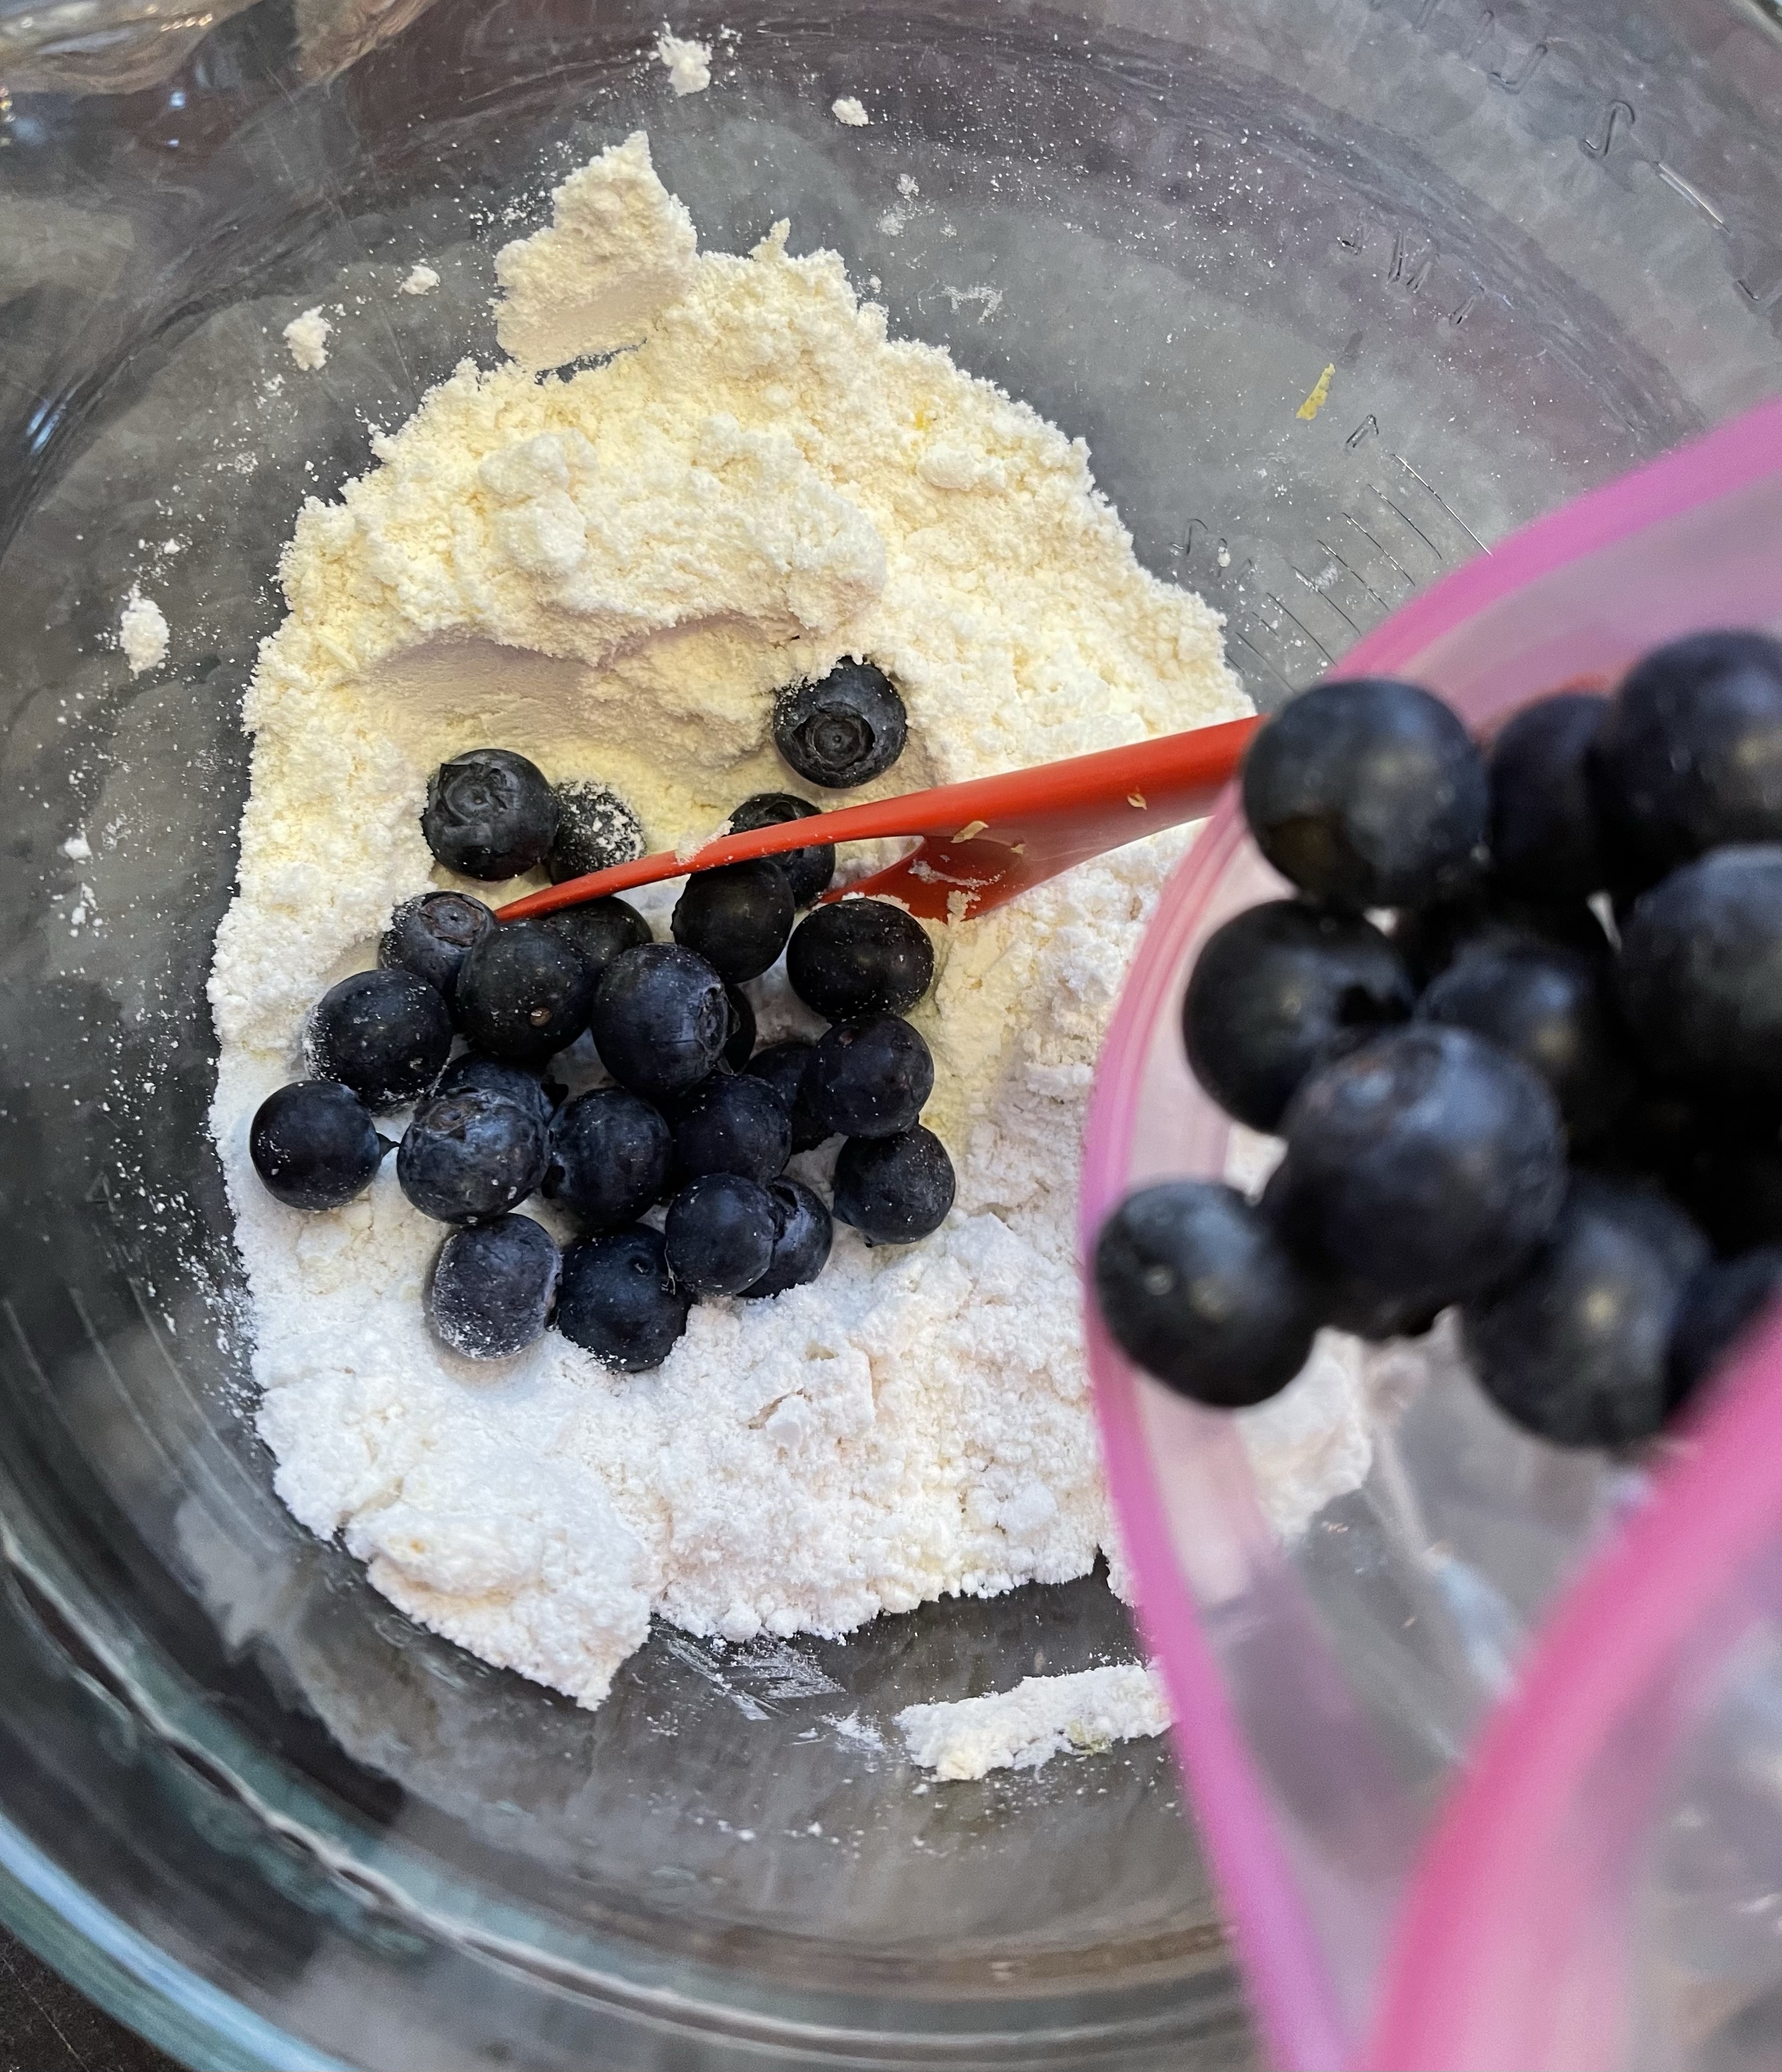
  • In a large bowl, blend Jiffy Mix, sugar, egg, liquids, and vanilla. Add zest and berries and mix thoroughly, but gently.
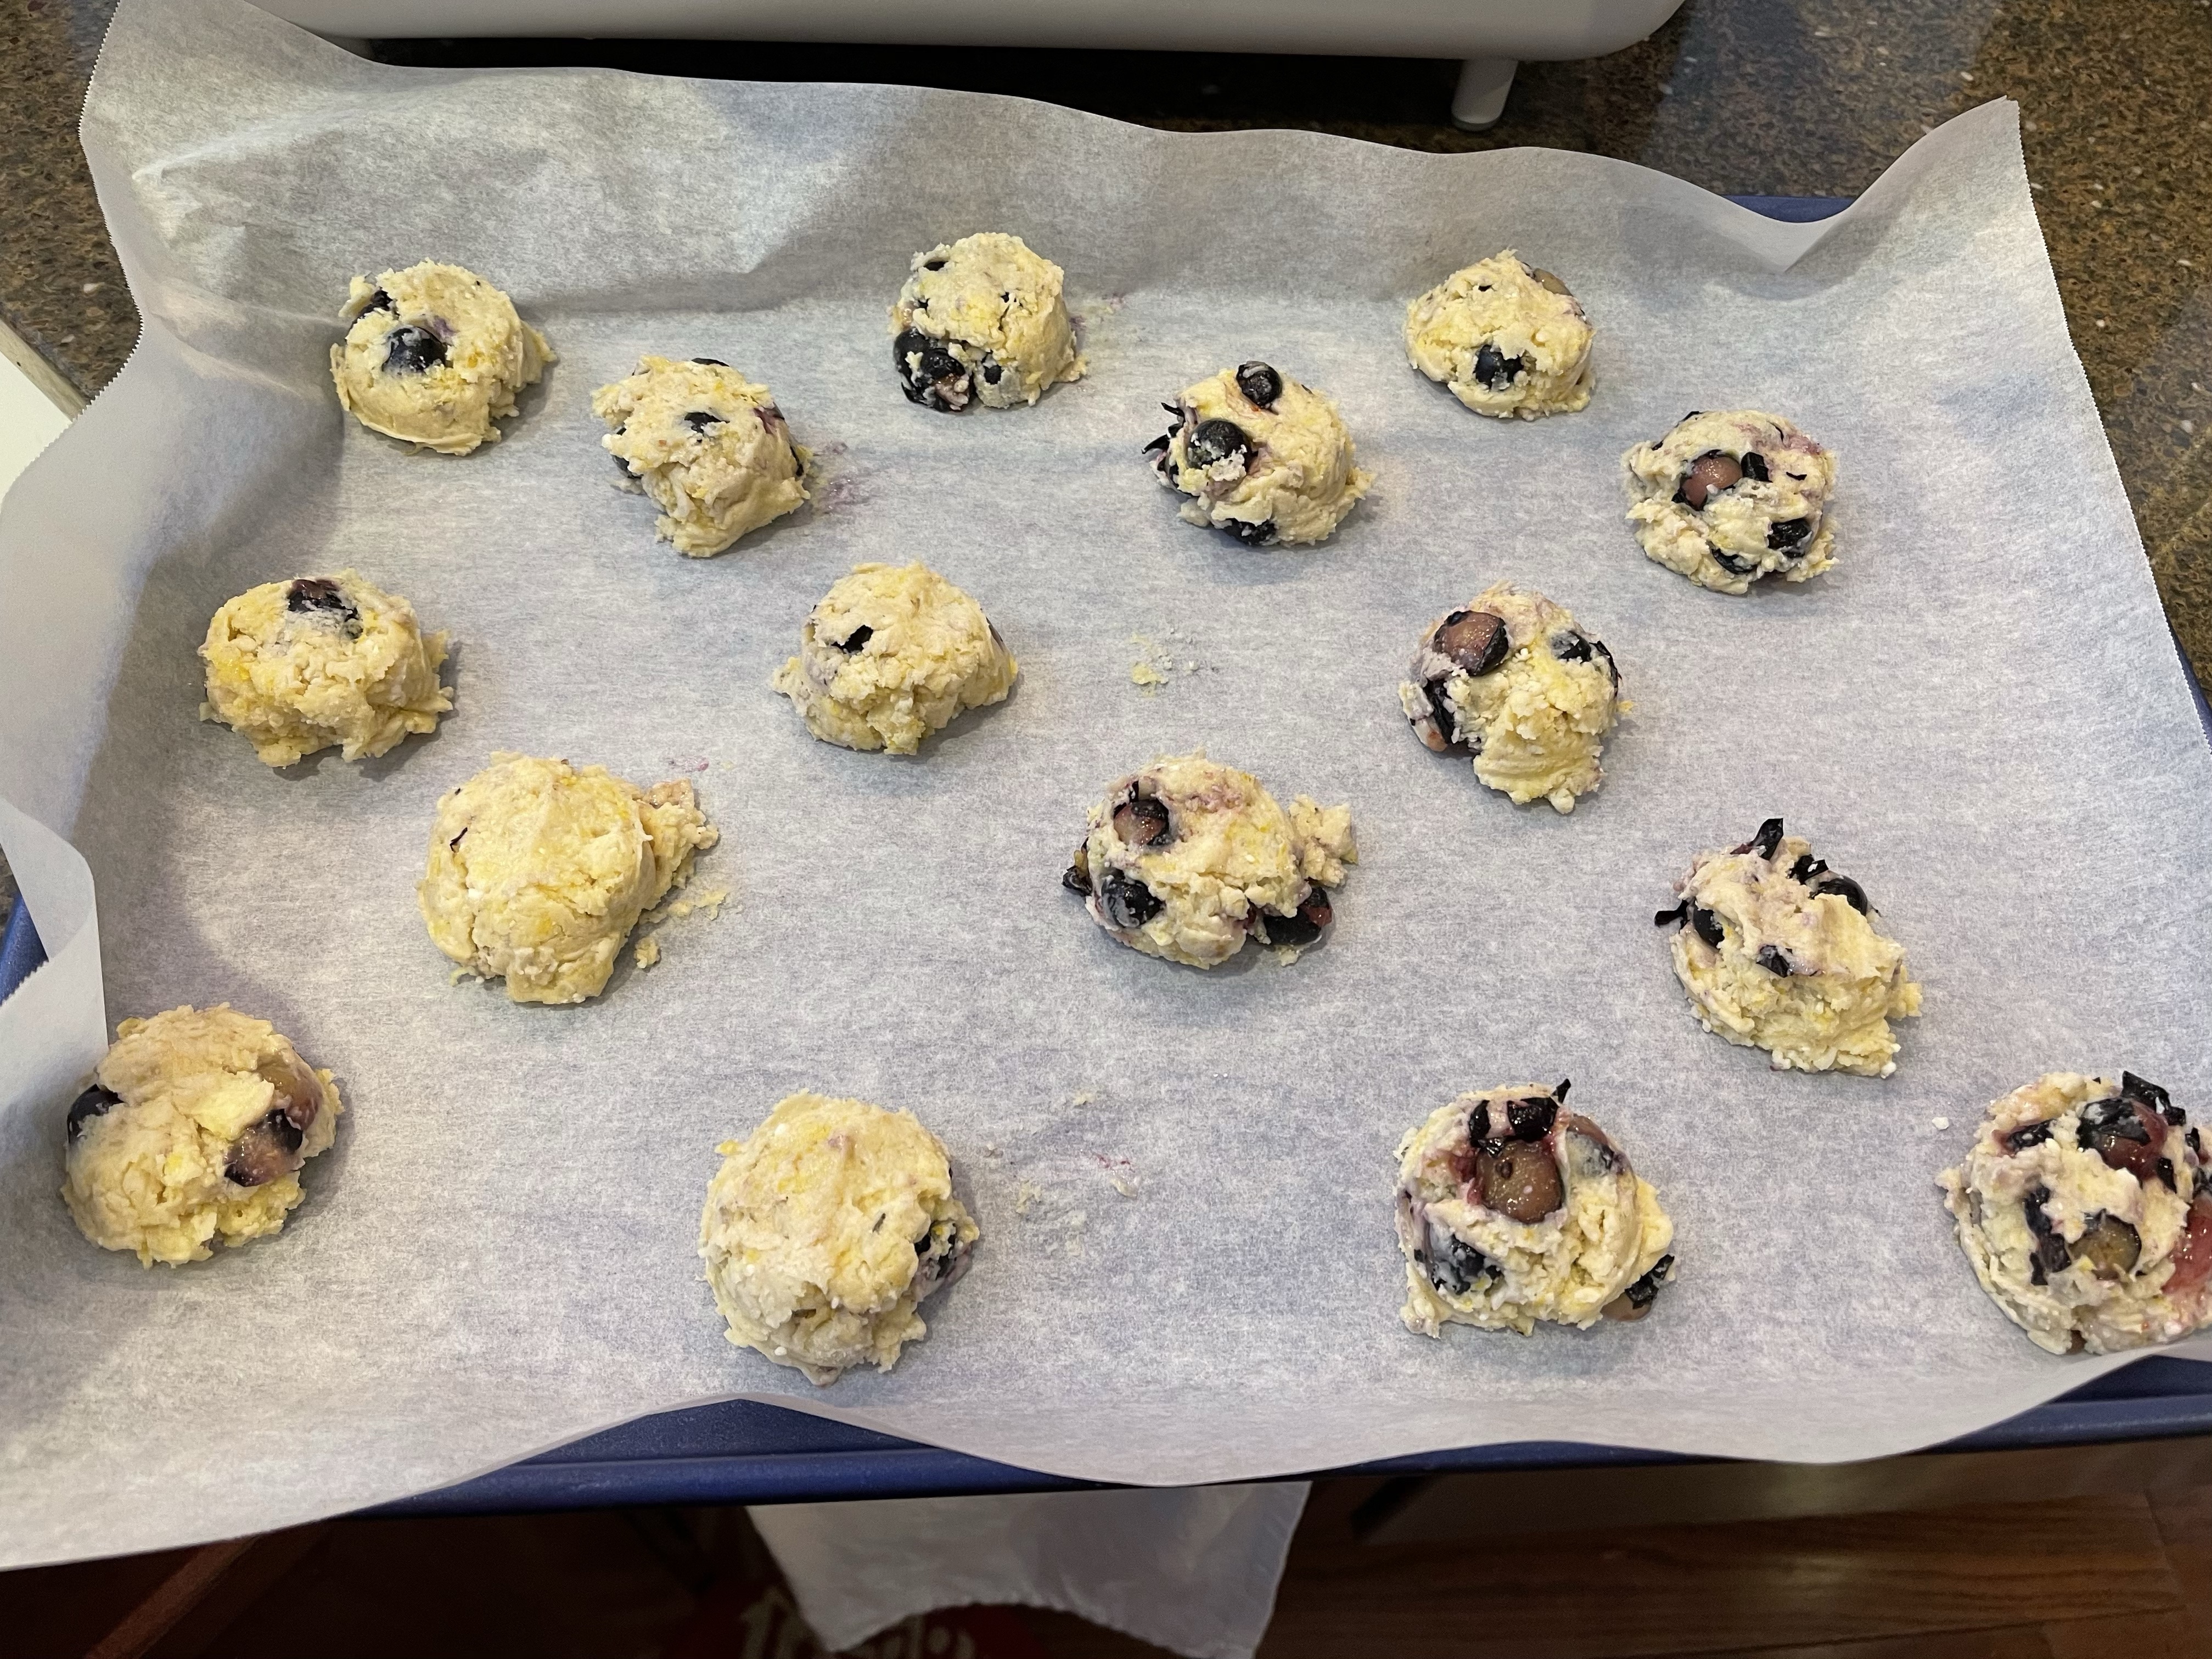
  • Lay a piece of parchment on cookie sheet and scoop out dough into small scones. I use a medium size cookie scoop and lightly press the dough down to flatten slightly. I like to lightly dust dough with sugar before baking
  • Bake in preheated oven for 10-15 minutes until edges begin to brown.
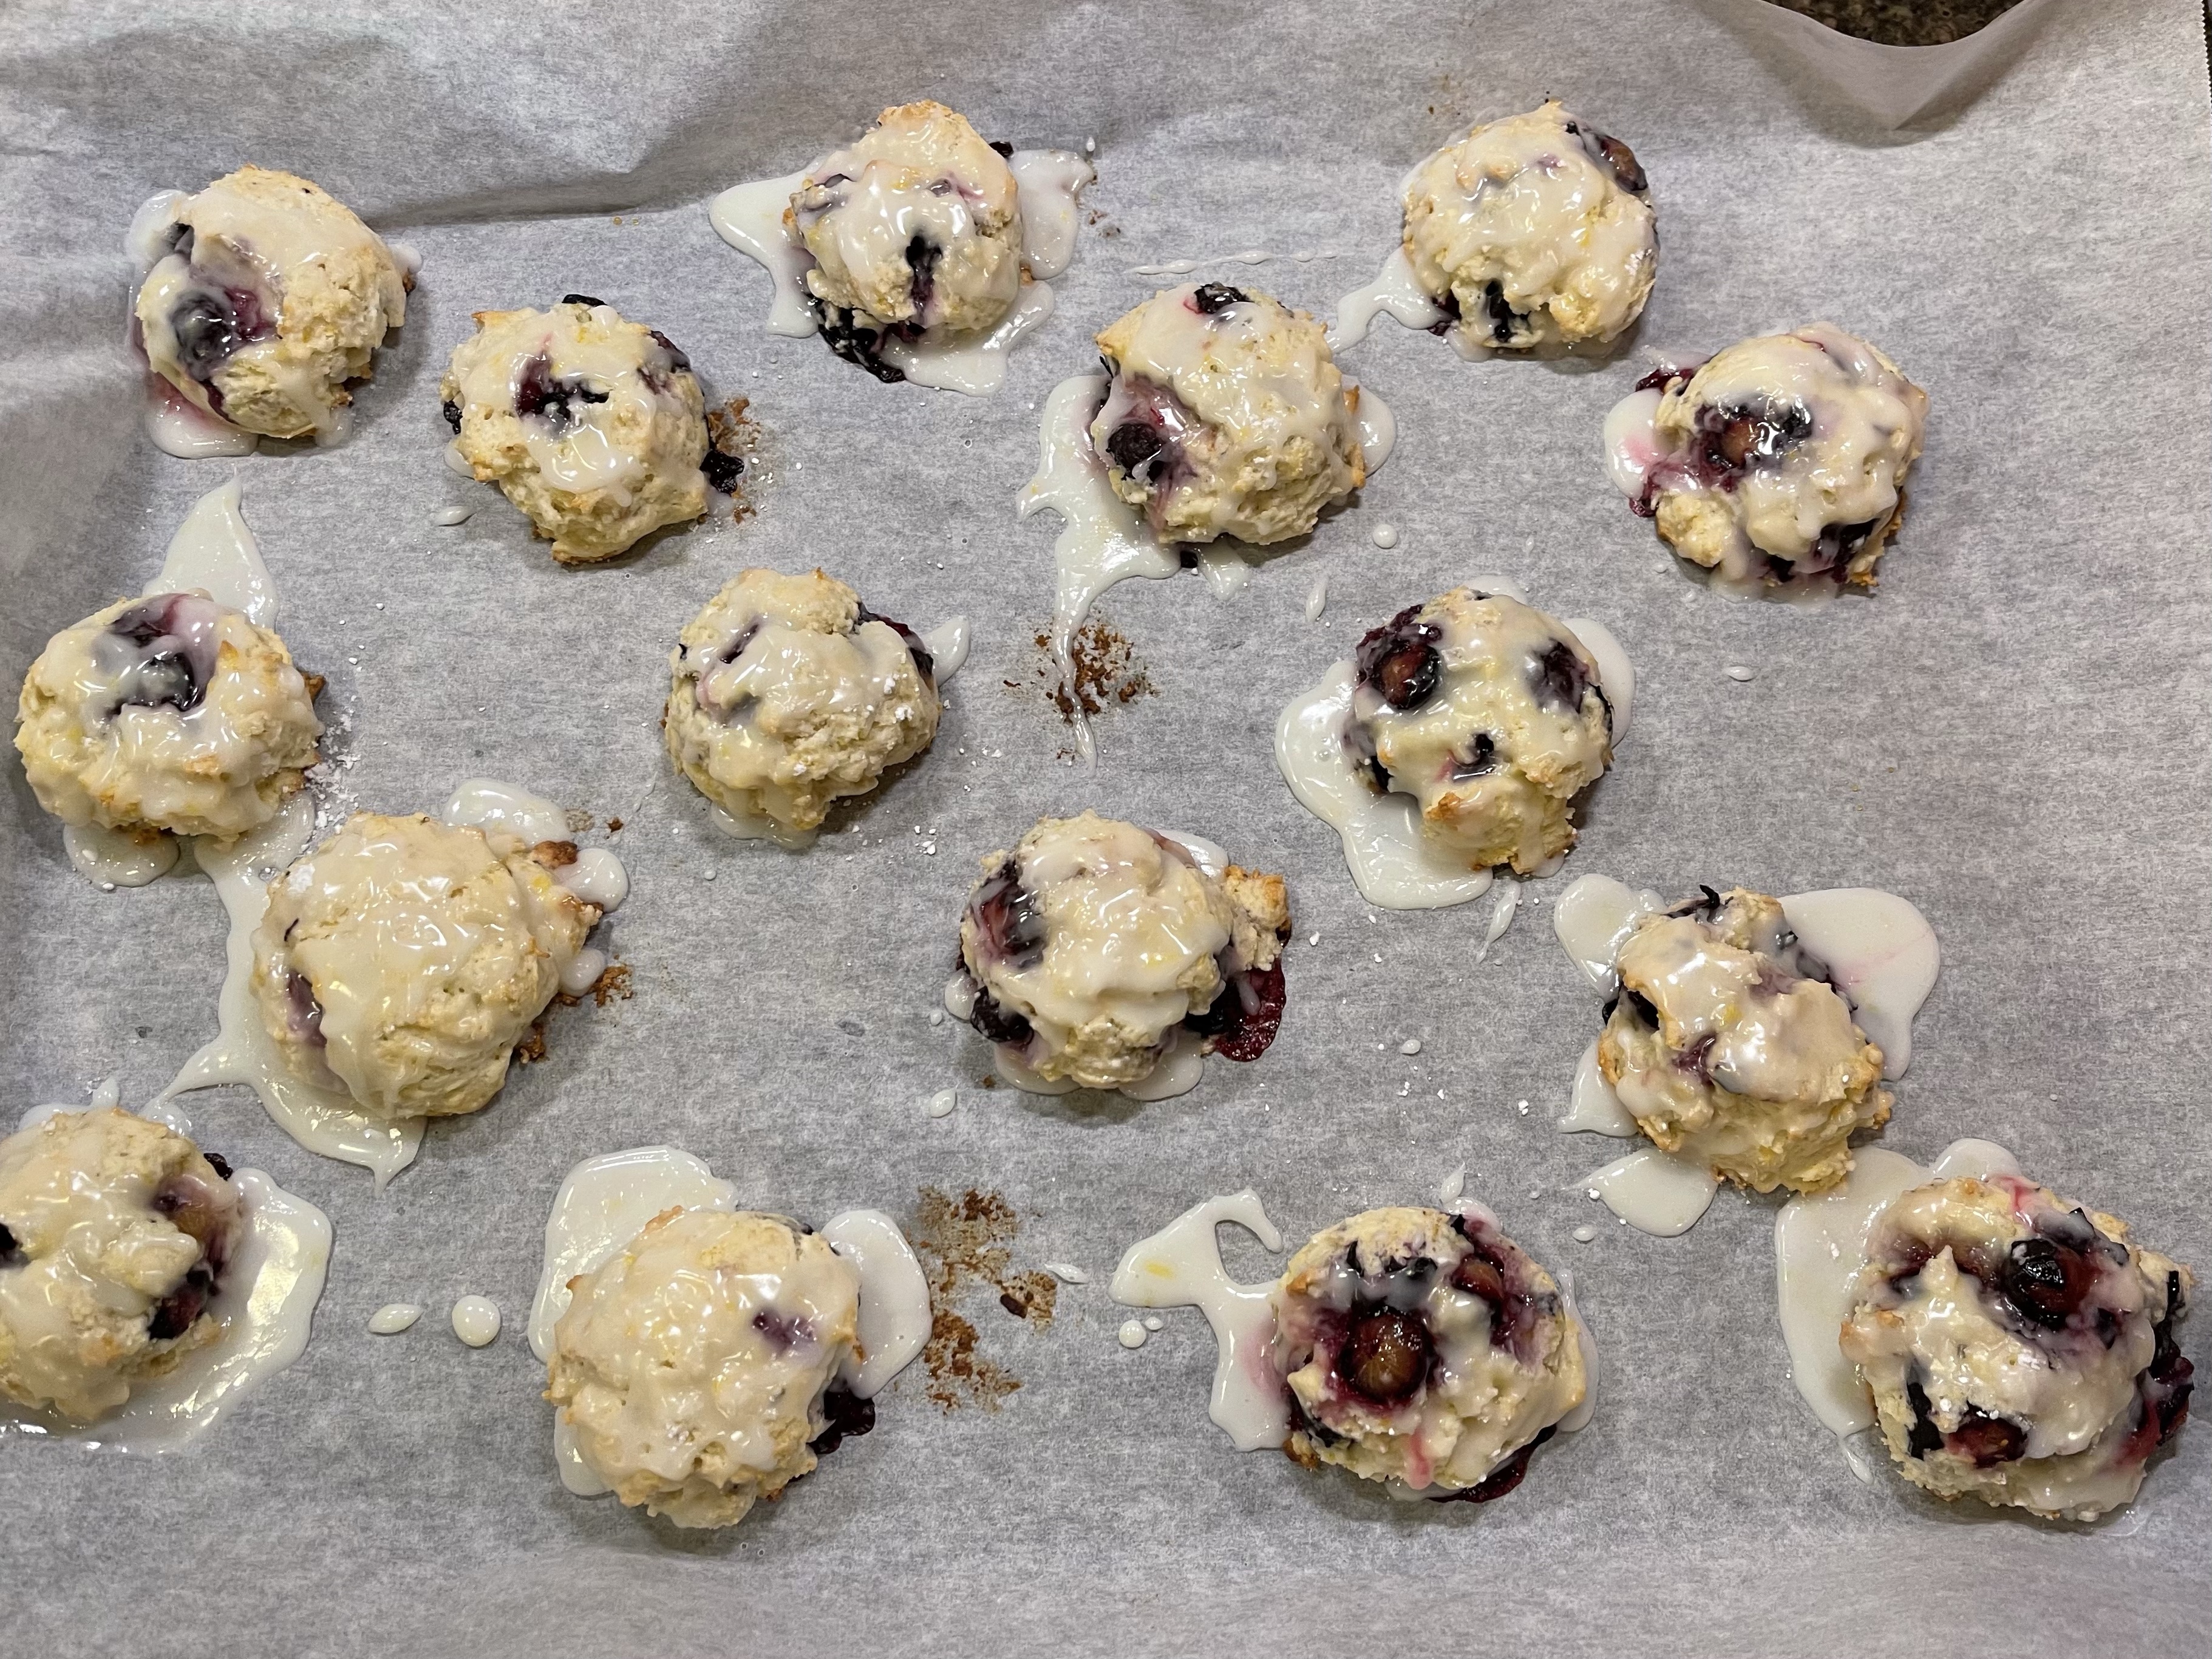
  • Let cool for at least 5 minutes before drizzling with glaze.

If you choose, you can drizzle the scones with a simple glaze made with the juice of one lemon and confectioner’s sugar. In this case, I also added a dash of salt and a splash of fat-free half and half. This is all personal preference, but I think it makes the scones look delicious!

I’ve made this recipe using a lot of different blends of add-ins such as dehydrated raspberries with cocoa nibs and orange zest with mini chocolate chips. The basic recipe isn’t difficult and doesn’t take a huge time commitment, which makes it a winner in my book.

I hope you’ll try this recipe and let me know what different combinations you’ve found to be delicious as well.

Thank You Muffins

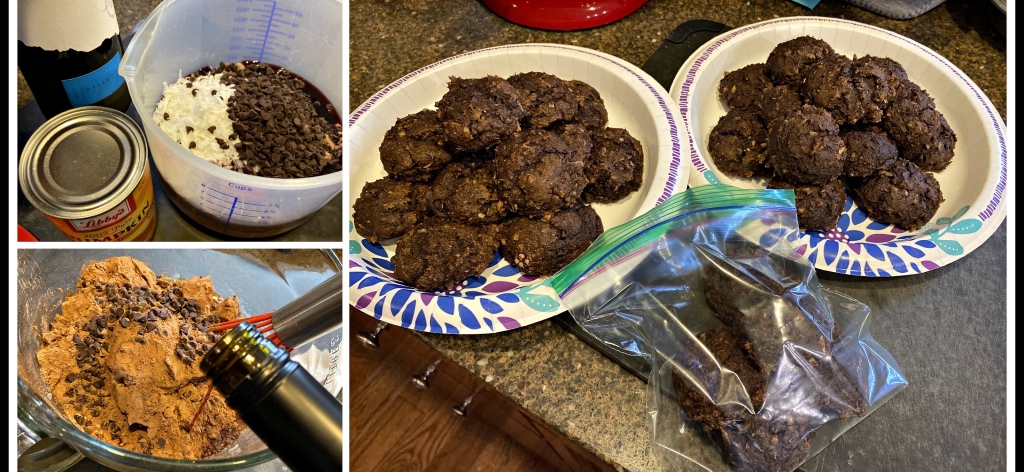
It’s been ages since I last posted a recipe or a food pic here. I’ve been sharing things on my Instagram account (@AliSportShots), but sitting down to formally type out something has taken a back seat. I’ve posted *sooo* many recipes here (over 175, by last count) and I like to be able to share something totally new, if possible…. however, I realized that I’ve been mentioning “Thank You Muffins” on multiple platforms and have never written this recipe for others to use, so I’m fixing that now.

Here’s my very favorite recipe… the one that I make at least once a week… the one I use anytime I need to express my appreciation for someone… the one that I’ve made SO many times throughout the past year that it’s become a “thing” in our house. This is my recipe for Thank You Muffins.

The ingredients list is fairly simple and incredibly flexible:

  • 1 box cake mix (any flavor)
  • 1 can solid pack pumpkin
  • Add-ins (chocolate chips, coconut, nuts, seeds, etc. – a palm-full)
  • Wine (just a few splashes, to thin out the batter a touch)

Directions:

  • Preheat your oven to 375*. Place a large piece of parchment paper (or use a silpat) on two large baking sheets
  • In a large bowl, empty the cake mix, add the pumpkin, include whatever add-ins you’d like, then splash in some wine. Mix thoroughly.
  • Using a small cookie scoop (I have all three sizes from Pampered Chef and prefer using the smallest for these muffins), place small scoops of batter on the prepared baking sheets. I’ve been able to get as many as 42 mini-muffins from a batch but it varies.
  • Bake at 375* for 12-14 minutes, until the muffins spring back if touched on the top. Remove and allow to cool on the paper (I lift the paper off the baking sheet so the bottoms of the muffins don’t continue to cook). NOTE: if you’re making these as full-size muffins, in a muffin tin, you’ll want to cook them at 400* for 15-17 minutes.
  • Once muffins are cool, you can freeze them for later use. I typically get two plates of muffins (or two weeks of muffins for my landscapers) from each batch.

I have used every flavor of cake mix for this recipe and tend to try and pair the flavor of the wine with the flavor of the cake mix. I’ve used chocolate cake mix with red wines, spice cake with red (or white) wines, yellow cake with white wine, carrot cake with rose’ (or most anything)… I’ve even used a sweet red (or a little sparkling wine) with a strawberry cake mix. Each one has come out well and has conveyed the right message…. “thank you”.

I must confess that the origin of this recipe is from about ten years ago, at a Weight Watchers meeting. It started as a two-ingredient sweet… cake mix and a can of pumpkin… no eggs, no oil, no complications… but I couldn’t leave it alone. I liked the idea of making full-size muffins from this recipe, which you can do easily, but I am a big fan of “bite-size” treats. After monkeying around with the recipe, I came up with the one you see above. My boys loved when I would make this recipe for their friends… especially since the main ingredient was solid-pack pumpkin… and I was happy to make it because I felt good about serving something relatively healthy to people.

Try this and see what you and your family think… I hope you enjoy it as much as me!

White Apple Tart

This Thanksgiving, I’ll be making a few additions to my traditional menu.  We’ll be spending Thanksgiving Day with relatives (instead of just having our family of four) and I’ve been tasked with bringing the apple pies.  Since I get bored making multiples of the same recipe, I’ve decided to make a lovely apple tart as one of my offerings.  I had to try out the recipe before the big day, so here’s the recipe that I’ll be making for our Thanksgiving day meal with the cousins… my White Apple Tart.

I found a great recipe for “Sweet Pastry Dough” as well as one for a “Rustic Apple Tart” from Perfect Little Desserts by Nick Malgieri and David Joachim. This cookbook is absolutely mouthwatering and worth purchasing if you’re looking for a dessert cookbook.  Because I always use wine in my recipes, this is where I began when I made both the pastry dough and the tart itself.

I started with the Pastry Dough.  I put 1 cup of flour, 3T sugar, 1/2 t baking powder, and 1/4 t salt into my food processor and I blended the dry ingredients.  I pulsed in 3T butter until the dough looked like wet sand.  I then added 1 egg and 1T cold Sauvignon Blanc (white wine) and ran the processor until the dough came together into a ball.  The dough was a bit wet, so I rolled it up in plastic wrap and popped it into the fridge for a few hours.  NOTE:  I intentionally made this in the morning so I could make the tart later in the afternoon… you can make this dough a few days ahead of time but the tart itself is best if made the day you want to serve it.  

A few hours later, I was ready to make the tart.  I actually had never made a tart before, so I had to purchase a tart pan for this dish.  Thankfully, we had an amazing kitchen store nearby, so that task was easily handled.  I pulled the pastry dough out of the fridge and gave it time to get to room temperature, then preheated the oven to 350 degrees.  I rolled out the dough and then fit it into the pan, using a scraper to take off bits of the crust along the top of the tart pan.  The dough was soft enough that I really only had to push and move around the dough to fit it all into the pan.  It looked lovely. WhiteAppleTart

The next step was to prepare the apples for the tart.  I used 3 large Honeycrisp apples (feel free to use your own favorite type of apples). I cut them in half, removed the core and skin, then sliced each apple into thin slices, across the width from bottom to top. Since there were 3 apples, you’ll use five halves to go around the outside of the tart and then use one half to fill the space in the center.  I’ll try and do a cleaner job of this on my next attempt, but I thought it turned out nicely. I then sprinkled everything with a blend of 2T sugar and 1/2 t ground cinnamon.  Once everything was nicely coated with the cinnamon/sugar mixture, I put the tart on the bottom rack of the preheated oven and cook for 40-45 minutes.  Note:  I think the apples needed a little more cooking time, so I will probably increase cooking time to 55-60 minutes when I next make this tart.  Once the tart was nicely browned and the fruit was bubbly, I removed the tart to a wire rack to allow it to cool a bit before glazing the tart.

While the tart is baking, I needed to make the glaze.  I simmered 1/2 cup apricot preserves mixed with 2T white wine (I used a Sauvignon Blanc) until it boiled a bit and then strained the glaze into another pan so it was as liquid as possible.  Note: I used a small saute’ pan for the first step, then strained the mixture into a small sauce pan, since I only have one “small saucepan”.  Before glazing the tart, I warmed up the glaze until it was thickened.  I used a brush to dab the glaze all over the tart and make it all look glossy.

Extra Note:  When making this recipe in 2016, I used fig preserves instead of apricot (because that’s what I already had opened in the fridge) as well as a simple dry white wine and the tart was still just as fabulous and delicious.  

When I had to unmold the tart, the easiest way was to use a thick, flat object – like a large-wide can or a squat-sized canister – to allow the outside rim of the tart pan to drop away.  I then put the tart on a large platter… it made for a beautiful presentation.

I hope you’ll consider trying to make this tart sometime.  If you don’t want to use wine in this recipe, you can follow the original recipe and simply use water.  I thought the addition was fun and added a light edge to both the crust and the glaze. Whichever way you choose to make it, it’s worth the try.  I found it to be simple, yet spectacular.  Totally worth the price of an actual tart pan!

Recipe: Espresso Wine Biscotti

I really love to snack.  I know it’s not what we’re supposed to do to maintain (or lose) weight, but I find myself wandering around the house when I’m bored, looking for something that might be delicious.  This recipe has saved me multiple times by being easy to make, yet satisfyingly delicious while still being fairly healthy.  Since I love to incorporate wine into anything I make or bake, this recipe has become one of my own after starting as one from a published cookbook (Simply Delicious).

  1. Start by preheating the oven to 350 degrees and spray a baking sheet with cooking spray.  EspressoWineBiscotti
  2. Mix your dry ingredients together:  1 1/8 cup flour, 1T ground espresso coffee, 1 t baking powder, 1/4 t cinnamon, and 1/8 t salt.
  3. Whisk your wet ingredients until frothy:  1/2 cup sugar, 1 egg, 1 1/2 T brewed espresso, 1/2 t vanilla, and 1 T red wine (I used a Merlot in this recipe, but use whatever red wine you like).
  4. Combine your dry ingredients into the wet, until they just come together.
  5. Roll the dough gently, on a floured board with floured hands, to form a log. Carefully transfer the log onto the baking sheet and pat it into a form about 3/4 inch high and 2 inches wide.
  6. Bake the log until it’s firm to touch, about 20 minutes, then transfer to a cutting board and allow to cool for 5 minutes or so.  Reduce heat in oven to 300 degrees.
  7. While log is still warm, cut into 1/4 inch slices, using a serrated knife, and lay the slices back on the baking sheet in a single file.  Bake biscotti for 10 minutes, flip, and bake for another 10 minutes, or until dry.  Remove to a wire cooling rack and cool completely.  The biscotti will become more crisp as they cool.
  8. If you want to add an extra touch, warm chocolate chips and drizzle over an end of the biscotti.  This is not necessary but is a delicious addition if you’re not planning to use these for dunking in coffee or hot cocoa.

I really liked the addition of the red wine to this recipe.  The flavor was just a touch deeper and it didn’t alter the consistency of the biscotti in any discernible way.  I like keeping these on hand for when someone stops by to visit… it’s always nice to seem prepared for company with such an elegant thing to add to a shared cup of coffee.  Hope you find them as tasty as I do… I love these!

Recipe: Red Turkey Chili

Last night was windy, cold, and rainy here in Maryland, so my first impulse was to make chili.  This dish is one of my favorite things to make, especially in the fall and winter, because I can change out the recipe so easily.  I’ve made it many different ways, but last night’s was a much healthier rendition that still warmed us up nicely.  See if you and your family notice a difference if you try this version!

I started by heating a large stock pot on the stove and dropped in one diced onion with some olive oil. Once the onion was translucent, I added one package of ground turkey and took some time to let it all brown thoroughly.  To add a bit of smokiness to the finished product, I added a bit of bacon that I pulled from the freezer and gave that some time to cook. RedTurkeyChiliNOTE:  I had previously taken a one-pound package of bacon and sliced it into 8 portions.  Each portion went into a small freezer bag and I use a portion any time I want a little bacon flavor without having to thaw or cook an entire package.  I diced this portion so the bacon wasn’t discernible, but the flavor permeated the chili nicely.

I then added about a cup of diced sweet pepper (as you can see, I used a variety of green, red, orange, and yellow peppers) as well as a generous pour of red wine.  NOTE:  For this recipe, I had a bottle of red wine from Adams County, PA, but any good dry red wine is great to add, provided it’s a red wine that you like to drink.  Don’t ever add wine that you wouldn’t drink to a recipe, since cooking will concentrate the flavors from the wine.  

Once the vegetables and wine are incorporated into the chili, I then added one can each of light and dark red kidney beans (rinsed and drained) and one can of diced tomatoes (not drained).  I was now ready to add my spices to make this dinner into something memorable.

Since my family is not a fan of hot/spicy flavors, I used a conservative amount of dark chili powder, ground cumin, and smoked paprikaone teaspoon of unsweetened cocoa powder, along with some salt and pepper.   At the very end, I drizzled in a bit of a prepared Balsamic Glaze, which really gave this dish a bit of zing without overpowering the traditional chili flavors.

I do hope that you’ll try your hand at this chili recipe.  Feel free to substitute other meats, beans, or vegetables as you like – that’s what makes each person’s recipe unique and special.  We thought this version had a great balanced flavor… exactly what I wanted on a cold, rainy fall evening.  This would be a great dish to share with friends and will freeze nicely, so feel free to double or even triple the recipe if you have the time (and freezer space)!

Crock Pot Recipe: Red Pulled Pork

If you’ve been following my blog, you may remember that I’ve already posted a recipe called “Red Wine Pulled Pork“.  That recipe is really great… but I also wanted to post this one because it is just so incredibly simple.  Simple to the point of being a “marinate, cook, shred, serve” type of recipe… how tough could that be?

I started with a large pork roast… I bought it because it was on sale that Friday and I was looking for something that could feed a crowd while watching Saturday football games in our living room.  When I got home from the store, I put the roast into a plastic storage bag and poured a mixture of smoked paprika, Montreal steak seasoning, and Lawry’s Seasoned Salt over the pork, massaging the seasonings into the meat.  I then put the bag into the fridge to marry the flavors overnight.RedPulledPork

On Saturday morning, I pulled out my crock pot and put dinner together.  I sliced two onions into thin strips (cut the onion in half, root to tip, cut off the top and slice the onion into strips the entire way down to the root, discarding the root) and put it into the bottom of the pot.  I placed the seasoned roast on top of the onions and then poured the end of a bottle of dry red wine (feel free to use as much or as little as you like) into the bottom of the pot.  I chose not to pour the wine over the roast because I really wanted the spices to have time to season the top fat layer as the meat cooked.

I set the crock pot to cook on high for 6-7 hours, but I could have easily chosen to cook it on low for 7-8 hours.  Much will depend on how comfortable you are with your crock pot.

I’m impatient when I use the crock pot, so I did check this about an hour before it was ready.  I like the feel of the meat when it falls apart, so I tend to push the envelope when I’m making this sort of dish.  I removed all the bones and then allowed it to cook until al the meat fell apart exactly as it should.  The onions were a nice addition into the meat, since they just “melted” into the pulled pork.

When I got ready to serve this dish, I sliced homemade kaiser rolls in half and spooned some meat into each roll before topping with a small bit of a jarred BBQ sauce from my fridge.  Potato rolls or chewy rolls from the store are also delicious with this meal… don’t feel that you *have* to make your own rolls for this meal to work.  This recipe was simple… the pork cooked all day and perfumed the entire house with a spicy warm smell that ushered football season into our home in the best possible way.  Enjoy playing with this recipe and making it your own… feel free to use whatever spice your family likes so your meal hits all the “high notes” for your favorite fans. Most of all… have fun!

Red Fudge Sauce

Wow… this sauce is such a wonderful recipe that it’s worth making so you can dress up almost any dessert.  Company coming over?  Toast some slices of pound cake or angel food cake (or even ice cream) and drizzle this fudge sauce over top.  Sweet tooth craving something decadent?  Spoon a little warmed sauce over cut up fruit.  Dinner still an hour away and you’re looking for something to “hit the spot” so  you don’t over indulge and ruin your dinner?  Have a small spoonful of this sauce, cold, right out of the fridge.  It’s dark, deep, and oh, so delicious.  I’m confident that you’ll want to keep this recipe on hand for the foreseeable future.RedFudgeSauce

The best part of this recipe, in my opinion, is that it’s just so darn easy to make.  The original recipe came from my boys’ elementary school cookbook, but I just had to tweak it until it hit all the high notes for me (read:  needed wine).  You’ll want to have the following ingredients on hand and ready to go.

Ingredients:

  • 5 squares of Baker’s unsweetened chocolate
  • 1/2 cup margarine
  • 3 cups confectioner’s sugar
  • dash of salt
  • 1 tall can evaporated milk (it’s about 1 2/3 cup total)
  • 2 Tablespoons of red wine
  • 1 1/4 teaspoon vanilla.

Directions:

  1. To start, melt chocolate and margarine over low heat, whisking until the chocolate is thoroughly melted.
  2. Add the salt to the sugar and add the wine to the evaporated milk.
  3. Alternately add sugar/salt and milk/wine to the chocolate mixture, blending well with a whisk.
  4. Once thoroughly incorporated, bring sauce to a boil over medium heat, stirring constantly.
  5. Cook and stir until thick and creamy, about 8 minutes, then turn off heat and stir in vanilla.

That’s all there is to making your own homemade fudge sauce.  The red wine adds just a touch of richness without altering the flavor to a great degree.  I have tasted it both ways…. feel free to omit the wine if you prefer, but I really enjoyed its’ addition.  Store this sauce in jars (or plastic containers) in the fridge and heat to serve as desired.  I used this sauce recently to pair with a loaf of angel food cake when bringing dinner and dessert to my neighbors.  Such a simple thing, but it was a wonderful thing to share with friends.

Fudge sauce… the new way to share some love with others?  Enjoy!

Recipe: Chicken Pie

My new neighbors were driving home from NC on Monday and I knew they were going to be stressed, so I decided to make dinner for them, while making dinner for us at the same time.  Since I decided to make a chicken pie, it was extremely easy for me to double ingredients and make two dinners at the same time.  This is one of my favorite things to make, so I hope you’ll try this recipe some day… it’s a great comfort meal with lots of old-home appeal.ChickenWinePie

I started with one rotisserie chicken that I bought from the grocery store.  I put the chicken and all its juices into a large stock pot, added water up to the halfway point of the bird, then set the pot to simmer on medium low for about a half hour.  While it was cooking, I threw in some leftover veggies that I had in the fridge (three stems of broccoli without the crowns and six chunks of celery) and allowed them to perfume the water until it became stock.  NOTE: This is my favorite way to make stock… although I usually use carrots, celery, and onion, this turns plain water into something you can use in a myriad of ways.

Once the chicken had cooked in the liquid long enough to be easy to shred, I removed the meat and vegetables to a colander (I used a set of tongs and the chicken fell apart nicely as I removed it from the pot). I then strained the stock through the same colander and into a bowl big enough to hold all the stock so I could use the same pot to start making the chicken pie sauce.

To make the sauce, I started with four Tablespoons of margarine and/or butter and four Tablespoons of flour and whisked them together over medium heat until the fat had time to cook the “raw” taste out of the flour. NOTE: Remember, we’re making enough sauce for two chicken pies.  I then added about one cup of chardonnay white wine (Use whatever wine you prefer) and whisked the sauce to incorporate the wine.  It was still very stiff at this point, so I added an equal amount (equal parts wine to chicken stock) of the reserved chicken stock to the sauce and whisked that until things started looking like a “sauce”.  Feel free to add more wine or stock to get the sauce to the consistency you want for your chicken pie.  I actually went back and added more of both the wine *and* stock, but made the sauce too thin.  TO FIX THIS, I used 1/4 cup of reserved stock and 2 teaspoons of cornstarch to create a slurry and added it to the sauce, whisking to make sure not to create any lumps.  Once I had enough of the thickened sauce, I needed to season it before adding it to the dish.  I used freshly ground pepper, some Herbes de Provence, some thyme (I like these two seasonings with chicken, but feel free to use your own favorites), and a squirt of dijon mustard.  I whisked everything together and then let it cook slightly, while I put the chicken pies together.  NOTE:  I went into greater detail in a previous post, entitled “How to make a sauce” on this blog, so feel free to open another tab and use those directions if they seem clearer to you.  I didn’t use any cheese in this sauce, as I did in the previous post, but the method is still the same.

To assemble the chicken pies, I picked and shredded half of the chicken into two separate casserole dishes.  I then drained two cans of mixed vegetables (this usually includes squares of carrots, potatoes, beans, and corn) and poured a can of the vegetables over the chicken in each dish.  NOTE: Since I had cooked extra celery and the broccoli stems, I sliced and added these as well, although they weren’t necessary. I then spooned the sauce evenly over both dishes to finish off the inside of the chicken pies.  NOTE:  I wasn’t sure if my neighbors were watching their salt intake, but knew that I would need to add a little more “umph” to our sauce, so I added a few dashes of Worcestershire sauce to the sauce in our dish.  This isn’t necessary either, but it’s a flavor I know we like.  

For the topping of the chicken pie, you can go in a variety of directions.  For this version, I used a box of Puff Pastry dough. I allowed the dough to thaw for 15-20 minutes, then laid the dough on top of the dish, folding the edges over and brushing everything with an egg wash (mixture of egg and water) to make a nice crust.  I also sprinkled our dish with some garlic salt, since that’s a favorite in our house.  NOTE:  Be sure to make 3-4 slits in the top of the pie to allow steam to escape during the cooking process.

To bake these beauties, preheat your oven to 400 degrees and pop the chicken pie into the oven for 30-40 minutes, or until you see bubbling sauce coming up through the edges of the slits.  NOTE:  You need to cook Puff Pastry version at a higher temperature.  You can decrease the oven temp to 375 degrees if using another topping of choice.  Remove the chicken pie from the oven and let it rest for a few minutes before serving so no one burns their mouth on food that is, to quote my husband, “hotter than the sun”.

NOTE:  If you don’t want to use Puff Pastry dough for your topping, you can use a can of biscuit dough, a pie crust, or some homemade Bisquick topping.  Whatever you choose, make sure you cook the dish long enough to allow the topping to cook thoroughly.  

I do hope you’ll try this recipe sometime soon.  As the Fall approaches and the weather gets cooler, this meal is a staple in our house.  It always reminds me of my childhood and never fails to bring a smile to my face.  May this become a staple in your home as you create those same memories for your own families.  Enjoy!

Recipe: Pork Scallopini

As with all my recipes, this really is my own take on this meal.  I have an idea in my head of how a “scallopini” should look and taste, so I play with the ingredients I have on hand until the final product comes close to my mind’s version.  I may be totally off-base from any traditional recipe but, since this is my own creation (and it garnered lots of “this is really good” comments), I’ll share it with you here.  I posted a teaser shot last night after dinner on my new Facebook page for this blog, so I hope you’re ready to check this one out!PorkScallopini

I started with 6 very thin pork cutlets that I picked up at the local grocery store.  NOTE: The original package had 12 cutlets, so I used 6 for the first go-round and used the last 6 for this dinner.  Essentially, they were used for the same recipe… I just didn’t post directions the first time, since I wasn’t sure how it would go over and hadn’t taken photos throughout the process. I dredged each cutlet… first in a wet mixture of almond milk and egg, then into a mixture of dry ingredients that included breadcrumbs, parmesan cheese, parsley, salt, and pepper… then saute’d them in a medium-hot skillet with one Tablespoon of melted butter.  I flipped them over after a few minutes, using a spatula, and cooked the other side until both were nicely browned.  I then removed the cutlets to a plate and kept them warm in a 200-degree oven until I was ready for dinner.

Before I started on the sauce, I wanted to choose a “base” for my scallopini.  When I made this dish the first time, I had leftover bow-tie pasta in the fridge, so I decided to heat that up and serve the scallopini over the pasta.  Last night, I had leftover mashed potatoes, so I chose to doctor these up for my scallopini base.  NOTE:  Feel free to use what you have in your fridge when making dishes such as these.  I really like egg noodles with this dish, but I tend to be the minority in my house on that ingredient, so I try and accommodate others’ taste preferences when I can.

Since I was using leftover mashed potatoes for this recipe, I knew I was going to have to work with them a bit to make them taste fresh and not look like I just warmed up some clumpy potatoes for dinner.  To that end, I put the leftover potatoes into a 4-cup Pyrex measuring cup and microwaved them until they were warm enough to melt some margarine.  Into the large cup of mashed potatoes, I added varying amounts of almond milk, Chardonnay (white wine), margarine, parmesan cheese, parsley, horseradish mustard, shredded cheddar cheese, and some freshly ground pepper.   I used a whisk to incorporate all the ingredients thoroughly and then microwaved this mixture for about a minute.  I repeated the whisking/microwaving step at least twice…. just until the mixture was creamy, tasted good (don’t forget to taste your food as you cook to adjust the seasonings), and had thickened enough to make a nice base for the scallopini.

Now, onto the sauce.  If you’ve read my blog before, you know that I have a post that is dedicated to “how to make a sauce”.  This truly is how I begin 90% of all my sauces.  I had removed the cutlets from the saute’ pan, so I added 1 Tablespoon of butter, a little olive oil, and some flour, then whisked everything together and let the fat cook the raw flour until it became lightly toasted and fragrant.  NOTE: If you’re using a non-stick skillet, please consider investing in a plastic coated wire whisk… you’ll save your skillet and be just as happy with the results.  The one I currently use is blue and I found it at Target… you don’t need anything fancy, just something that won’t scratch the surface of your pan and ruin it.  Now that my thickener (fat/flour mixture) was ready, I whisked some Chardonnay white wine and chicken stock into the sauce.  As hard as it is to wait, I allowed the liquids to become thoroughly incorporated into the thickener before adding more liquid.  This is when you want to adjust things to make the sauce as thick or as thin as you’d like.  I also knew that I was going to be adding frozen peas to the sauce, which would add some water as they thawed, so I had to keep that in mind as I was cooking.  I then added a few simple seasonings to the sauce, in the form of parsley, horseradish mustard, salt, and pepper, making sure not to add too much salt because of all the other flavors from the pork cutlets and the potatoes.  My last step was to pour in some frozen peas and allow them to cook in the sauce.  NOTE: Don’t forget to adjust your seasonings before you finish… it’s better to season while you’re cooking, rather than after, since they will incorporate better this way.

When you begin to plate your meal, feel free to be creative.  When I made this dish with pasta, I simply laid the pork across the pasta on the plate and spooned the sauce over top.  Since the mashed potatoes made a sturdier base, I placed the pork specifically (as you can see in the photo) and spooned the sauce in the middle so all three layers of the meal were visible.  It was a very simple, yet elegant way to present our dinner.

I hope you’ll try out this recipe.  I think it’s one of my favorite ways to cook pork and, because of the versatility of other ingredients used, helps to clear out some of my leftovers from the fridge.  I actually toyed with making mashed potato waffles for under the cutlets/sauce, but chose not to because I couldn’t reach the waffle iron.  Maybe I’ll make potato pancakes next time instead of using pasta?  If you make this dish, feel free to let me know what you chose to use.

Enjoy!


Recipe: Chocolate Wine Muffins

This is one of the easiest recipes in my arsenal – essentially a two-ingredient muffin recipe that I like to doctor by using a bit of red wine and mini chocolate chips.  It’s my favorite recipe to take to events because adults and kids alike inhale these delicious bites as quickly as they’re put on the table.  ChocolateWineMuffins

I start with a box of devil’s food cake mix.  I like the “devil’s food” flavor because it seems to have the most chocolate flavor, but feel free to use whatever chocolate cake mix you prefer.  Into this dry mix, I add one can of pumpkin (NOT the canned “pumpkin pie” stuff), 1/4 cup red wine (dry is best but use what you have and what you prefer – I typically will use a Cabernet Sauvignon or Merlot if I have it available), and a small handful of mini chocolate chips.  NOTE: These are the ONLY ingredients – don’t use the ingredients listed on the box.  Your batter will be thick – make sure to mix it well so there are no dry bits of mix left.

Using a small cookie scoop and mini muffin tins, scoop the batter into the greased pans and cook in a 375 degree oven for 16-17 minutes.  You’ll need to do this three times as the recipe definitely makes more than 48 muffins – I was able to scoop out 57 but you may have less.  These muffins do tend to puff a bit when cooking, so don’t put too much batter into each spot. NOTE:  You’ll see that I don’t flatten the muffins into each spot – I like the puffy look about them in the end – feel free to do whichever you prefer.  You can also make these into larger muffins, but I find that the smaller ones are easier to handle and don’t get overcooked on the edges as you try and cook the inside thoroughly.

When the muffins come out of the oven, remove them to a wire rack and allow them to cool a bit before serving.  These make lovely gifts for neighbors and new colleagues… see if you get the same positive reaction I got when handing them around.  They’re a great ice-breaker and (if you make 52 of them) are only 38 calories each Sign me up for that bake sale!