Shrimp in Lemon Butter

Shrimp in Lemon Butter

This recipe is a favorite of my husband and one that I love to make during the week. It’s a simple meal to pull together and doesn’t take a lot of complicated ingredients.

Ingredients:
Raw Shrimp (I use Jumbo Shrimp)
3-4T Butter
2T Garlic Confit (or 3T crushed garlic cloves + 1T olive oil)
Juice of 1/2 lemon (reserve zest)
2T Parmesan
1/4 C White Wine (Use something you love to drink)
Splash of Half & Half
Pinch of sugar (if desired)
Salt, pepper, and parsley to taste
Brown Rice (or pasta)

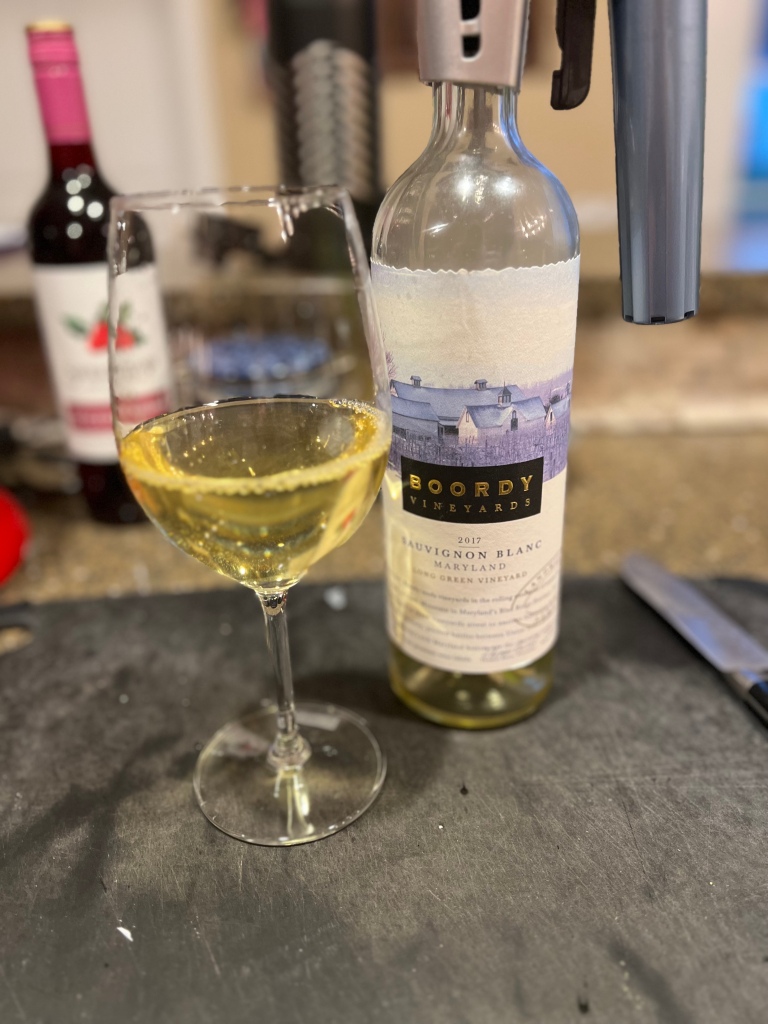
Sauvignon Blanc by Boordy Vineyards

COOK YOUR SHRIMP:
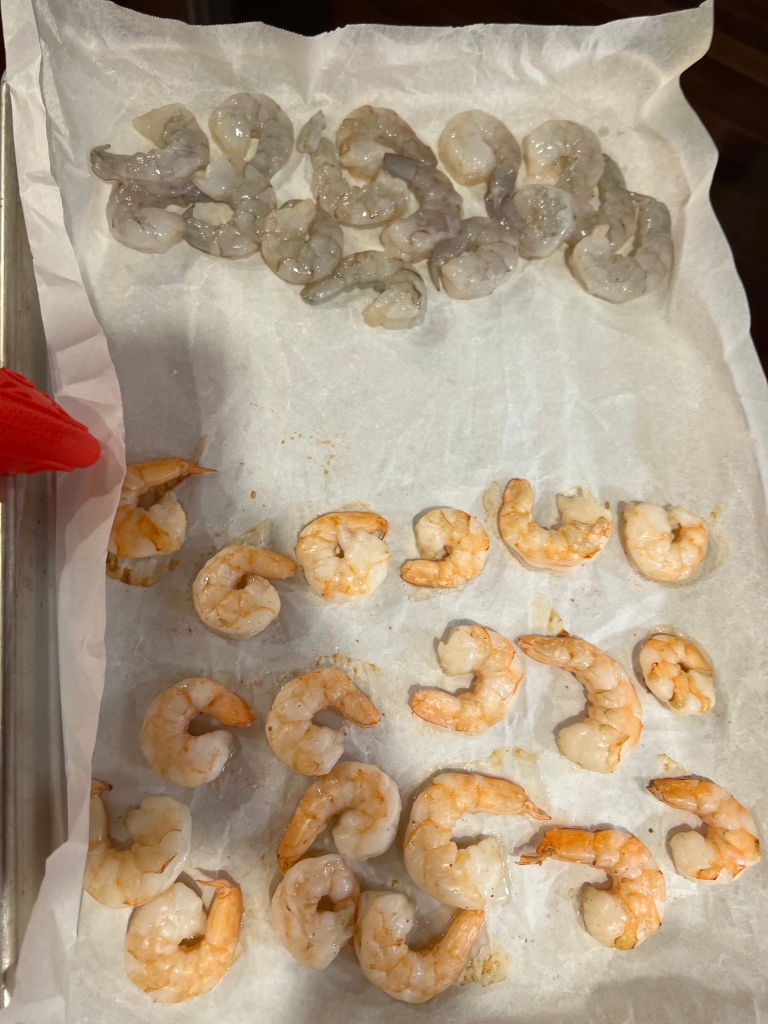
Cook your shrimp, however you’d like. I shell my shrimp first, then bake shrimp on a piece of parchment on a baking sheet in a 400* oven until done.
NOTE: My husband likes his shrimp cooked longer than me, so I start cooking his shrimp in a 400* oven for about 15 minutes before adding mine to the baking sheet.

My husband’s shrimp on the bottom of the pic, mine on the top.

COOK YOUR SAUCE:
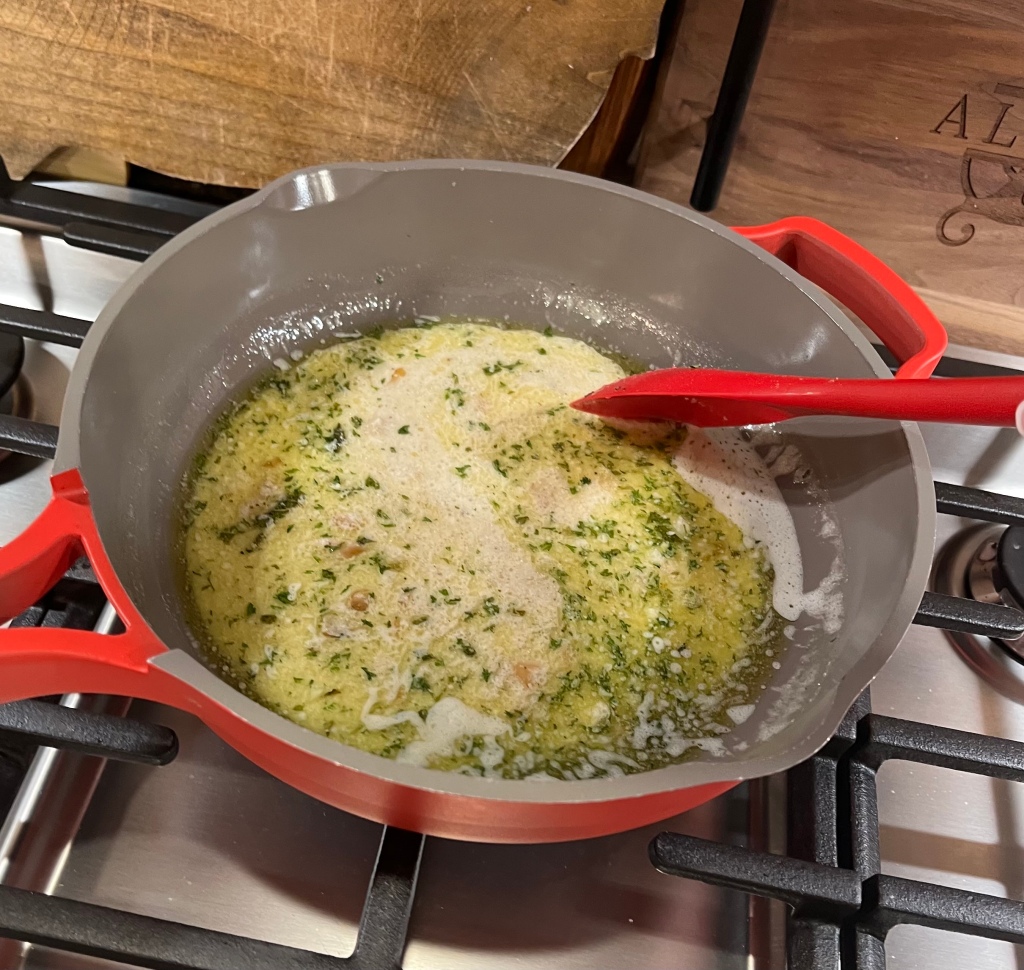
In a sauté pan, melt butter with garlic confit and lemon juice. Sprinkle with Parmesan and stir to combine. Add in the wine and half & half, then simmer until sauce thickens slightly, stirring frequently. Taste and add seasonings as desired.
NOTE: If sauce gets thick, add a little liquid (wine, water, stock, or pasta water) to thin.

Stirring to incorporate the butter into the sauce is key.

MAKE RICE (OR PASTA):
I use microwaveable brown rice. If you prefer to serve this meal on pasta, make your pasta so it’s ready to be plated when your shrimp are done.

ASSEMBLE DINNER:
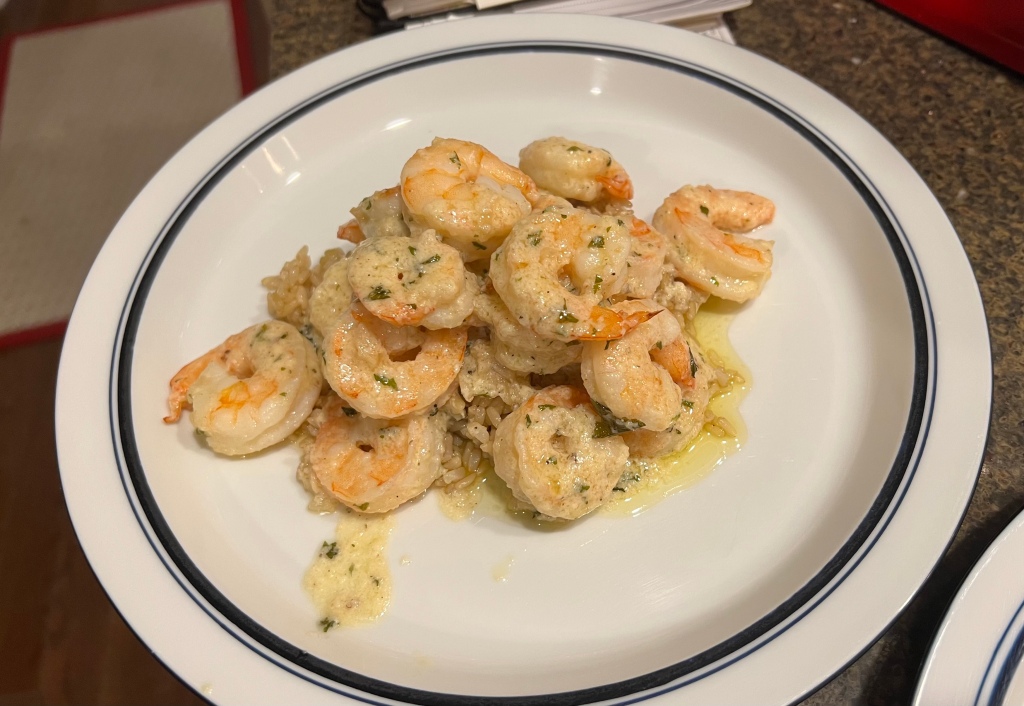
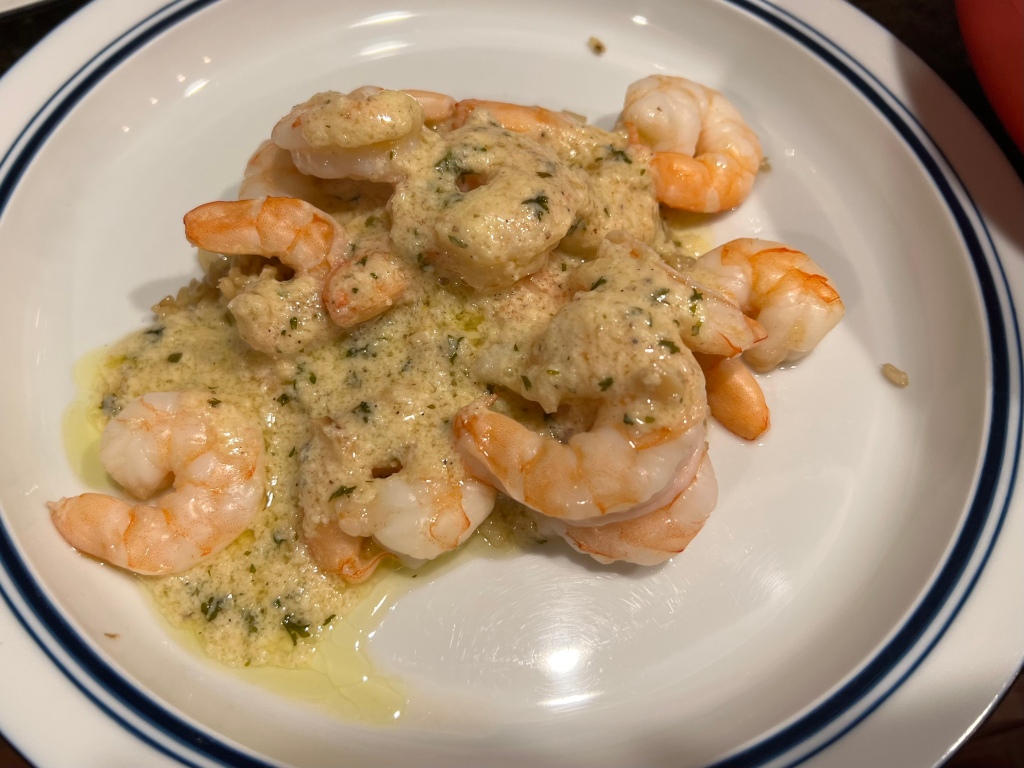
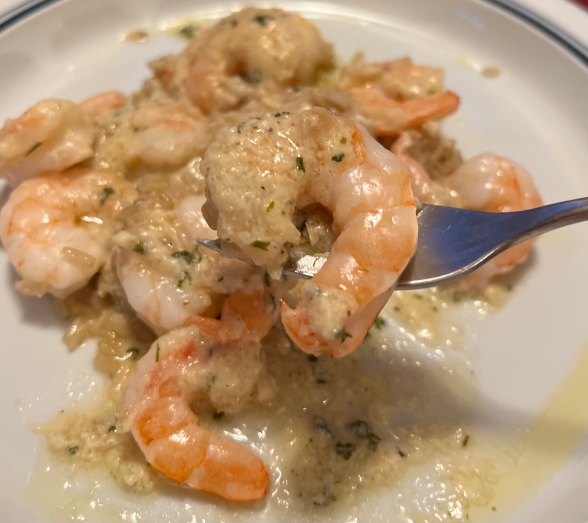
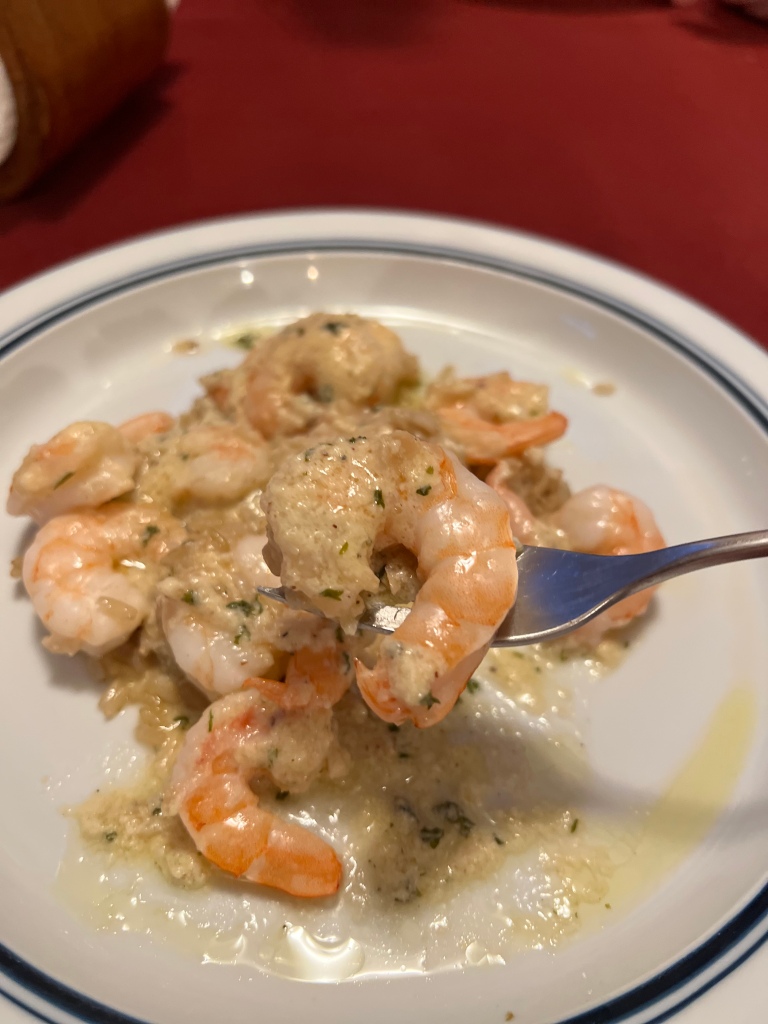
You can either fold shrimp into the sauce (I do this with my husband’s shrimp) or place shrimp on rice and spoon sauce over top.

My husband’s shrimp, tossed with the sauce.
My shrimp, with sauce spooned over top.

ENJOY!

Chicken Divan Casserole

I have very fond memories of my mom making Chicken Divan casserole throughout my childhood. The recipe she used was based on one from Aunt Treva, my grandfather’s sister, and had lots of “cream of” soups included to make the sauce. It was always yummy, but I decided that I wanted to create a healthier version.

When searching for a similar recipe as the one from my childhood, I found a fabulous one created by Natasha Bull of http://www.saltandlavendar.com. Her original recipe can be found here: https://www.saltandlavender.com/chicken-divan/ but I needed to adjust the flavors to match what I was trying to recreate. If you’re looking for a cheesy, creamy chicken and broccoli casserole, look no further… this one is terrific.

For me, simply adding curry powder to the recipe above wasn’t quite what I wanted, so I played around with it until I created something that made sense for me. I also trimmed everything down to make an easy meal for two + 1 leftover serving. This recipe will make 3 servings in a 9×9 baking dish.

INGREDIENTS:

  • Broccoli florets – I used a small bag from the local store
  • Chicken Breast – I shredded two breasts from a rotisserie chicken but you can also use leftover chicken or even turkey
  • 2 T butter
  • 2 T flour
  • 3/4 c almond milk – you can use a mixture of almond milk and half & half if you prefer
  • 2 T whipped cream cheese
  • 1 tsp Dijon mustard
  • 1 tsp Worcestershire sauce
  • 1 tsp white wine – use what you have available/open but I also use this wine to thin the sauce before adding the cheese
  • 1 tsp curry powder
  • 1/4 tsp onion powder
  • 1/4 tsp garlic powder
  • 1 cup grated cheddar cheese – separate in half
  • 1/4 cup grated Parmesan
  • 10 Ritz crackers (approximate)

DIRECTIONS:

Preheat your oven to 375*F.

Prepare your broccoli for the casserole. After trimming down the broccoli into bite-size pieces, put all the florets in the bottom of the 9×9 baking dish. Lay a piece of paper towel over the broccoli and lightly dampen it with some white wine. Microwave the broccoli on HIGH for 2-3 minutes or until the broccoli is lightly cooked and still crisp. NOTE: if you’re using a metal dish, you can microwave the broccoli in the original bag and layer the cooked broccoli onto the bottom of the baking dish.

Layer your shredded chicken on top of the broccoli.

Make your sauce. Start by melting the butter in a sauce pan. Add the flour and whisk until combined and the mixture starts to bubble. Let the butter/flour mixture cook until it begins to get slightly toasty. Slowly add your milk and whisk to combine, then cook this mixture until it begins to thicken. Add the cream cheese (I like the whipped version b/c it’s light and combines fairly easily – if you use a block of cream cheese, I would decrease to 1T), whisking to combine. Add in your spices (mustard, Worcestershire, wine, curry powder, onion powder, garlic powder) and taste the sauce, adjusting as needed. Add salt and pepper if desired. NOTE: if sauce is too thick, add a splash of wine or almond milk. I have been known to add 1/4c-1/2 cup of wine to thin the sauce. Be aware that the sauce will thicken when you add the cheese. Remove the sauce from stove top and stir in 1/2 cup cheddar cheese.

Pour sauce over the chicken/broccoli mixture in your baking dish. Top with remaining cheddar cheese and Parmesan cheese then crush Ritz crackers over the entire casserole.

Bake casserole, uncovered, for 30-35 minutes. Cheese should be melted, crackers should be browned, and the sauce should be bubbling. Let casserole sit for 5 minutes before portioning out and serving.
Tuscan-style sauce

Oh, my goodness…. this sauce is so delicious! A friend recently mentioned a crock pot dinner that she’d made that sounded good, but I didn’t want to use my crock pot. I got the basics of the recipe from her, looked at a few other recipes, and went to “work”.

INGREDIENTS:

  • 2 TBSP butter
  • 1/3 cup half & half (fat-free is fine)
  • 2-3 forks of julienned sun dried tomatoes *I like to add a spoonful of the oil to this sauce as well
  • 2 handfuls of spinach
  • 1 TBSP Parmesan
  • 1 wedge Laughing Cow light cheese
  • 1-2 T white wine (I used Boordy Vineyards Vidal Blanc)
  • Salt and pepper to taste
  • Pasta water, as needed/if available, to thin or extend sauce

DIRECTIONS:

  • In a heavy sauce pan, simmer butter with half & half until butter melts.
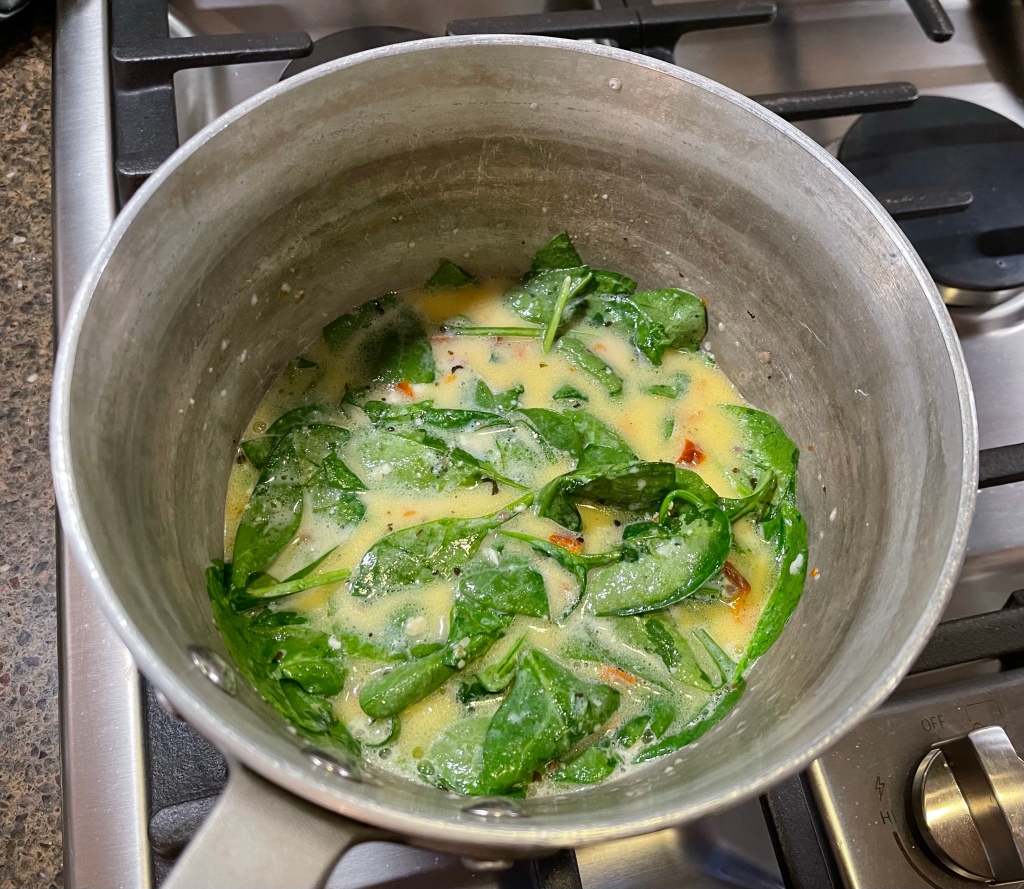
  • Add sun dried tomato and fresh spinach, stir and allow spinach time to wilt.
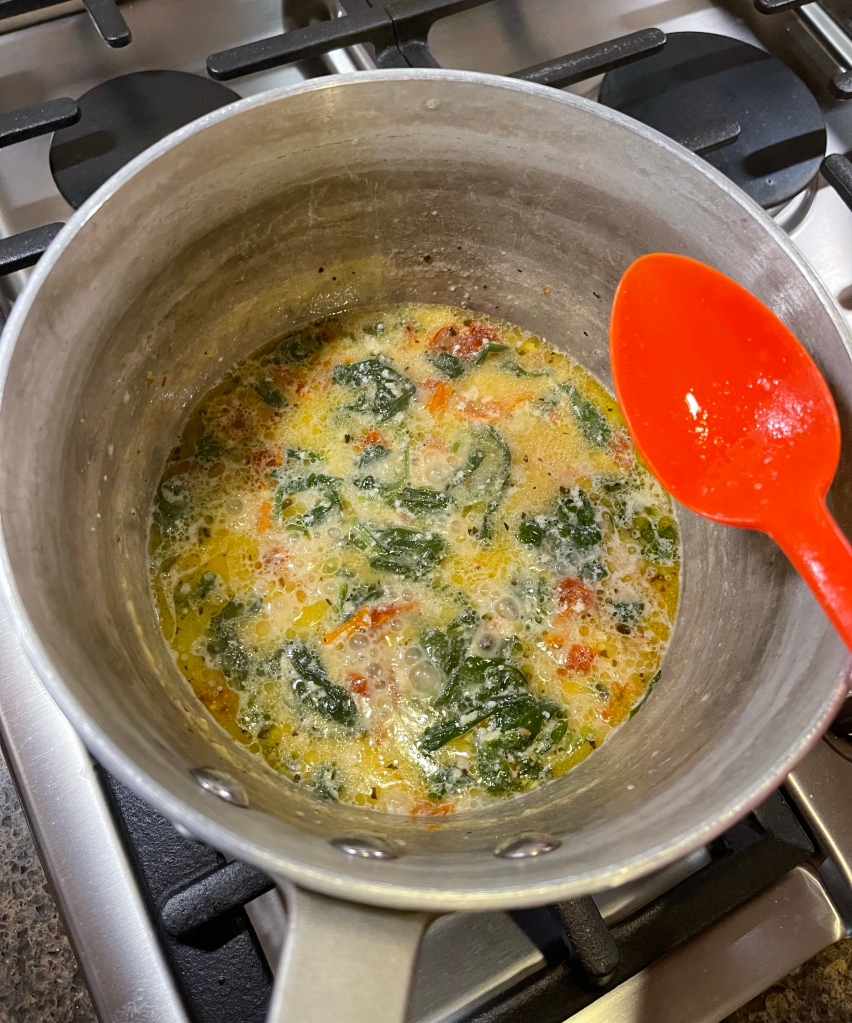
  • Add Parmesan and Laughing Cow, stir to combine and allow the flavors to meld.
  • Add wine, salt & pepper, then taste sauce, adjusting flavors as needed. Add pasta water, if needed.

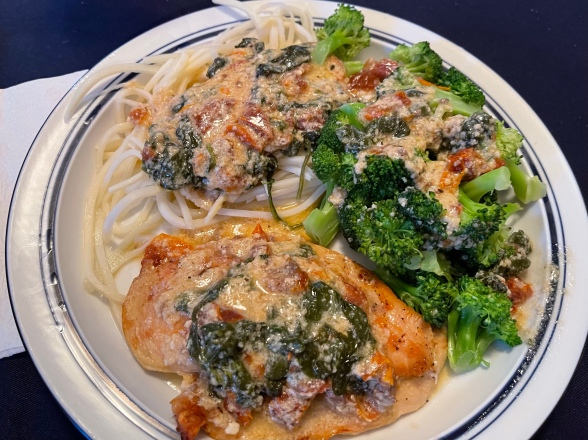
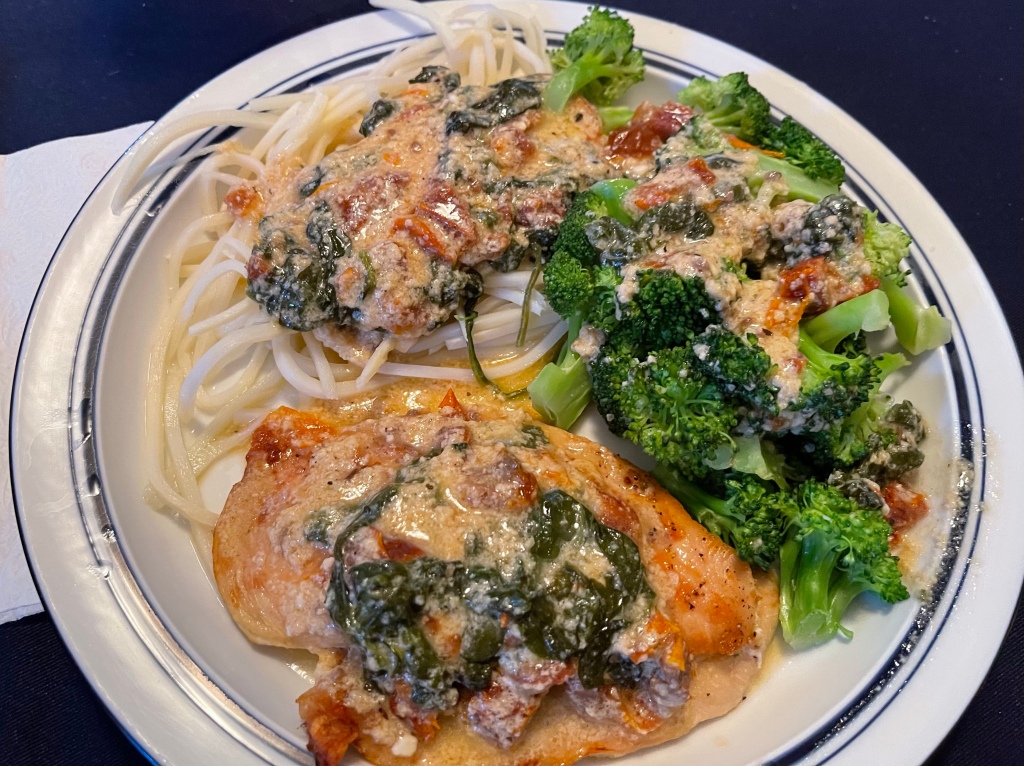
I typically spoon this sauce over baked chicken, pasta, and broccoli, as seen in the photo. I’ve also served this sauce over shrimp. It’s a delicious addition to enhance that plain chicken and vegetable dinner. It doesn’t take long to make this sauce and makes for a beautiful dinner plate!

Fish in a Flash

I’ve written this recipe a few times, but wanted to update it a bit for everyone.  This is one of the easiest and fastest three-course meal recipes I’ve ever written and I love that it’s also incredibly versatile.  The basic premise is the same but the specific ingredients can be adjusted, depending on your preference and what you have available.  I hope you love this recipe as much as me!fishinaflash

  • I call this recipe “Fish in a Flash” because you’re only going to need 15 minutes to make this three-course meal for your family.  It’s full of flavor, cost-effective, and adjustable… what more could you want in a recipe?

Ingredients:

  • Fish (Feel free to use whatever fish is on sale or what you happen to have in your freezer)  In this case, I used two tilapia fillets, but I’ve made this dish with flounder, haddock, or any other light, flaky fish.  I haven’t used salmon, but that doesn’t mean that you can’t!
  • Crackers (Ritz crackers, Cheese crackers, club crackers, saltines, etc) crushed
  • Salt, Pepper, and any favorite seasoning (I like Paprika)
  • White wine (use whatever you have on hand or you can substitute water)
  • Broccoli flowerettes (I used a half bag of Broccoli-Wokly from the local grocer)
  • Bag of microwave brown rice (or your favorite starch)

Directions:

  • Spray a microwavable dish with cooking spray and arrange your fish fillets on dish.
  • In a small bowl, crush the crackers and mix in your seasonings.  Sprinkle fish with seasoned cracker crumbs.
  • Using your thumb as a stopper, gently “thumb” wine over the crumbs to lightly wet them  to create a coating on the fish.  You can also spoon the wine (or water) over the fish.
  • Top fish with broccoli flowerettes – I did them in a decorative fashion for these photos, but I typically just add a layer of broccoli over the fish.
  • Wet a paper towel and lay on top of the broccoli – this will help to steam the veggies.
  • Pop your dish into the microwave and cook on high for 10-12 minutes, until the fish is flaky and well-cooked.
  • Remove the fish from the microwave and allow to sit for 2 minutes.
  • Cook the 90-second brown rice in the microwave.
  • Remove rice and divide onto individual plates.
  • Serve meal with brown rice on the plate, topped with fish and vegetables.

This has been a staple in our menu selection for most of my 28-years of marriage.  I’ve adjusted and altered the recipe to the point where this is the cleanest and most simple rendition.  The original recipe (from my first year of marriage) included a half stick of butter and lots of lemon juice… this version is much healthier and the flavors really seem to pop.

I hope you’ll try this recipe and see how your family likes our Fish in a Flash.  It might just become a favorite in your house too!

White Roasted Stir Fry

Have you ever wanted to make dinner but you didn’t actually want to “make dinner”? That was my night tonight.  I had an idea to make a stir fry, using a bag of frozen shrimp that I had thawed during the day, but I had no desire to stand by the stovetop.  Enter the idea of a “roasted stir fry”.  While it was a bit of a gamble, I do think it paid off in the end when we sat down to dinner.  It was yummy!  The best part is that it can qualify as a Starter Recipe because it’s just so darn simple.  Check out the recipe for yourself!WhiteRoastedStirFry.jpg

Ingredients:

  • 1 bag frozen shrimp
  • 1 bag broccoli bites
  • grape tomatoes (sliced in half)
  • half onion, cut in half and sliced
  • a thumb of garlic (I used a tube, so it was about the size of my thumb… probably 1 clove, crushed)
  • teriyaki sauce (just a small pour)
  • white wine (a large splash)
  • Splash of cream (totally unnecessary but looked good)
  • 1 pkg 90-second brown rice

Directions:

  1. Preheat oven at 400 degrees and cover baking sheet with foil.
  2. Remove shells from shrimp and put raw shrimp in a bowl.  Toss in broccoli, grape tomatoes, onion, and garlic.
  3. Pour sauce over shrimp mixture and toss to combine.
  4. Pour shrimp mixture onto baking sheet and pop into oven.  Cook 20-25 minutes, until shrimp are cooked.
  5. If you decide you want to add the splash of cream, you can add it by removing baking sheet from oven, pour cream, and toss to blend before serving.
  6. Cook brown rice packet as directed.
  7. Serve with shrimp mixture over brown rice.

To finish off our dinner, I like to add bread when I make dinner… I typically have sliced bread in the freezer, so I grab a few pieces, spray it with Pam and season with garlic salt. Feel free to play with the ingredients and create something that fits into your family’s favorites… add veggies, serve on noodles, change out some of the sauce flavors… the sky’s the limit when it comes to making dinners that everyone will like!  Enjoy…

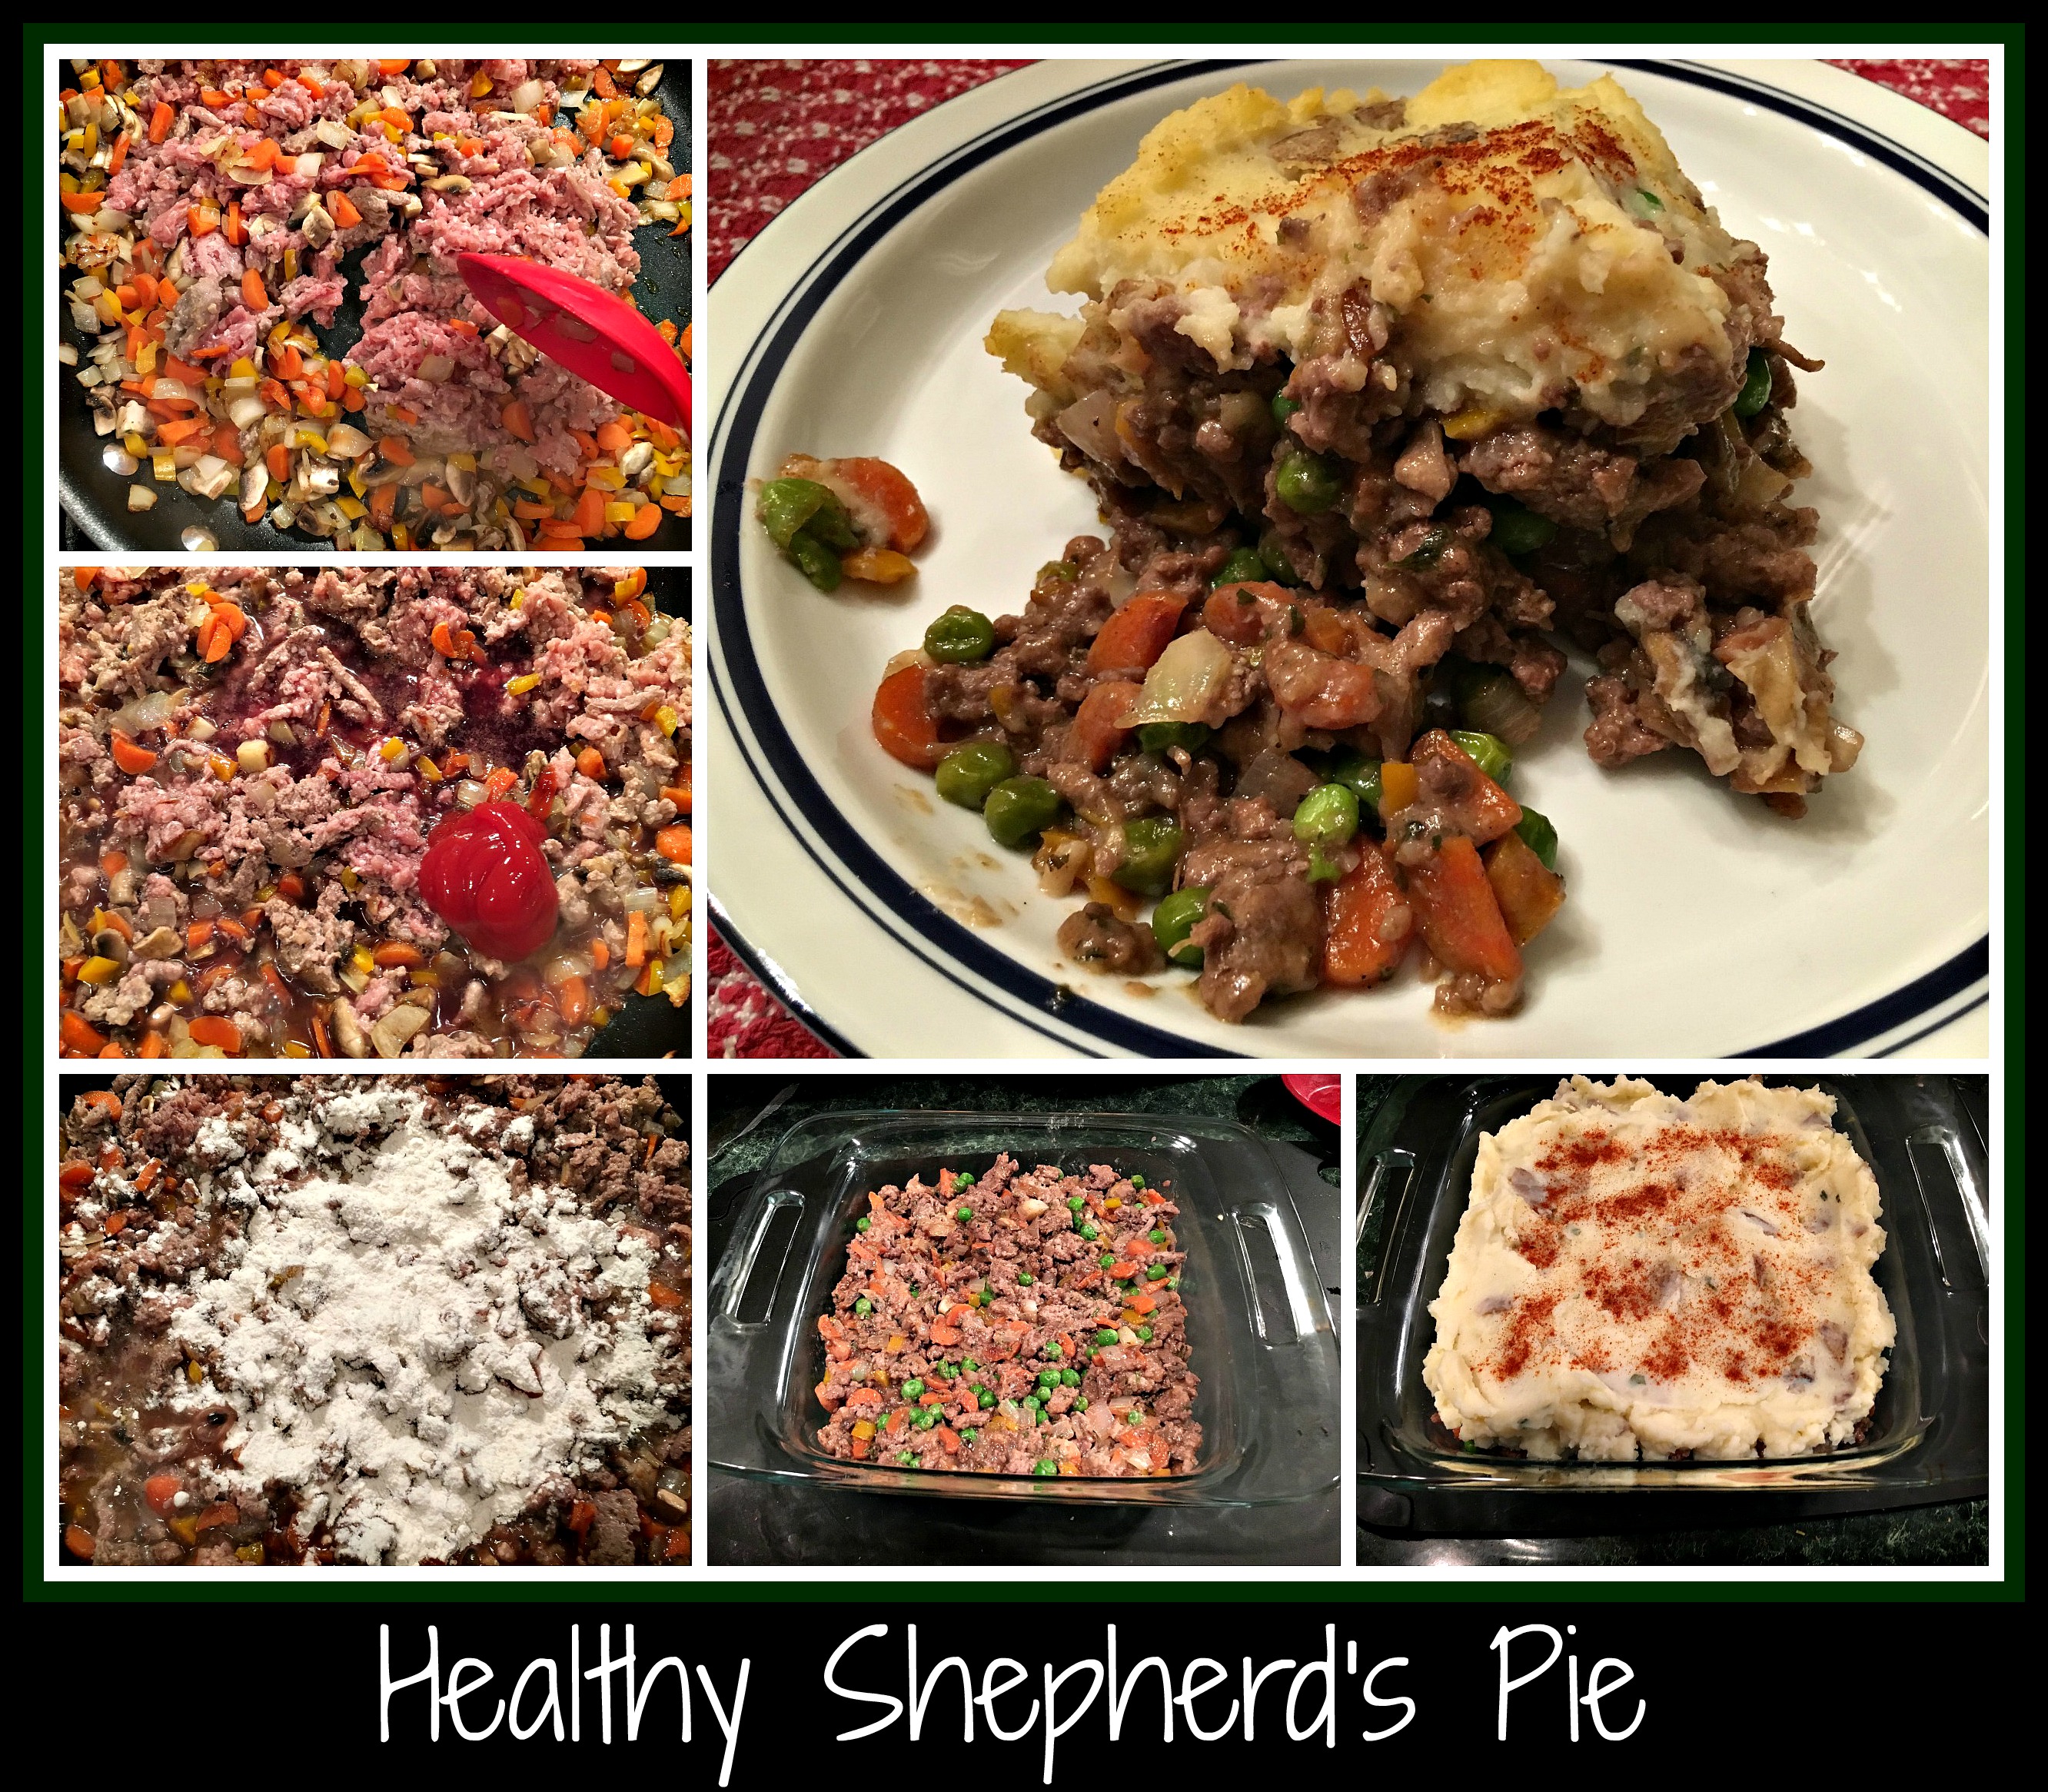
Starter Recipe: Healthy Shepherd’s Pie

I have been making some version of “Shepherd’s Pie” for ages, but I wanted to try and make something that would be a simple recipe for others to duplicate.  This recipe is pretty healthy, has lots of “hidden vegetables”, and tastes absolutely divine… a perfect comfort food dish for those who are just learning to cook and those who are proficient.  HealthyShepherdsPie

Ingredients:

  • 1 package ground turkey
  • Coconut oil – I used about a Tablespoon
  • 1 onion, diced
  • 1 handful of baby carrots, diced
  • 1/2 sweet pepper, diced (I used 2 small yellow peppers)
  • 3 mushrooms, diced fine minus stems (I was trying to hide them)
  • 1 handful of frozen peas (added at the very end)
  • red wine (I like the flavor when added to ground turkey)
  • granulated garlic (or use fresh, if you have it)
  • salt/pepper
  • Worcestershire sauce
  • 1 dollop ketchup
  • flour (use as a thickener – I just sprinkled some over the pan)
  • mashed potatoes (I used a batch of leftover potatoes, but use what you’ve got… if you don’t have any on hand, just boil two or three potatoes and mash with milk/butter)

Directions:

  1. Brown onion and carrots in coconut oil over medium heat until onions are translucent.  I then added the peppers and mushrooms but feel free to use whatever vegetables you have on hand.  This is a great way to use up things in your fridge!
  2. Once veggies are cooked, add the ground turkey and brown thoroughly.  I use a potato masher to get all the meat separated so it browns evenly.
  3. You’re now going to flavor your dish.  I always use red wine when I’m cooking ground turkey – I feel it adds a depth of flavor to the turkey and gives it a more “full” taste.  Once the wine was incorporated, I sprinkled granulated garlic, added salt and pepper, and flavored things with the Worcestershire sauce and ketchup.  I like to add the ketchup in something like this because it adds a touch of sweetness without getting a cloyingly sweet/sugar taste.
  4. When the flavors are balanced, I sprinkled on some flour to thicken the dish and tossed in the frozen peas.  Stir all to combine and put into your serving dish.
  5. Top your dish with mashed potatoes.  I love to use this dish when I have leftover mashed potatoes but it’s not difficult to make a small batch of mashed potatoes if necessary.
  6. Bake this dish for 30 minutes, or until hot and bubbly, in a 350 degree oven.  I love to serve this with garlic toasts (made from sliced ciabatta rolls, this is a simple side that can add a lot to the meal).

I hope you find this to be an easy recipe that makes your winter a little “warmer”.  Comfort food that doesn’t take hours to make is something that makes me very happy!  If you have any questions, as always you are welcome to message me and I’ll do my best to help walk you through the process.  Cooking should be fun and enjoyable… don’t stress over making it too “perfect”… it’s simply food and you’re feeding the ones you love.

Enjoy the process!

Starter Recipe: Easy Red Sauce

When you’re cooking, it’s always nice to have a great basic recipe for an easy pasta sauce in your arsenal.  Something that you can pull together with items from your pantry can make you feel prepared to whip up a great dinner any night of the week.  This is that sort of a recipe… it’s foolproof, yet easy to adapt to each family’s favorite tastes, which makes it a perfect “starter recipe” to have on hand.EasyRedSauce (1)

Ingredients:

  • 1-28oz can of crushed tomatoes
  • 1 can tomato paste (you’ll only need an amount the size of your thumb)
  • Seasonings (I like Italian Seasonings, Basil, and Oregano, as well as salt & pepper)
  • Red wine (Use as much or as little as you like – I used a dry red that I had in the fridge)
  • Balsamic Vinegar (One of my favorite ingredients to use to punch up the flavor)
  • Brown Sugar (I used 2 spoons-worth, but use as much or as little as you like)

In a medium saucepan, blend the entire can of crushed tomatoes, a thumb-worth of tomato paste, the seasonings and red wine.  Once this mixture simmers for a bit, add a bit of the vinegar and the brown sugar… make sure to taste your pasta sauce as it cooks and adjust the seasonings as needed.

For the latest dinner, I roasted a few turkey meatballs and added them to the sauce before dinner.  I served the meatballs and sauce on a bed of cooked thin spaghetti and it was a huge hit… everyone soaked up the last bits of sauce with pieces of bread, which is a positive sign in our house.

Hope you enjoy making this sauce for your own family… feel free to adjust and alter ingredients to make this sauce your own!

Starter Recipe: Easy Chicken Pie

A quick note about this new term; “Starter Recipe”… I have two sons who are learning to cook.  E has been playing around with recipes and ingredients for awhile now, but D has just started to venture into making his own meals.  Because of D’s newly found interest, I’m going to start posting recipes (aptly named “Starter Recipes”) to help those, like D, who want to cook but are intimidated by huge lists of ingredients or just want to make something that can be pulled together with things that are easy to keep on hand.  Use the search engine on my blog for more “Starter Recipes”… until I get more recipes posted, here’s our first of what I hope will become a long list of easy-to-follow and delicious recipes.EasyChickenPie

D wanted to use some of the leftover turkey that I had given him to take back to his apartment, but he didn’t just want to make a few sandwiches… he wanted to make a Chicken pie (with turkey).  We started with a short list of ingredients.

Ingredients:

  1. Leftover turkey/chicken NOTE: You can pull meat off a pre-roasted chicken if you don’t have any leftover from a previous meal.
  2. One can of mixed vegetables. NOTE: I like to use a can of “Veg-all” because it includes potatoes.
  3.  One can Cream of Chicken soup, undiluted. NOTE: If I were making this, I would add a bit of white wine here.
  4. One can of pre-made Biscuits NOTE: Use whatever biscuits you like best… these will be your topping.

Directions:

  1. Spray a 9×9 baking pan with cooking spray and preheat your oven to 350 degrees.
  2. Chop or shred meat and cover the bottom of your pan with bite-sized pieces.
  3. Open and drain the canned vegetables.  Spread them over top the meat in an even layer.
  4. Open and spoon the soup over the vegetables.  If you would prefer to mix these three ingredients together and then pour them into the pan, feel free to do so.  This is your dish, so make it however you like.
  5. Top with approximately 5 biscuits (as shown in the photo).  You can also cut each biscuit into smaller pieces and layer them on top of your pie… again, this is your dish.
  6. Spray top of biscuits with cooking spray (“Pam” is cooking spray) so they brown as they cook.
  7. Put pan in oven and bake at 350 degrees for 30-40 minutes, or until the sauce is bubbling.  Serves 2-4 (depending on serving sizes)

I do hope that you’ll try this recipe, especially if you’ve never cooked before.  Cooking can be a relaxing experience, as long as you have all your ingredients at hand and feel confident that your final outcome will be tasty and satisfying.  By following these recipes, I hope to help you learn how to become more comfortable with cooking for yourself and for others.  There’s really nothing as wonderful as making a meal that satisfies both body and soul.

Enjoy the journey!

Recipe: Apricot Chicken and Snow Peas

This recipe was such a huge success this week!  I was trying to come up with a simple recipe to use a sweet/spicy sauce with chicken and I ended up with this winner of a meal.  You’ve GOT to try this one… truly!

I started with a package of boneless, skinless chicken thighs.  I salted/peppered each side and seared them in a medium-large skillet pan into which I had melted a small amount of olive oil and sesame oil.  Once they were nicely browned, but definitely NOT cooked through, I added a rather creative sauce.ApricotChickenSnowPeas

My sauce consisted of the following ingredients:  Gewurztraminer (dry) wine, sesame oil, garlic, ginger, apricot jam, commercial orange sauce, and soy sauce.  All these ingredients can be used, to varying degrees, depending on your taste preferences. NOTE: I chose to use a dry Gewurztraminer wine because of the heat that was going to come out from the orange sauce, but you could easily switch out a sweeter Riesling or Vidal Blanc white wine (or even chicken stock if you don’t want to use wine) but if you choose a sweeter wine, I’d decrease the amount of jam used.  It’s totally up to you!

Once I rolled the chicken in the sauce, I chose to roast this dish, covered, in a 200 degree oven for 2 hours.  I had the time and really wanted to have the scent permeate the house before we had dinner.  If I were more pressed for time, I could easily have left this on the stove top and kept the heat on medium for about 45 minutes or until the chicken thighs were cooked through.

Once the chicken was done, I added half of a small package of snow peas (sugar snap peas would be a great substitute) and allowed them time to cook in the sauce. Just before serving, while the sauce was still a bit runny, I mixed a few tablespoons of sauce with a little bit of cornstarch to make a slurry and added that into the sauce to thicken the mixture.  NOTE:  Make sure to add the cornstarch to a small amount of liquid rather than adding the cornstarch directly to the pan to prevent lumps in your sauce.

When I added the snow peas, I started cooking a small batch of egg noodles so they would be ready in time for dinner. This was a great bed for the dish and really allowed the flavors to pop.  If you prefer, brown rice would also make an excellent accompaniment.

I do hope you’ll try this recipe sometime.  I’ll be using the basic idea of this sauce for a shrimp dish tonight for dinner and expect it to present the same stellar results.  It’s all about finding the flavors that mix best for your family and playing with them to make your own arsenal of go-to recipes.  Enjoy!

Recipe: Red Turkey Chili

Last night was windy, cold, and rainy here in Maryland, so my first impulse was to make chili.  This dish is one of my favorite things to make, especially in the fall and winter, because I can change out the recipe so easily.  I’ve made it many different ways, but last night’s was a much healthier rendition that still warmed us up nicely.  See if you and your family notice a difference if you try this version!

I started by heating a large stock pot on the stove and dropped in one diced onion with some olive oil. Once the onion was translucent, I added one package of ground turkey and took some time to let it all brown thoroughly.  To add a bit of smokiness to the finished product, I added a bit of bacon that I pulled from the freezer and gave that some time to cook. RedTurkeyChiliNOTE:  I had previously taken a one-pound package of bacon and sliced it into 8 portions.  Each portion went into a small freezer bag and I use a portion any time I want a little bacon flavor without having to thaw or cook an entire package.  I diced this portion so the bacon wasn’t discernible, but the flavor permeated the chili nicely.

I then added about a cup of diced sweet pepper (as you can see, I used a variety of green, red, orange, and yellow peppers) as well as a generous pour of red wine.  NOTE:  For this recipe, I had a bottle of red wine from Adams County, PA, but any good dry red wine is great to add, provided it’s a red wine that you like to drink.  Don’t ever add wine that you wouldn’t drink to a recipe, since cooking will concentrate the flavors from the wine.  

Once the vegetables and wine are incorporated into the chili, I then added one can each of light and dark red kidney beans (rinsed and drained) and one can of diced tomatoes (not drained).  I was now ready to add my spices to make this dinner into something memorable.

Since my family is not a fan of hot/spicy flavors, I used a conservative amount of dark chili powder, ground cumin, and smoked paprikaone teaspoon of unsweetened cocoa powder, along with some salt and pepper.   At the very end, I drizzled in a bit of a prepared Balsamic Glaze, which really gave this dish a bit of zing without overpowering the traditional chili flavors.

I do hope that you’ll try your hand at this chili recipe.  Feel free to substitute other meats, beans, or vegetables as you like – that’s what makes each person’s recipe unique and special.  We thought this version had a great balanced flavor… exactly what I wanted on a cold, rainy fall evening.  This would be a great dish to share with friends and will freeze nicely, so feel free to double or even triple the recipe if you have the time (and freezer space)!