Comfort Foods

Just a quick note to say that, in my humble opinion, there’s nothing more comforting than soup and a sandwich for dinner when you’re sick.

My darling hubby has a cold. He’s not sick often, but when he gets a cold, it knocks him for a loop. Because of that, I pulled out my favorite recipe for Chicken Noodle Soup (see previous post on this blog) to get him on the road back to “healthy”. This recipe is a classic… Simple, clean, and full of chicken soup goodness.

Try it the next time someone in your household is feeling under-the-weather. Add in an easy grilled cheese sandwich and you’ve got a great meal full of love. Doesn’t it just look like it’ll make you feel better??

Wishing you health as we head into the middle of March!

20130315-195240.jpg

Recipe: Easy Beef Stew

I love making a dinner that cooks long on its own…. something that takes short bursts of attention and ends up being incredibly tasty. This recipe could probably have been done in the crockpot, but I chose to start it in my large Calphalon skillet and just cooked it that way for the afternoon.

I started with two packages of “sale beef” – one was a packet of beef strips for stir-fry and the other was a packet of stew beef. Since I pulled both out of the freezer in the morning, I chose to slice the beef while things were partially frozen so the cutting would go faster. Once the beef was sliced, I sliced a vidalia onion and left both items on my cutting board for a moment.

Using my large Calphalon skillet, I heated one T of butter and one T of olive oil. When this was sizzling, I popped both the beef and onions in the skillet to brown. The kitchen started to smell wonderful, so I popped in three or four garlic cloves and then put the skillet into the oven at 350 degrees for an hour or so.

When I went back to the skillet a little later, the meat and onions had started to carmelize, so I added some James River Cellars Rad Red (you can just as easily use a Cabernet Sauvignon, a Cabernet Franc, or a Meritage for this dinner), as well as some salt and pepper, and popped it back in the oven. At the next look, dinner was looking a little soup-y, so I shook a spoonful of flour over top and stirred it into the sauce. Note: make sure to taste your food along the way – it’s much easier to adjust the flavors throughout the cooking process than to dump in a spoonful of garlic salt at the end.

When dinner was almost complete, I tossed in some frozen peas, stirred them into the sauce, and returned the skillet to the oven until the peas were cooked and dinner tasted “ready”. I warmed up some rolls, but you could also use pre-made rolls or breadsticks, depending on your family’s preference.

My favorite part of this dinner was the fact that I could be doing other things throughout the afternoon and dinner still turned out fabulously. The beef had a rich, deep flavor and the sauce that I had at the end was perfect when served over a baked potato (as pictured) or over pasta (as my husband preferred). Either way, dinner was a success and this recipe became an instant favorite. I hope you’ll try making this for your own family and see if it doesn’t become a favorite for you as well. Enjoy!

20130228-134859.jpg

Recipe: Breakfast Hash with Wine

People have been joking with me for years about pairing wine and breakfast… so that’s been my latest challenge.  To create a tasty breakfast food that somehow incorporates wine?  I couldn’t imagine it… until this morning.

I started with a pre-baked potato.  I diced the potato and began to saute it in a mixture of olive oil and margarine.  As it browned, I diced about 1/3 of a granny smith apple and added that to the pan.  In the meantime, I boiled water with a bit of white vinegar to cook a quick poached egg.   The picture on the left is of the potato/apple mixture as it cooked and browned.

To add a kick of flavor to this simple dish, I added 1/4 cup of James River Cellars Petit Verdot as well as a spoonful of House Sauce (from Take It Away in Charlottesville.  Note: this sauce can also be found at The Cheese Shop in Williamsburg).  The wine added a lovely tinge of pink to the potato and apple pieces and the House sauce brought its own smokey mayonnaise touch.  Using both in combination created a wonderful flavor that otherwise might have relegated this dish to the “ho-hum” list.

As I plated my breakfast, I sprinkled the potato/apple mixture with 1T of Asiago cheese crumbles.  I gently laid the poached egg on top and added a bit of cracked pepper.  It was amazing.Breakfast Hash

Nothing is “out of bounds” when it comes to cooking… try it and see how you like adding wine as a flavoring agent.  You might be inspired and totally surprised with a new favorite.   I certainly did!

Recipe: Shrimp Puttanesca

I have to caveat this post by saying that this sauce is not a true Puttanesca… it has none of the tomatoes, olives, and capers one would expect in a traditional puttanesca sauce, should you place an order for this in a restaurant.  My darling husband isn’t a fan of olives and capers, but I was hungry for something along the same lines of a puttanesca sauce with shrimp, so this is the recipe that came about.  I hope you enjoy it as much as we did!

I started with a frozen package of Extra Jumbo Shrimp from my local grocery store.  I love to pick up packages of shrimp any time they’re on sale, so this is always a “go to” for me… especially since my husband and I both love shrimp.  I thawed and shelled the shrimp while they were still partially frozen, so they were easy to peel.  I also put a pot of pasta on to cook… cook as much as you’d like for your meal.  We like either bowties, rotini, or ziti as any of these hold the sauce nicely and are easy to eat with a fork.  If you like spaghetti or linguini, this would be a great recipe to use as well.ShrimpPuttanesca

Once the pasta is almost cooked, I warmed up some olive oil and then sauteed a large amount of finely chopped garlic and shallots until softened and lightly browned.  Into the pan, I then added two anchovy fillets (I used the ones packed in oil, because that’s what I had in the cupboard – I’ll use anchovies packed in water for the next rendition) and allowed them to melt into a sauce.  SIDE NOTE:  Anchovies are fun to cook with because they really do melt into the sauce when exposed to heat and bring a salty back note to any sauce.  I find them fun to use, as long as my family isn’t aware that I’m using them… they’re a little finicky about fish in their sauces.  Once the base of the sauce was cooked and the anchovies were incorporated, I added the shrimp.  As you can see in the photo, I sliced the shrimp length-wise so they would curl up and look pretty in the dish.  This also allowed the shrimp to cook pretty quickly and pick up the sauce even better than if they were whole.

With the shrimp were in the pan and starting to cook, I added some James River Cellars’ Chardonnay to fill out the sauce.  If I were trying to make a meal without wine (why would anyone DO that??), I’d simply substitute chicken stock for the wine.  I allowed the wine to cook into the shrimp and add a lovely taste to the seafood before topping the entire dish with some chopped parsley.  If the sauce is still a little thick, you can add more wine OR you can add a little pasta water.   The pasta water will end up thickening the sauce as well, so adding both is not a bad idea either.

For plating purposes, I drained the pasta and then tossed it into the shrimp and sauce.  This dinner was a huge hit and will definitely be seen often in my “easy/go-to” line up of recipes.  Try it yourself and see if you don’t add it to your own family’s favorites!

If you’re thinking about making a Valentine’s dinner, this is wonderful for a seafood lover.  Just add some crusty bread and a decadent dessert, and your loved one will be putty in your hands.  Happy Valentine’s Day!

Recipe: Meritage Cheddar Bread

I pulled out one of my Bread Machine cookbooks recently and was taken with the idea of creating a wine and cheese bread. I had apparently tried this recipe before, as evidenced by some ancient notes I’d written, but was bound and determined to try it again. Since I had some extra sharp cheddar in the fridge and a small amount of red wine from work, I decided it was worth the time to see how this experiment would come out.

I started with a bottle of Veritas’ Vintner’s Reserve red wine. I had helped work the recent Governor’s Cup Seminar and was given the remains of one of the medal winners. This wine is a meritage-like blend that I really enjoyed, so it was a good wine to use, in my opinion. I wanted to use something similar to the James River Cellars’ Meritage and this wine fit the bill for me. I also had some extra sharp cheddar cheese that was leftover from a recent event at the winery, so I really was killing two birds with one stone, so to speak.

20130205-153536.jpg

As you can see by the photos across the top of the collage, I used my bread machine for the dough portion of this recipe. It made my life so much easier. Here are the directions for making this bread, using a machine such as the Zojirushi that I have.

Ingredients:
3/4 cup wine
2/3 cup sharp cheddar cheese, shredded
1 1/2T margarine
1/2 t salt
3/4 t sugar
2 1/4 c flour
1 1/2 t yeast

Directions:
I put all the ingredients into the machine and allowed it to do it’s work. Once the dough was ready, I separated it into two sections and rolled each as if for French bread. I placed each length on my baking tray and allowed them to rise for 30-45 minutes. Once they had risen sufficiently, I sprayed them with water and baked them in a 375 degree oven for 30 minutes or so. I also turned the pan around mid-way through the baking process and sprayed the loaves with water again. As you can see in the photo, the loaves split, so next time I’ll make sure to slice them a few times to allow for steam to vent.

This experiment turned out fairly well, although I might just let the loaves bake in the machine next time to see how they differ. This would be a nice base for a simple garlic toast to accompany a dinner or used as an appetizer under a fresh tomato/basil topping. Try it and see how you’d like to use it… I’d love to hear your feedback!

Recipe: Chardonnay Cassoulet

It was snowing yesterday and I wanted to make a stew that would make me feel warm.  Thinking about what always makes me think of roaring fires and home-cooked meals, I decided to make a chicken cassoulet.  For those who think that a cassoulet is something beyond their abilities, I would strongly suggest trying this recipe, then sit back and bask in the compliments.  This is a simple, stove-top casserole that has all the elements of a meal that would normally take all day to cook.  Thankfully, with a few simple substitutions, this dinner can come together fairly easily and be just as tasty (in my opinion).  I’ve adapted a recipe that I originally found through a weight-loss program cookbook, so it’s not quite as trim as it might be, but it IS pretty yummy.

Ingredients:ChardonnayCassoulet

  • 1 package (8 total) boneless, skinless chicken thighs
  • 1 package diced prosciutto (my grocery store sells this, pre-packaged, in the deli area)
  • 2 cups baby carrots, sliced
  • 2 cups celery, diced
  • 1 large leek, cleaned and sliced
  • garlic, chopped (I typically use 2-3 cloves)
  • 2 cans cannellini (white kidney) beans  (I use them with their liquid and smash one can for thickness)
  • 2 cups chicken stock/broth
  • 1 cup Chardonnay (I like to use James River Cellars Reserve Chardonnay – use your favorite)
  • 1T dried lemon thyme (I have a jar of this from a friend – use regular thyme if you prefer)
  • 1T dried poultry seasoning (the leafy stuff, not the ground variety)
  • 2 bay leaves
  • salt and pepper to taste

Directions:

  1. Preheat oven to 350 degrees.
  2. Using a stock pot sprayed with Pam, brown chicken thighs on both sides  and then transfer to a plate.  Set aside for a bit.
  3. In same large pot, saute prosciutto until lightly crispy.  Add veggies (carrots, celery, leek, and garlic) and saute until vegetables begin to wilt.
  4. Add remaining ingredients and bring everything to a simmer.  The meal will now look like a soup, even with the mashed can of beans.  (*First photo on the top left of the collage)
  5. Add the chicken and collected liquids to the mixture, push the meat deep into the broth, and put the lid on the pot.  (*Middle photo on top of the collage)
  6. Pop the stock pot into the oven and bake until the meat is falling apart and the broth has thickened, about 1 1/2 hours.  Remove the two bay leaves and discard.
  7. Using an immersion blender, blend 3-4 times in very short bursts to thicken the vegetables but not destroy the chicken.  You can also spoon a cup of the vegetables into a blender, pulse until smooth, and return to the dish.  This will also thicken the meal without destroying the meat. (*Right side photo on top of the collage)

I love the addition of a hearty sourdough bread with this meal (as shown in the bottom photo of the collage).   While this meal takes some time to make, it’s really the baking that takes the most time.  Skill-wise, it’s not much more difficult than making soup, so it’s definitely worth a trip to the store for a few special ingredients to make this for dinner.

I mean, really… how many times do you get to use a special french word to describe something so homey and comforting?  I could have easily called this dinner a “Chardonnay Casserole”, but it sounds so much more unique and mysterious when I get to use the word cassoulet.  Heck, even my computer wanted to change that word to casserole.

Silly computer…

I hope you’ll try making this dinner… and feel free to tell me all about your own trials and tribulations… sharing is what makes cooking so much darn fun to me!

Recipe: Cabernet Franc Chili

Cab Franc ChiliThere’s something wonderful about having Chili on a cold winter’s day that just makes me feel warm inside.  The intoxicating smell of a simmering blend of onion, garlic, and green pepper gets me in the mood for a crackling fire, snow on the ground, and a big pot of chili.

Since I live in Virginia, “snow on the ground” typically isn’t going to happen very often, but once the temperature dips into the lower 40’s, I’m ready to start going through my winter repertoire and cooking up some wonderful hearty dinners.  This recipe is basic and allows for anyone to alter ingredients to suit their own particular tastes.  Here’s the general starting point:

Ingredients:

  • Olive oil
  • 1 package ground turkey
  • 1 large green pepper, chopped
  • 2 small (or 1 large) onion, chopped
  • Crushed garlic, to taste
  • 1 cup Cabernet Franc
  • ½ small can tomato paste
  • 1 Large can crushed tomatoes
  • 1 can diced tomatoes (with or without spices)
  • 1 can light kidney beans
  • 1 can dark kidney beans
  • 1 can black beans
  • 1 can cannellini beans (white beans)
  • Chili powder
  • Cumin
  • Salt/pepper

Brown the ground turkey in olive oil, using a large stock pot.  Add green pepper, onions, and garlic, sauteeing until vegetables are softened.  Add wine and tomato paste and cook until liquid is absorbed.  Add canned tomatoes and beans (I don’t drain or rinse my beans).  If desired, mash one of the cans of beans prior to adding, to thicken the chili.  Cook to warm everything thoroughly.  Add spices to taste.  If chili is still too thin, add remaining half can of tomato paste.

This is my most basic recipe.  If you want to make it hot, feel free to add some cayenne pepper… if you want it to be sweeter, feel free to add some honey or sugar.  This is a flexible recipe, so feel free to make it your own by adding or subtracting items as you see fit.

That’s the beauty of cooking… enjoy the process and revel in your results.

Recipe: Red Macaroni and Cheese

I love a simple recipe.  I also love to take a simple recipe, like one for macaroni and cheese, and turn it on its ear by adding and altering ingredients to create something entirely different and entirely delicious.  This recipe started out as one of those creative journeys into my childhood favorites… but with an added spark of the here-and-now.

I’ve always loved macaroni and cheese.   It’s a secret indulgence, a hidden splurge, and a step beyond the “blue box” staple that most think of when “macaroni and cheese” is mentioned.  Lots of chefs do their own rendition of this meal and I, while not a chef, have a version that I have served to hungry throngs of volleyball players more times than I can count.  This recipe, howeRed Mac and Cheesever, is one that is heartier than most, with the addition of ground turkey.   While a variation of the original, it’s got the staying power of a great meal.  Feel free to play with the ingredients to suit your own family’s tastes!

Ingredients:

  • 1 package ground turkey
  • ¼ cup Mesquite steak seasoning
  • 1 cup Red Wine (I like using Cabernet Franc or Rad Red)
  • Jumbo elbow pasta
  • 2T butter
  • 2T flour
  • Milk
  • Reserve Chardonnay
  • Cheddar cheese
  • Salt/pepper

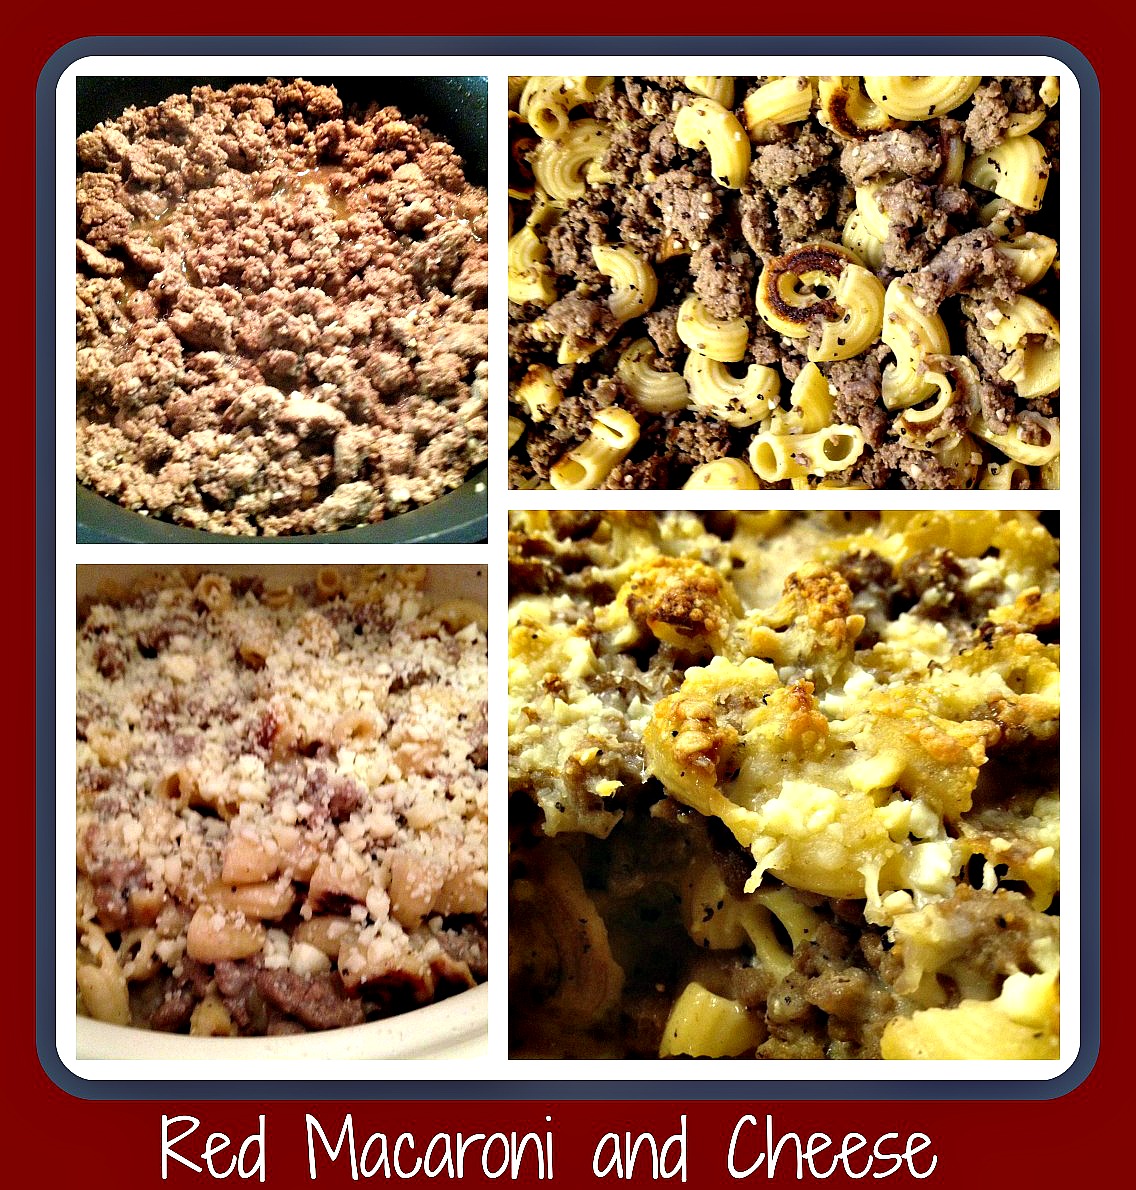
Start by browning the ground turkey in a large sauce pan.  You won’t need to use a stock pot or anything very deep since you’ll be transferring the meat into a casserole dish to bake later.  Once browned, top liberally with mesquite steak seasoning and red wine, as you do in taco meat directions, and cook until the liquid is thoroughly absorbed.  I used the same amount of steak seasoning and wine as the taco seasoning packet directs (I always have to recheck that part) and the meat becomes something entirely new and really tasty.

While the meat is browning, cook your jumbo macaroni pasta to al dente and then drain.  Feel free to use another pasta shape if you prefer – I love the fat rounded shape of the jumbo elbow macaroni, so we keep that in the house for just such an occasion.

Once the meat and pasta are both cooked, blend them together in a large casserole dish.  You’ll want to make sure to mix them thoroughly so there aren’t big clumps of either meat or pasta.

Now make your cheese sauce.  Start by melting your butter and flour together and allow them time to bubble a bit to cook off the flour taste.  Alternately add both milk and white wine (equal amounts is fine) until the white sauce is smooth and thickened.  You’ll know you’re done adding liquid if the white sauce is just barely thick but has nice flavor.   I know that doesn’t sound like a very precise term, but I really do feel my way around this part of the cheese sauce.  The sauce needs time to cook and incorporate the milk and wine, so take your time at this point… it can take 7 minutes or more to add/cook the sauce until it “feels right”.  Once you’re happy with the white sauce, add liberal amount of cheese to morph this into your cheese sauce.  I sometimes add a sprinkle of fresh nutmeg before I season with salt and pepper… just a little will go a long way to make this dish your own.  Make sure to taste your cheese sauce… it’s the final touch of this casserole and needs to taste yummy before you add it to the dish.

Pour cheese sauce over meat/pasta, top with cheese, and bake casserole at 350 degrees for 30-45 minutes or until top is nicely browned and cheese is crunchy.  Serve hot.

This is a great dinner to make a day ahead and simply bake that evening.  Since everything has already been cooked, all you’re really doing is bringing all the ingredients together into a wonderful warm meal of comforting goodness… just the right touch after a long day and a chilly drive home.  Add some warm bread and I don’t know many people who could possibly resist…. I know my family wouldn’t!

Recipe: Italian Pot Roast

Here’s one of my favorite recipes for a chilly winter’s evening.  It’s great on a night where you don’t want to have to think about dinner and all you want to do is come home to dinner with the family.  This is a simple recipe to make for as many people you’ll be feeding… from two on up to as many as you can fit in your kitchen.  Feel free to play with the ingredients as well – it’s the idea of the recipe rather than the specifics.  Use The Force and create your own version of this delicious meal… then sit back and enjoy the compliments!Italian Pot Roast

Ingredients:

2 ½-pound London broil

1 t salt

½ t pepper

1 t extra virgin olive oil

2 onions, sliced or chopped

½ -pound fresh mushrooms, sliced

4 garlic cloves, roughly chopped

1 28-ounce can diced tomatoes

1t dried basil

½ cup dry red wine (Suggested: James River Cellars’ Cabernet Franc, Merlot, or Meritage)


Directions:

  1. Cut beef into large chunks, then sprinkle with ½ t salt and ¼ t pepper.  Heat oil in large stock pot over medium high heat and cook until browned, about 6 minutes.
  2. Remove beef.  Add onions, mushrooms and garlic to pot.  Cook, stirring occasionally until the vegetables begin to brown and soften, about 6-7 minutes. Add tomatoes, basil and wine along with remaining salt and pepper.  Cook until mixture begins to thicken, about 5-6 minutes.  Replace the beef in the stock pot and place in oven, at 250 degrees.  Cook for 4-5 hours.
  3. Remove beef once fork-tender and keep warm.  Cook all remaining ingredients on stove-top until thickened, 10-15 minutes, stirring occasionally.
  4. Serve beef and sauce with mashed potatoes and a crisp, green salad.


Note:  Can use Crock pot and cook on high for 4-5 hours OR on low for 6-8 hours

Recipe: Meritage Marinara Sauce

It’s always good to have a basic recipe in your cooking repertoire that can be used for lots of different dishes.  A basic marinara sauce is just such a recipe.  I used James River Cellars Meritage for this recipe, but you can just as easily use a Merlot, a Cabernet Franc, a Petit Verdot, or any other dry red wine that you prefer.  I based this recipe on one I found in the latest Cooking Light magazine (Slow-cooker Marinara) but I really didn’t want to take the time to use my crock-pot, so I altered the recipe and came up with something that make more sense for my current timetable and needs.  I hope you like it!

Ingredients:Meritage Marinara

  • Olive oil to coat the bottom of the pan
  • 2 onions, finely chopped
  • 1/2 bag of mini carrots, finely chopped
  • 4 stalks celery, finely chopped (I like the taste of celery, so I tend to go heavy on this veggie)
  • garlic, to taste (again, I like garlic, so I tend to use more than most – use as much as you like)
  • fresh oregano, finely chopped (I used a few stems from the plant I have – about 2-3 Tablespoons)
  • tomato paste (about 1/4 of a can)
  • red wine (I used James River Cellars Meritage, since that’s what I had on hand)
  • 2 large cans of crushed tomatoes

Directions:

  • In a large stockpot, heat the olive oil before adding the onions, carrots, celery, and garlic.  Saute’ all until the vegetables are softened.  *See #1 on the photo
  • Add oregano and tomato paste and cook until fragrant.  *See #2 on the photo
  • Add wine to the sauce and simmer until most of the liquid evaporates.  I used The Force with regards to the amount I used, but it was equal to two turns around the pan.  *See #3 on the photo
  • Once the wine is incorporated, add the tomatoes and stir to combine.  *See #4 on the photo.  At this point, I covered the pan with foil and popped it into a 200 degree oven for about 2 hours.
  • After baking the sauce, I removed it from the oven and used an immersion blender to smooth out the sauce.  *See the final photo marked “YUM!”.  I adjusted the seasonings by adding some salt/pepper and a little sugar to sweeten the sauce a touch, since our family likes a sweeter marinara.  It’s now ready to use for a myriad of different dishes.

Ideas for Marinara Sauce use:

  • Meatball sandwiches:  For each sandwich, fill hoagie roll with meatballs (homemade or store-bought), top with marinara and sprinkle with mozzarella cheese.  Broil sandwiches to melt cheese and serve.
  • Portabella Mushroom sandwiches:  For each sandwich, fill hoagie roll with sauteed portabella mushroom/spinach mixture, top with marinara and ricotta cheese, then broil to warm before serving.
  • Veggie Mexican Pizza:  On pizza crust, smear marinara sauce as you would tomato sauce, top with black bean and corn salsa and sprinkle cheddar cheese on top.  Bake as desired and serve.
  • Simple Italian dinner:  Top pasta (macaroni) with Meritage marinara sauce and Parmesan cheese.  Serve with garlic bread.
  • Eggplant, chicken, or veal Parmesan:  substitute Meritage marinara sauce for standard tomato sauce under your eggplant/chicken cutlet/veal cutlet and top with mozzarella cheese

This sauce is incredibly versatile and really tasty.  Try it in any dish where you’d typically use a canned or jarred tomato sauce.  It’s a great way to sneak vegetables into your family’s favorite meals and you can feel good that you’d made something healthy AND tasty.  It’s one of my favorite things… making healthy foods that my family will love.  Enjoy!