Recipe: Easy Wine’d Beef

Since the weather was so chilly last week, I was searching out a way to make something for dinner that would warm us up.  Stir-fry would have been tasty, but since I don’t have a good non-stick pan at my disposal yet (still in the apartment), I opted to make a faster version of a traditional Beef Bourguignon.  EasyWine'dBeef

I started with a piece of beef that was on sale at the local grocery store.  I’m not exactly sure what cut of beef I purchased… I just know that there was some great marbling of fat (for yummy flavor) and it was boneless.  I popped it in the freezer for a bit to make it easier to cube, then tossed the cubes of beef with some flour seasoned with salt, pepper, and smoked paprika.

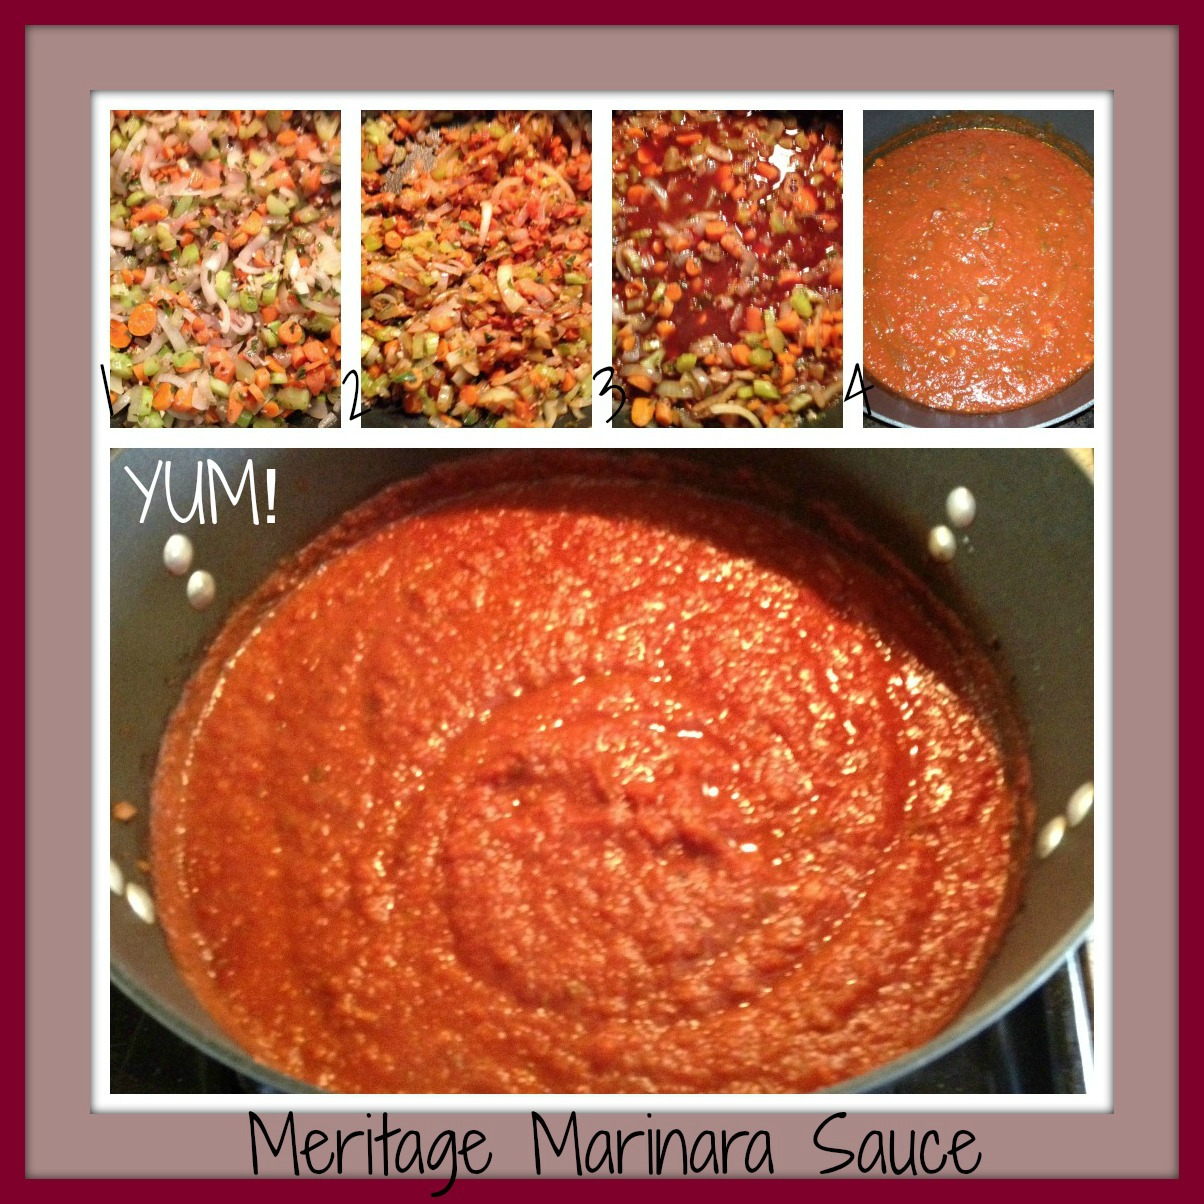
In the meantime, I heated some olive oil in a large stock pot and then sauteed a diced onion, a little green pepper, and a few handfuls of celery until they were softened and fragrant.  I love the way the smells in a kitchen can permeate the entire apartment and make the place smell “homey”, don’t you?

Once everything had a nice browned glaze to it, I moved them over and added the flour/seasoned beef to the pot.  I added a little more fat (some olive oil and a little margarine) to start the browning process for the beef.  This took some time, but it was well worth it.  NOTE: You’re not trying to cook the beef the whole way through, you’re just browning it in preparation for the slow cooking it will do in the liquid you’ll add next.

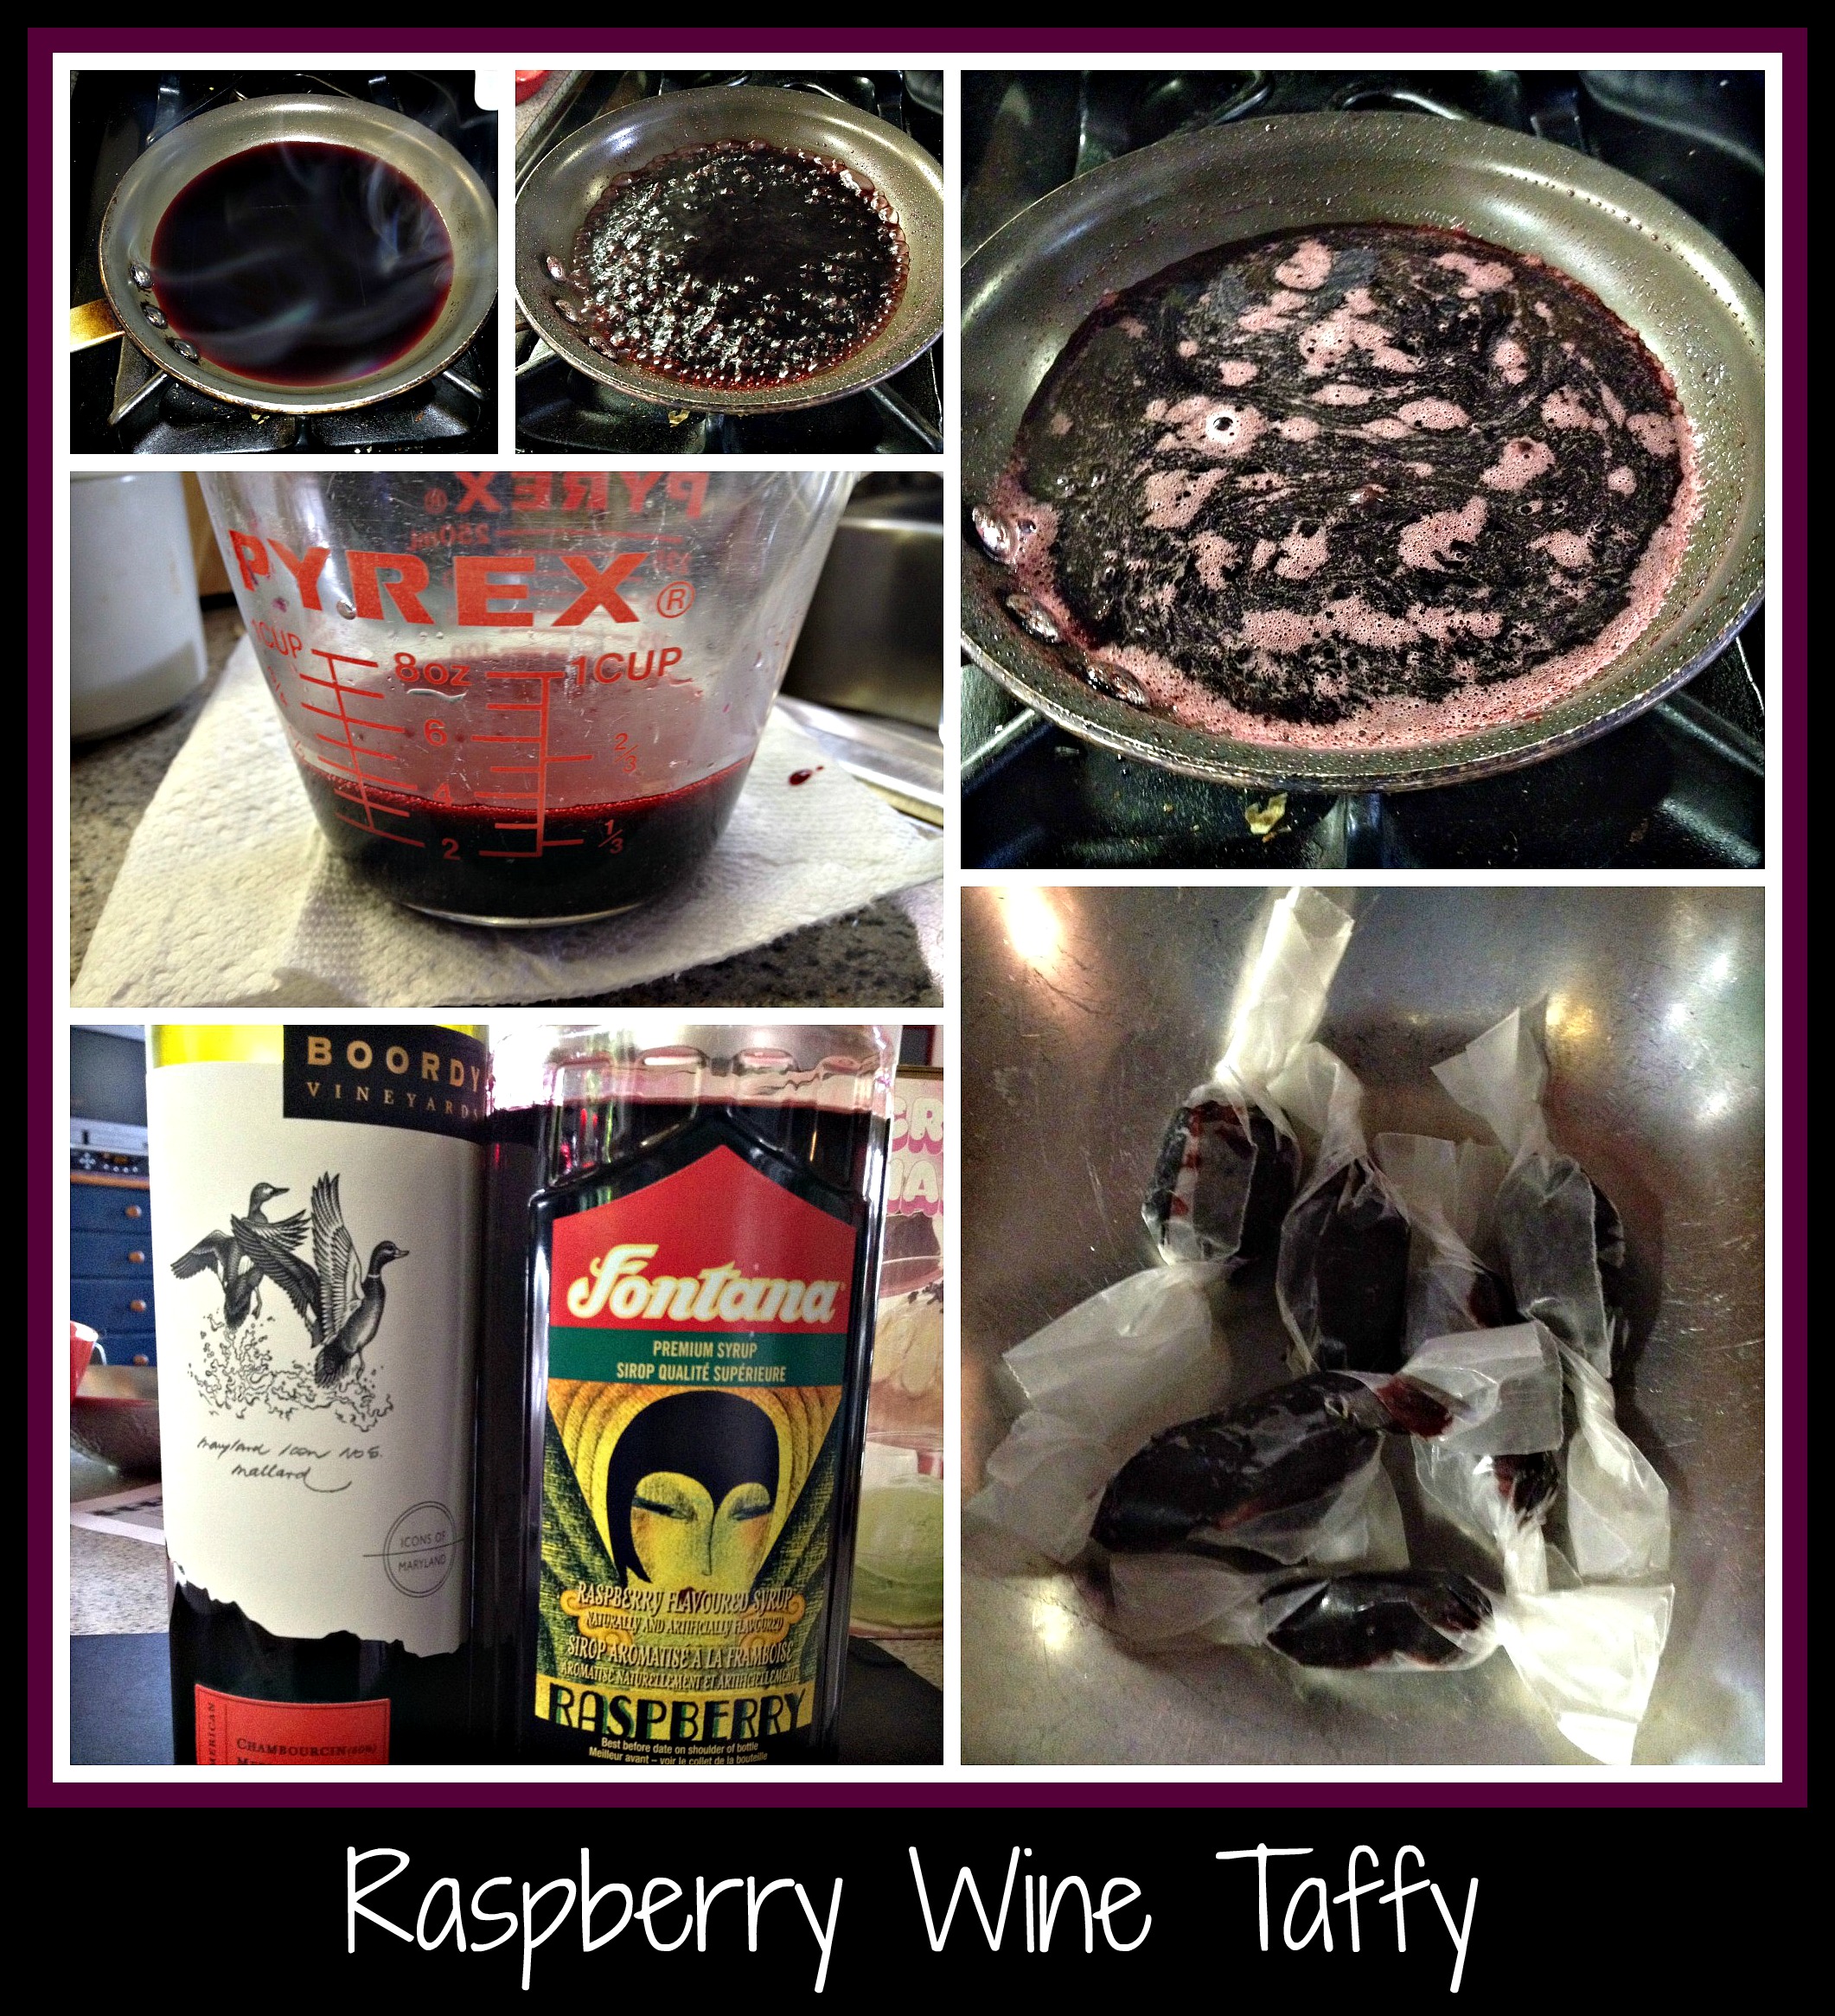
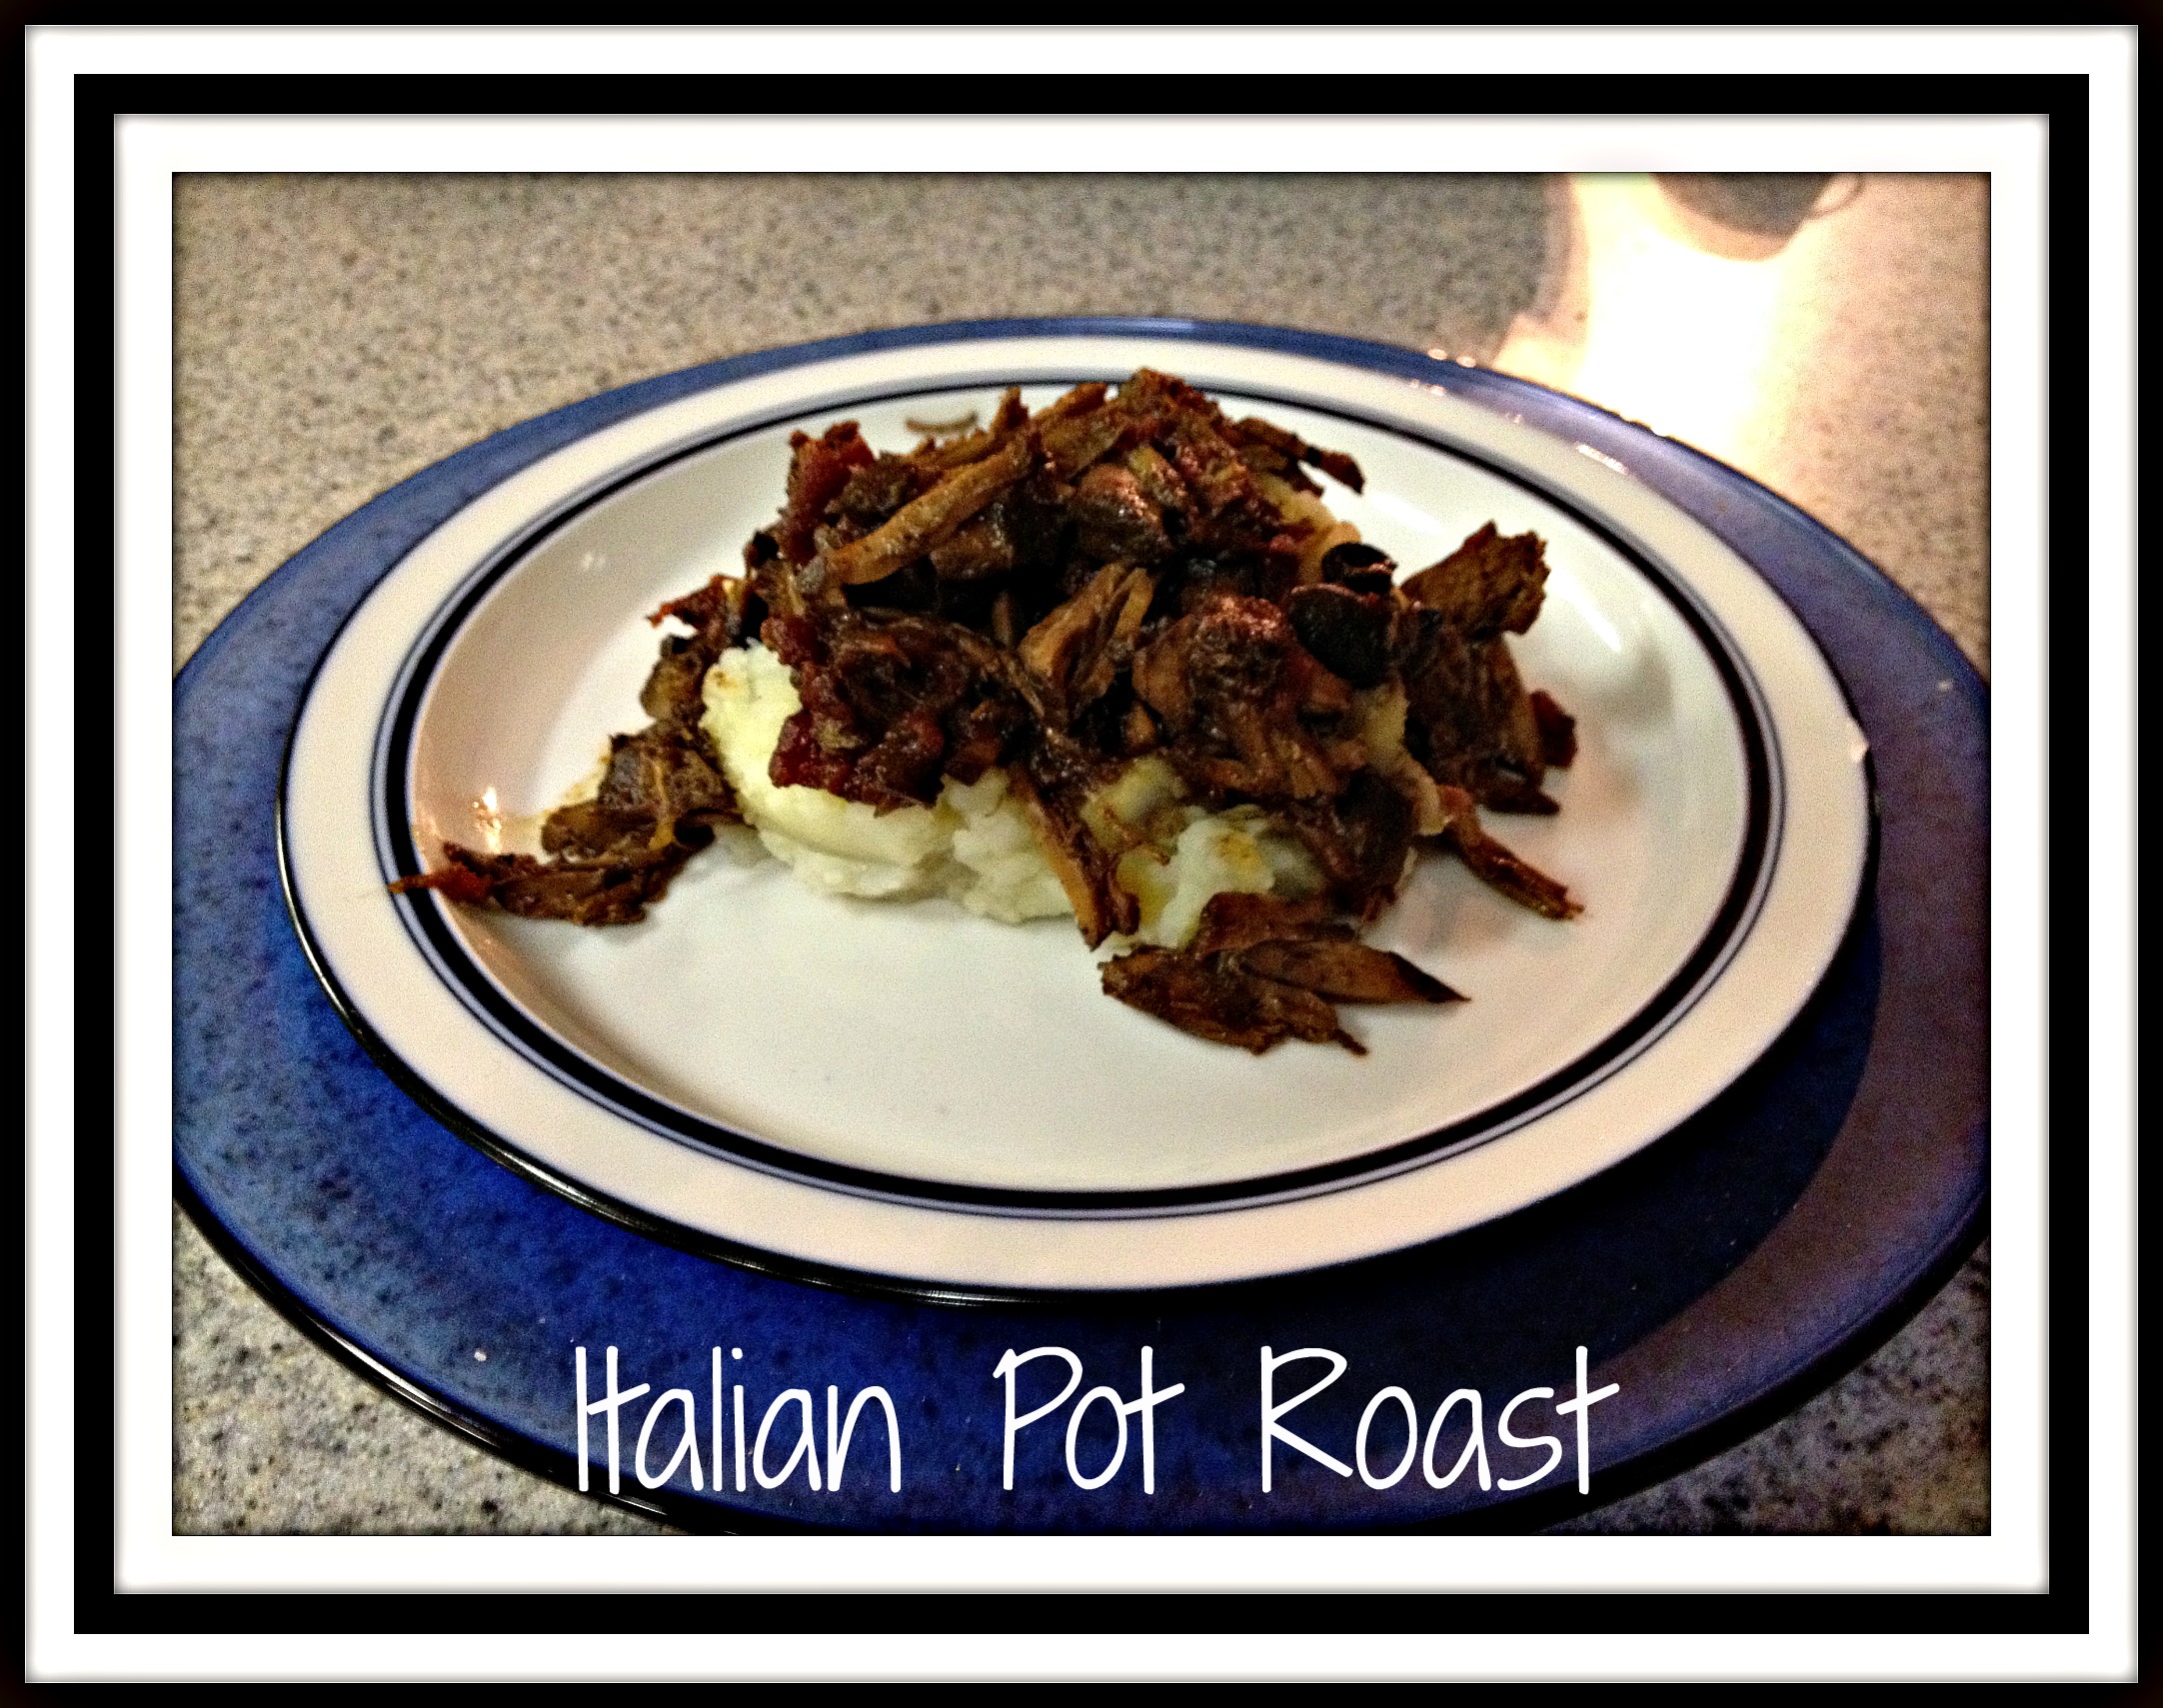
Once the beef is nicely browned, you are now going to add liquid.  I like to add a half bottle of a delicious red wine (like James River Cellars Merlot, Meritage, Rad Red, or even Hanover Red).  I also add about a cup of water and a beef bouillon cube to add some depth of beef flavor to the meal.  Your seasonings can be added now – I like to use a bay leaf or two, some herbs de provence, some worchestershire sauce, and a glop of ketchup.  Mix everything together, pop a lid on the top, and put the entire pot into a preheated 300 degree oven for an hour or two.  Stir it occasionally, to make sure that you’re getting the right blend of thickness and flavors… feel free to add more liquid if it’s getting too dry and don’t forget to remove the bay leaf before serving.

When you get close to dinner time, choose and cook a vegetable and a pasta of your choice.  As you can see by the photo, I used spaghetti noodles and broccoli.  Since my pantry is limited at the moment, I have an abundance of spaghetti, so I just broke the noodles in half and cooked them in salted water.  I then put a small bag of broccoli into the microwave and cooked it until it was bright green and cooked through.  I love serving this meal with wide egg noodles, but those didn’t make the cut when I was choosing what to bring to the apartment… feel free to use whatever pasta (or even a baked potato) you and your family like best.

I hope my recipes give you some ideas of meals you can make for your family, even if you don’t have a lot of “extras” at your disposal.  Play with what you’ve got on hand, pick up one or two essentials, and you can make a delicious dinner at home instead of spending extra money on dining out every night.  I have a hard time going to a restaurant and ordering something that I know I am able to make at home.  While I believe that going out should be a special experience, I do believe that staying in and making dinner for your family can bring about some pretty wonderful satisfaction as well.  It’s all in how you frame the experience.

Wishing you fun as you re-frame your own cooking experiences with your family!


Advertisement

Recipe: Meritage Mock Lasagna

I was craving something Italian last night for dinner, but needed to come up with something that would be do-able in our current apartment situation.  Going to the store and purchasing all the individual ingredients for a delicious lasagna sounded wonderful, but the reality is that I brought tons of spaghetti noodles with us in the move (they didn’t fit as well into Ziploc storage bags).  I also didn’t want to have extra foods around that might spoil, so I came up with a simpler plan.  I utilized the salad bar at the local Fresh Market next to our apartment building.

After an extended afternoon (which included another trip to the leasing office to replace the “new” garage gate remote), I didn’t want to waste a lot of time trying to make a full-on lasagna.  Instead, I used quicker cooking spaghetti noodles (broken into thirds) and some delectable James River Cellars Meritage to create our dinner for last night.  Here’s how things came together.MeritageMockLasagna

I diced the peppers (from the salad bar) and added half an onion into a stock pot with touch of olive oil to saute everything together.  I added one package of ground turkey and browned everything well before adding a healthy dose of James River Cellars Meritage red table wine.  NOTE: By using the words “red table wine”, a winery doesn’t have to post the exact percentage of alcohol in the wine… if the words “red wine” are used, the wine must by law share the exact percentage of alcohol.  Interesting, huh?

Once the base of the sauce was well cooked, I added one large can of crushed tomatoes and a spoonful of tomato paste.  After combining everything (and adding another pour of wine), I added a handful of dry spaghetti noodles, carefully breaking the strands into thirds, and allowed it to cook until the spaghetti was al dente (“to the tooth”).  At this point, I could have served dinner as a version of mazetti, but I was craving more of a lasagna-style flavor, so I kept cooking.

To turn this yummy pot of food into something that resembled lasagna, I simply added three spoonfuls of ricotta cheese and a handful of shredded mozzarella cheese.  Once mixed together, the cheese added a creaminess to the sauce and bumped up the flavor to a “lasagna-esque” taste that made me happy.  I added some garlic toasts to complete a wonderful, meal.

This is definitely something that it pretty simple to personalize to suit each family’s particular taste preferences.  Feel free to try it on your own… we loved it!

Recipe: Raspberry Wine Taffy

What’s a girl to do when her college roommate gives her four bottles of good Raspberry Syrup? Why, create a recipe using the syrup and WINE, of course!

Armed with the fore-mentioned syrup, I decided to play in the kitchen today. I didn’t want to waste the syrup, so I thought I’d make a simple reduction of the syrup and red wine that would drizzle nicely over desserts. While my end product didn’t exactly meet my expectations, it definitely wasn’t a total loss… I ended up with Raspberry Wine Candies!

I decided to start small… I poured 1/2 cup raspberry syrup and 1 cup red wine into a small saute’ pan and allowed this mixture to simmer for awhile. Note: I used Boordy Vineyard’s Chambourcin Merlot for this recipe, but I could have easily used James River Cellars’ Meritage… I just had an extra bottle of the BoRaspberryWineTaffyordy wine and wanted to use it up. I allowed this syrup/wine mixture to simmer for about 30-45 minutes – I wasn’t paying close attention to the clock and I was simply cooking the mixture until it reduced significantly and started to look “thick”.

Once the mixture had cooked down to the look of a heavy syrup, I added a dash of salt and a teaspoon of margarine. I stirred these two additions into the mixture and allowed it to simmer a little longer.

At this point, I probably should have removed it from the stove and used it as a drizzle for pound cake or ice cream. Instead, I continued to cook it until it was even thicker and looked as if a spoon could leave a trail down the center of the pan. I removed the confection from the stove and poured it into the Pyrex measuring cup (as seen in photo) to find that the entire mixture had reduced from 1 1/2 cups of liquid to a scant 1/2 cup of confection. It tasted lovely, but I had no idea what to do with it… so I popped it into the fridge.

An hour in the fridge allowed this recipe to thicken so much that I could manhandle a small spoonful onto a piece of waxed paper and eventually eat it as a soft taffy… hence the recipe’s name. I’ve never intentionally made taffy before, but this is what I thought of when I tasted it.

Next time, I’ll stop cooking this mixture earlier and allow it to cool so it can be used as a flavorful topping for ice cream or pound cake (as I mentioned before)… but maybe not. It’s kind of fun to create something totally unexpected!

Here’s to the unexpected sweetness of life… may we all create more of it to share with others!

Recipe: Sloppy Joes and Pretzel Rolls

My boys will recognize this recipe as the one we always have on Halloween.  You know… the time of year when everyone is ordering pizza because it’s so much easier to handle with all the trick-or-treating?  I started making a recipe of my Auntie Jean’s Sloppy Joes (she calls it BBQ) when the boys were small because I wanted them to have a filling dinner before heading outside to beg for candy.  I’m not a huge fan of Halloween (See my feelings on this “holiday” on my other blog) but since my boys loved it, this was my way to add some “normal” to the evening… add in some homemade rolls, and I was a happy camper.

Some of you will be happy because this recipe starts as an actual “recipe”.  My aunt gave us the ingredients, my cousin dutifully wrote them down, and I amended it into my own version.  I always pull out the recipe card when making Sloppy Joes, because I can’t always remember exactly what goes into this delicious meal, but I also rarely use a measuring device of any sort, since I cook using The Force.  Here’s the original:

Auntie Jean’s BBQ (Sloppy Joes)

  • 2 lb hamburger – brownedSloppyJoes and PretzelRolls
  • 1 bottle ketchup (small, 28 oz size)
  • 3 Tbs vinegar (we always use apple cider vinegar)
  • 3 Tbs mustard (plain yellow mustard works best here)
  • 3 Tbs worchestershire sauce
  • 4 tsp sugar
  • 2 tsp celery seed

Note: I typically use one package of ground turkey instead of ground hamburger – I think it takes flavors even better than traditional beef.  I also like to add a diced onion along with the meat, but this is purely up to you.   When I make my version of Auntie Jean’s Sloppy Joes, I also add two turns around the pan of red wine to the ground meat to bump up the flavor a bit.  For this recipe, I used a bottle of Pinot Noir that I had open in the fridge, but if I were opening something specifically for this dish, I’d reach for James River Cellars’ Rad Red or James River Cellars’ Meritage.  Both have great cooking capability and are delicious all alone.

I browned the diced onion, added the ground turkey until everything was nicely browned.  Add the wine at this point and allow it to cook until the wine is incorporated into the mixture.  Start adding your Sloppy Joe ingredients at this point.  Remember that this recipe is written for DOUBLE the amount of ground meat, so you’ll need to have a light hand when adding ingredients.   I always add much less ketchup than is called for, simply because you can always add more of an ingredient but you can’t remove it once it’s been incorporated.  Allow the mixture to cook for a good half hour to really meld the flavors.  I’ve found that really makes a difference with this recipe.  NOTE: I served my Sloppy Joes on spaghetti squash (a la MomUncorked) and it was amazing!

We have loved this Sloppy Joe recipe on all sorts of rolls, but here’s a BONUS RECIPE for you… Pretzel Rolls!

PRETZEL ROLLS: (using a recipe from Donna German’s Bread Machine Cookbook VI)

  • 1 1/8 cups water
  • 2 tsp sugar
  • 1/2 tsp salt
  • 3 cups all-purpose flour
  • 1 1/2 tsp yeast

I make my pretzel dough in my bread machine, according to the machine’s directions.   I then divided it into 10 sections and formed thick pretzel shapes before allowing them to rise for about an hour in a warm, dry place.  The key to making pretzel rolls is to boil the rolls (2-3 at a time) in 2 quarts of water plus 2 Tbs baking soda, flipping the roll and allowing to boil on both sides.   I removed the rolls to baking sheets, sprayed with cooking spray and dusted with cornmeal (I used grits, since I was out of cornmeal).  As the rolls came out of the water mixture, I  brushed them with an egg wash and sprinkled them with coarse salt.  Once all the rolls had been treated, I baked them in a preheated 400 degree oven for 10-13 minutes.  Note:  If you want to make this recipe into large soft pretzels instead of rolls, you can adjust the directions by making the pretzels thinner and then bake them just a little longer, until they’re even chewier.  

We did find that these rolls are a little chewy for sloppy joes… they’re more suited to burgers or grilled chicken… but they are just so darn delicious that I had to include this recipe for my readers.   I hope you try this recipe sometime… they are TOTALLY worth the effort!

Recipe: Weeknight Taco Pie

TacoPieIs it a crime to tweak a recipe until it’s simple, easy, and an instant family favorite?  I didn’t think so.  This recipe certainly hits all the high notes of a great weeknight dinner (quick, uncomplicated, and easy to throw together) with the added benefit of a dinner I can tailor-make for whomever I’m feeding.  When the entire meal disappeared in one sitting, I was SOLD!

I started with a basic recipe that I stumbled upon on Facebook – I think it’s originally a Pillsbury recipe for a Taco Bake.  I used one roll of Pillsbury Crescent dough and pressed the dough together around a pie plate.  I then browned one package of ground turkey until thoroughly cooked.  I then heavily sprinkled the browned meat with taco seasoning and red wine.  I cooked the meat until the taco seasoning and wine were both well incorporated.  For this recipe, I used a red wine from my fridge – my favorite to use in this sort of situation would normally be James River Cellars’ Rad Red or James River Cellars’ Meritage but since Rad Red isn’t available right now, I used a Pinot Noir that I picked up in March at the Hilton Head Wine and Food Festival.

Once the taco meat was ready, I added 1 cup of frozen fresh corn and 1 cup of Gunther’s Gourmet Spicy Black Bean Dip, which I had picked up at James River Cellars Winery.  I put the meat mixture in the crescent-dough-covered pie plate and topped the meal with a generous portion of shredded Mexican cheese.  At this point, I put dinner into the oven at 375 degrees for 15-18 minutes. Once dinner was cooked through and the crescent dough was nicely browned, I served the meal on plates with shredded romaine lettuce.

What a simple, yet incredibly tasty, dinner.  I’ll be able to alter this recipe as I make this dinner again and again.  I can switch out salsas for a different taste.  I can leave the salsa out altogether.  I can add onion and green pepper into the meat mixture.  I can use a more decadent cheese.  There are tons of ways to make this recipe more unique and individualized… and I hope you’ll consider trying every one of them!

Enjoy!


Recipe: Simple Shepherd’s Pie

Maybe I’m just strange, but I really love the challenge of making a totally new meal out of leftovers from a previous meal.  Such was the case with how this dinner came about.

I made shredded beef sandwiches for dinner on Sunday night and, since I used a large London Broil, had lots of cooked beef left over.  I was coming up with lots of different ways to use this meat but the decision was made for me when I got a huge response from my guys when I suggested making a Shepherd’s Pie.  Unfortunately, for me, my husband’s idea of a Shepherd’s pie was “meat, peas, gravy, potatoes”, so that became my recipe.

The first thing I did was start making the mashed potatoes by dicing a few potatoes and putting them into a pot of water to boil.  While they cooked, I layered the beef in a casserole dish and topped it with frozen peas.  Now all I needed to do was make a gravy so dinner wouldn’t just be dry beef and cooked peas.

Making a gravy is so much easier if you start with the cooking liquid of the meat you’re using – it adds flavor without having to rely on bouillon packets.  Sadly, I totally forgot to reserve the liquid after dinner on Sunday, so I had to start from scratch.  Not my favorite way to do things, but not a huge deal.  I have learned to love making gravy, so it’s always a fun creative way to add my own little touch to dinner.  I always start with a roux…. equal parts butter (fat) and flour, simmered long enough to cook off the raw flour taste.  Liquid is the next ingredient.  I typically stick with the idea of using red wine for beef dishes and white wine for chicken or fish dishes, but this is definitely something I don’t mind mixing up.  For this gravy, I used a packet of beef bouillon, water, and James River Meritage red wine (‘cuz that’s what was in my fridge… I could have just as easily found James River Merlot or a random Pinot Noir from a recent trip to the Hilton Head Wine and Food Festival).   I seasoned the gravy with salt and pepper, and let it simmer a bit until it was thick enough.  I then poured the gravy over the beef/peas already layered in the casserole dish and got to work on making mashed potatoes.ShepherdsPie

Please know… if you prefer using instant mashed potatoes, this meal will be just as tasty.  I’m not really a purist that has to make homemade mashed potatoes anytime I need them… I just don’t have any instant potato flakes in my pantry.  Who knows… I might have used them instead.  Honestly, I tend to make mashed potatoes often enough that I almost always have potatoes available in my pantry, so it’s just easier to make them rather than search for a packet of the instant stuff.

For my homemade mashed potatoes, I use an old potato masher that my mom gave me instead of using my electric mixer – I like the chunky feel of the finished product better than the more whipped consistency I get when I put everything into my KitchenAid mixer.  I use varying amounts of margarineLaughing Cow light original cheesea touch of horseradish, salt, pepper, and maybe some milk.  It really depends on my mood when I’m cooking, so using The Force really comes into play on this recipe.   Once the mashed potatoes are finished, I spooned them on top of the casserole, sprinkled a bit of paprika for color, and then popped the casserole into the oven.  After 30-45 minutes in a 350 degree oven, this dinner is ready for the troops to dig in.

Feel free to experiment with this recipe to make your own family happy – if they like cooked carrots, feel free to add them.  Want a whole mess of veggies?  Go ahead!  Want to swap out the beef for chicken or a vegetarian option you like?  Try it!  There’s no “dinner police” who will come by and take your food from you, so enjoy coming up with your own options on this recipe.  I just like the tastes of beef, peas, and mashed potatoes all baked into a sublime concoction that makes my family happy.

Ultimately, that’s the goal… make something that will feed your family and keep a smile on their faces.  My heart is full every time my guys declare a “winner”… may you have the same experience with your dinners!

Recipe: Weeknight Chicken and Potatoes

I really love meals that don’t take a huge amount of effort on my part.  The oven does most of the work and I just transfer things from one place to another until dinner just “comes together”.  Such was the case with this meal.

I started with a few potatoes.  Much depends on how many mouths I’m feeding at any given meal, but I usually try to stick with the “one-and-a-half potato per person” rule if I’m just roasting these bad boys.  I diced them into chunks and then diced a half an onion to add some flavor.  Once these were done, I tossed both in a bowl with some balsamic salad dressing and laid them out on a baking sheet to roast for an hour or so in a 375 degree oven.

Since the potatoes were going to take awhile, I started the chicken a little after I had the potatoes in the oven.  I had purchased “thin cut chicken breasts” from the store, with the intention of using them for my chicken prosciutto rolls, but totally forgot to pick up the Boursin cheese.  Instead, I had 6 lovely thin chicken breasts that I decided to simply saute on the stove top.  I seasoned them, using more of the same balsamic salad dressing that I’d put on the potatoes, and then added more salt and pepper for good measure.  Using a heavy skillet, I sauteed the breasts in a little olive oil and butter until they were nicely browned and cooked through.  Since there were six breasts in the package, I did them in two shifts so they didn’t crowd the pan and cooked more evenly.  Once the outsides were nicely caramelized and toasty, I removed them to a platter and popped some foil on top to keep them warm. Note: I also put the platter into the oven for about 5-7 minutes before dinner was ready to reheat just a touch.

With all the yummy bits that were left in the pan, I thought a nice gravy was in order to make dinner to come together.  I put a pat of butter and a spoonful of flour into the skillet and let the fat/flour combine and sizzle a bit to cook off the raw floWeeknight ChickenNpotatoesur taste.  I then added a healthy helping of James River Meritage Red Wine (I chose the Meritage simply because that’s what I had in the fridge… I could have just as easily switched out the red wine for James River Reserve Chardonnay.  Use what you have available or what you like best) and whisked the gravy together to incorporate the flavors and pick up all the bits that had been left in the pan from the sauteed chicken.  After tasting the gravy, I adjusted the seasonings with some salt, pepper, and dry Italian seasonings until I was satisfied.

Oh, and I had thrown some broccoli florets on top of the potatoes (after the potatoes were almost finished) so we’d have a green vegetable for dinner… this was purely for my benefit, since none of my guys have any interest in eating green vegetables unless they’re coerced.

For serving, I put a single layer of the roasted potatoes/onions on the plate and topped them with a chicken breast and some pan gravy.   Obviously, this picture is of the plate I made up for my son, since there are two breasts on the plate and not a speck of green to be seen.   It was a really tasty dinner, even if I was the only one to eat the green stuff.  Maybe you’ll have better luck with your family if you top their broccoli with a little gravy?


Recipe: Meritage Cheddar Bread

I pulled out one of my Bread Machine cookbooks recently and was taken with the idea of creating a wine and cheese bread. I had apparently tried this recipe before, as evidenced by some ancient notes I’d written, but was bound and determined to try it again. Since I had some extra sharp cheddar in the fridge and a small amount of red wine from work, I decided it was worth the time to see how this experiment would come out.

I started with a bottle of Veritas’ Vintner’s Reserve red wine. I had helped work the recent Governor’s Cup Seminar and was given the remains of one of the medal winners. This wine is a meritage-like blend that I really enjoyed, so it was a good wine to use, in my opinion. I wanted to use something similar to the James River Cellars’ Meritage and this wine fit the bill for me. I also had some extra sharp cheddar cheese that was leftover from a recent event at the winery, so I really was killing two birds with one stone, so to speak.

20130205-153536.jpg

As you can see by the photos across the top of the collage, I used my bread machine for the dough portion of this recipe. It made my life so much easier. Here are the directions for making this bread, using a machine such as the Zojirushi that I have.

Ingredients:
3/4 cup wine
2/3 cup sharp cheddar cheese, shredded
1 1/2T margarine
1/2 t salt
3/4 t sugar
2 1/4 c flour
1 1/2 t yeast

Directions:
I put all the ingredients into the machine and allowed it to do it’s work. Once the dough was ready, I separated it into two sections and rolled each as if for French bread. I placed each length on my baking tray and allowed them to rise for 30-45 minutes. Once they had risen sufficiently, I sprayed them with water and baked them in a 375 degree oven for 30 minutes or so. I also turned the pan around mid-way through the baking process and sprayed the loaves with water again. As you can see in the photo, the loaves split, so next time I’ll make sure to slice them a few times to allow for steam to vent.

This experiment turned out fairly well, although I might just let the loaves bake in the machine next time to see how they differ. This would be a nice base for a simple garlic toast to accompany a dinner or used as an appetizer under a fresh tomato/basil topping. Try it and see how you’d like to use it… I’d love to hear your feedback!

Recipe: Italian Pot Roast

Here’s one of my favorite recipes for a chilly winter’s evening.  It’s great on a night where you don’t want to have to think about dinner and all you want to do is come home to dinner with the family.  This is a simple recipe to make for as many people you’ll be feeding… from two on up to as many as you can fit in your kitchen.  Feel free to play with the ingredients as well – it’s the idea of the recipe rather than the specifics.  Use The Force and create your own version of this delicious meal… then sit back and enjoy the compliments!Italian Pot Roast

Ingredients:

2 ½-pound London broil

1 t salt

½ t pepper

1 t extra virgin olive oil

2 onions, sliced or chopped

½ -pound fresh mushrooms, sliced

4 garlic cloves, roughly chopped

1 28-ounce can diced tomatoes

1t dried basil

½ cup dry red wine (Suggested: James River Cellars’ Cabernet Franc, Merlot, or Meritage)


Directions:

  1. Cut beef into large chunks, then sprinkle with ½ t salt and ¼ t pepper.  Heat oil in large stock pot over medium high heat and cook until browned, about 6 minutes.
  2. Remove beef.  Add onions, mushrooms and garlic to pot.  Cook, stirring occasionally until the vegetables begin to brown and soften, about 6-7 minutes. Add tomatoes, basil and wine along with remaining salt and pepper.  Cook until mixture begins to thicken, about 5-6 minutes.  Replace the beef in the stock pot and place in oven, at 250 degrees.  Cook for 4-5 hours.
  3. Remove beef once fork-tender and keep warm.  Cook all remaining ingredients on stove-top until thickened, 10-15 minutes, stirring occasionally.
  4. Serve beef and sauce with mashed potatoes and a crisp, green salad.


Note:  Can use Crock pot and cook on high for 4-5 hours OR on low for 6-8 hours

Recipe: Meritage Marinara Sauce

It’s always good to have a basic recipe in your cooking repertoire that can be used for lots of different dishes.  A basic marinara sauce is just such a recipe.  I used James River Cellars Meritage for this recipe, but you can just as easily use a Merlot, a Cabernet Franc, a Petit Verdot, or any other dry red wine that you prefer.  I based this recipe on one I found in the latest Cooking Light magazine (Slow-cooker Marinara) but I really didn’t want to take the time to use my crock-pot, so I altered the recipe and came up with something that make more sense for my current timetable and needs.  I hope you like it!

Ingredients:Meritage Marinara

  • Olive oil to coat the bottom of the pan
  • 2 onions, finely chopped
  • 1/2 bag of mini carrots, finely chopped
  • 4 stalks celery, finely chopped (I like the taste of celery, so I tend to go heavy on this veggie)
  • garlic, to taste (again, I like garlic, so I tend to use more than most – use as much as you like)
  • fresh oregano, finely chopped (I used a few stems from the plant I have – about 2-3 Tablespoons)
  • tomato paste (about 1/4 of a can)
  • red wine (I used James River Cellars Meritage, since that’s what I had on hand)
  • 2 large cans of crushed tomatoes

Directions:

  • In a large stockpot, heat the olive oil before adding the onions, carrots, celery, and garlic.  Saute’ all until the vegetables are softened.  *See #1 on the photo
  • Add oregano and tomato paste and cook until fragrant.  *See #2 on the photo
  • Add wine to the sauce and simmer until most of the liquid evaporates.  I used The Force with regards to the amount I used, but it was equal to two turns around the pan.  *See #3 on the photo
  • Once the wine is incorporated, add the tomatoes and stir to combine.  *See #4 on the photo.  At this point, I covered the pan with foil and popped it into a 200 degree oven for about 2 hours.
  • After baking the sauce, I removed it from the oven and used an immersion blender to smooth out the sauce.  *See the final photo marked “YUM!”.  I adjusted the seasonings by adding some salt/pepper and a little sugar to sweeten the sauce a touch, since our family likes a sweeter marinara.  It’s now ready to use for a myriad of different dishes.

Ideas for Marinara Sauce use:

  • Meatball sandwiches:  For each sandwich, fill hoagie roll with meatballs (homemade or store-bought), top with marinara and sprinkle with mozzarella cheese.  Broil sandwiches to melt cheese and serve.
  • Portabella Mushroom sandwiches:  For each sandwich, fill hoagie roll with sauteed portabella mushroom/spinach mixture, top with marinara and ricotta cheese, then broil to warm before serving.
  • Veggie Mexican Pizza:  On pizza crust, smear marinara sauce as you would tomato sauce, top with black bean and corn salsa and sprinkle cheddar cheese on top.  Bake as desired and serve.
  • Simple Italian dinner:  Top pasta (macaroni) with Meritage marinara sauce and Parmesan cheese.  Serve with garlic bread.
  • Eggplant, chicken, or veal Parmesan:  substitute Meritage marinara sauce for standard tomato sauce under your eggplant/chicken cutlet/veal cutlet and top with mozzarella cheese

This sauce is incredibly versatile and really tasty.  Try it in any dish where you’d typically use a canned or jarred tomato sauce.  It’s a great way to sneak vegetables into your family’s favorite meals and you can feel good that you’d made something healthy AND tasty.  It’s one of my favorite things… making healthy foods that my family will love.  Enjoy!