Easy Pulled Pork

Ingredients:

My favorite thing to make, when friends come to visit, is anything that will make my house smell amazing while it’s cooking. This recipe fits the bill perfectly!
NOTE: While I roasted this pork in the oven, you could easily make this into a crock pot recipe.

  • Boneless Pork Shoulder – Mine was just under 5 pounds
  • Dry onion soup mix
  • Red wine – I used Boordy Vineyards Cabernet
This is the pork I used for this recipe

Directions:

  • Remove netting from pork shoulder and toss in a gallon ziploc bag with dry onion soup mix and 1/2 cup red wine.
  • Marinate pork overnight.
Pork in marinade of onion soup mix and red wine
  • Remove pork from bag and sear on stovetop in cast iron pot.
  • Once all sides are browned, add another splash of red wine and cover.
  • Place pot in 300* oven to roast.
Pork, after 2 hours of roasting. This is my mother’s cast iron pot.
  • Roast, low and slow, until pork shreds easily.
  • Serve on homemade rolls for a delicious and easy dinner
Easy Pulled Pork, ready to eat!

I love to use my mom’s heavy cast iron pot. This is my favorite pot to use for low/slow cooking (pulled pork, pulled chicken, roasts of any sort) but I also love using it for soups and stews. While there are many options for a large pot, this specific one always reminds me of cooking with my mom.

This recipe is a great one to keep on hand for feeding a crowd. I’ll make it again in a few weeks when my son and his friends come for the weekend, but I’ll add a large pork butt roast so there’s enough food to go around. I like to make homemade kaiser rolls to complete the meal.

I hope you enjoy this recipe – let me know if you ever try it!

Advertisement

Chicken Divan Casserole

I have very fond memories of my mom making Chicken Divan casserole throughout my childhood. The recipe she used was based on one from Aunt Treva, my grandfather’s sister, and had lots of “cream of” soups included to make the sauce. It was always yummy, but I decided that I wanted to create a healthier version.

When searching for a similar recipe as the one from my childhood, I found a fabulous one created by Natasha Bull of http://www.saltandlavendar.com. Her original recipe can be found here: https://www.saltandlavender.com/chicken-divan/ but I needed to adjust the flavors to match what I was trying to recreate. If you’re looking for a cheesy, creamy chicken and broccoli casserole, look no further… this one is terrific.

For me, simply adding curry powder to the recipe above wasn’t quite what I wanted, so I played around with it until I created something that made sense for me. I also trimmed everything down to make an easy meal for two + 1 leftover serving. This recipe will make 3 servings in a 9×9 baking dish.

INGREDIENTS:

  • Broccoli florets – I used a small bag from the local store
  • Chicken Breast – I shredded two breasts from a rotisserie chicken but you can also use leftover chicken or even turkey
  • 2 T butter
  • 2 T flour
  • 3/4 c almond milk – you can use a mixture of almond milk and half & half if you prefer
  • 2 T whipped cream cheese
  • 1 tsp Dijon mustard
  • 1 tsp Worcestershire sauce
  • 1 tsp white wine – use what you have available/open but I also use this wine to thin the sauce before adding the cheese
  • 1 tsp curry powder
  • 1/4 tsp onion powder
  • 1/4 tsp garlic powder
  • 1 cup grated cheddar cheese – separate in half
  • 1/4 cup grated Parmesan
  • 10 Ritz crackers (approximate)

DIRECTIONS:

Preheat your oven to 375*F.

Prepare your broccoli for the casserole. After trimming down the broccoli into bite-size pieces, put all the florets in the bottom of the 9×9 baking dish. Lay a piece of paper towel over the broccoli and lightly dampen it with some white wine. Microwave the broccoli on HIGH for 2-3 minutes or until the broccoli is lightly cooked and still crisp. NOTE: if you’re using a metal dish, you can microwave the broccoli in the original bag and layer the cooked broccoli onto the bottom of the baking dish.

Layer your shredded chicken on top of the broccoli.

Make your sauce. Start by melting the butter in a sauce pan. Add the flour and whisk until combined and the mixture starts to bubble. Let the butter/flour mixture cook until it begins to get slightly toasty. Slowly add your milk and whisk to combine, then cook this mixture until it begins to thicken. Add the cream cheese (I like the whipped version b/c it’s light and combines fairly easily – if you use a block of cream cheese, I would decrease to 1T), whisking to combine. Add in your spices (mustard, Worcestershire, wine, curry powder, onion powder, garlic powder) and taste the sauce, adjusting as needed. Add salt and pepper if desired. NOTE: if sauce is too thick, add a splash of wine or almond milk. I have been known to add 1/4c-1/2 cup of wine to thin the sauce. Be aware that the sauce will thicken when you add the cheese. Remove the sauce from stove top and stir in 1/2 cup cheddar cheese.

Pour sauce over the chicken/broccoli mixture in your baking dish. Top with remaining cheddar cheese and Parmesan cheese then crush Ritz crackers over the entire casserole.

Bake casserole, uncovered, for 30-35 minutes. Cheese should be melted, crackers should be browned, and the sauce should be bubbling. Let casserole sit for 5 minutes before portioning out and serving.

Recipe: Simple Shepherd’s Pie

Maybe I’m just strange, but I really love the challenge of making a totally new meal out of leftovers from a previous meal.  Such was the case with how this dinner came about.

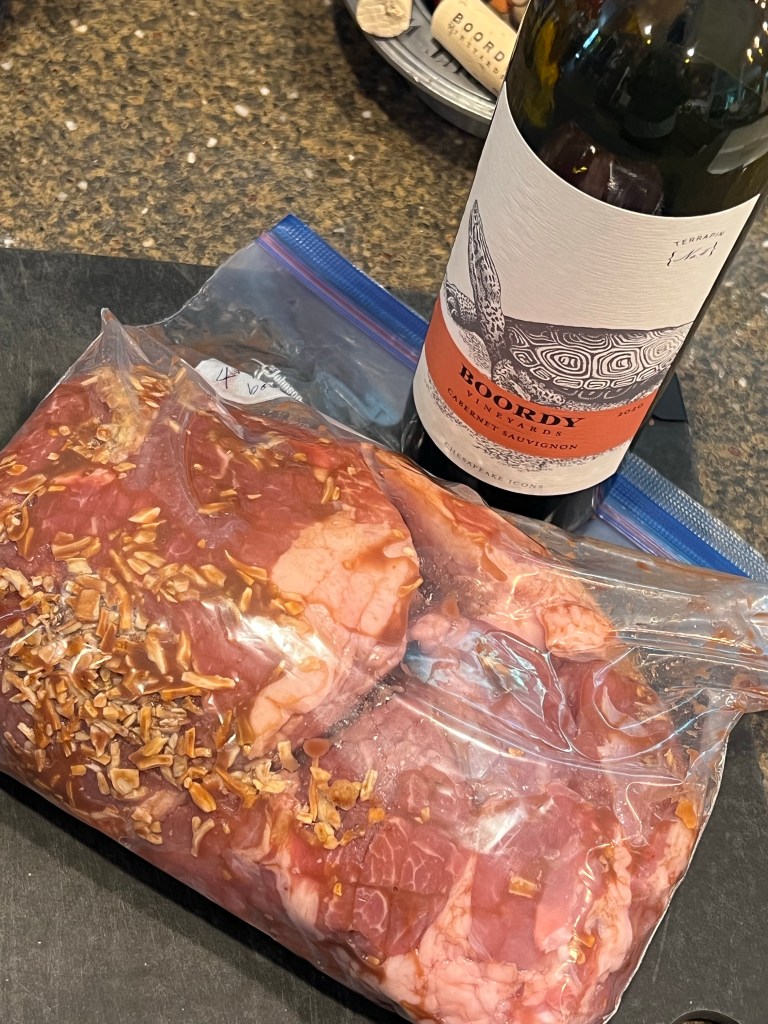
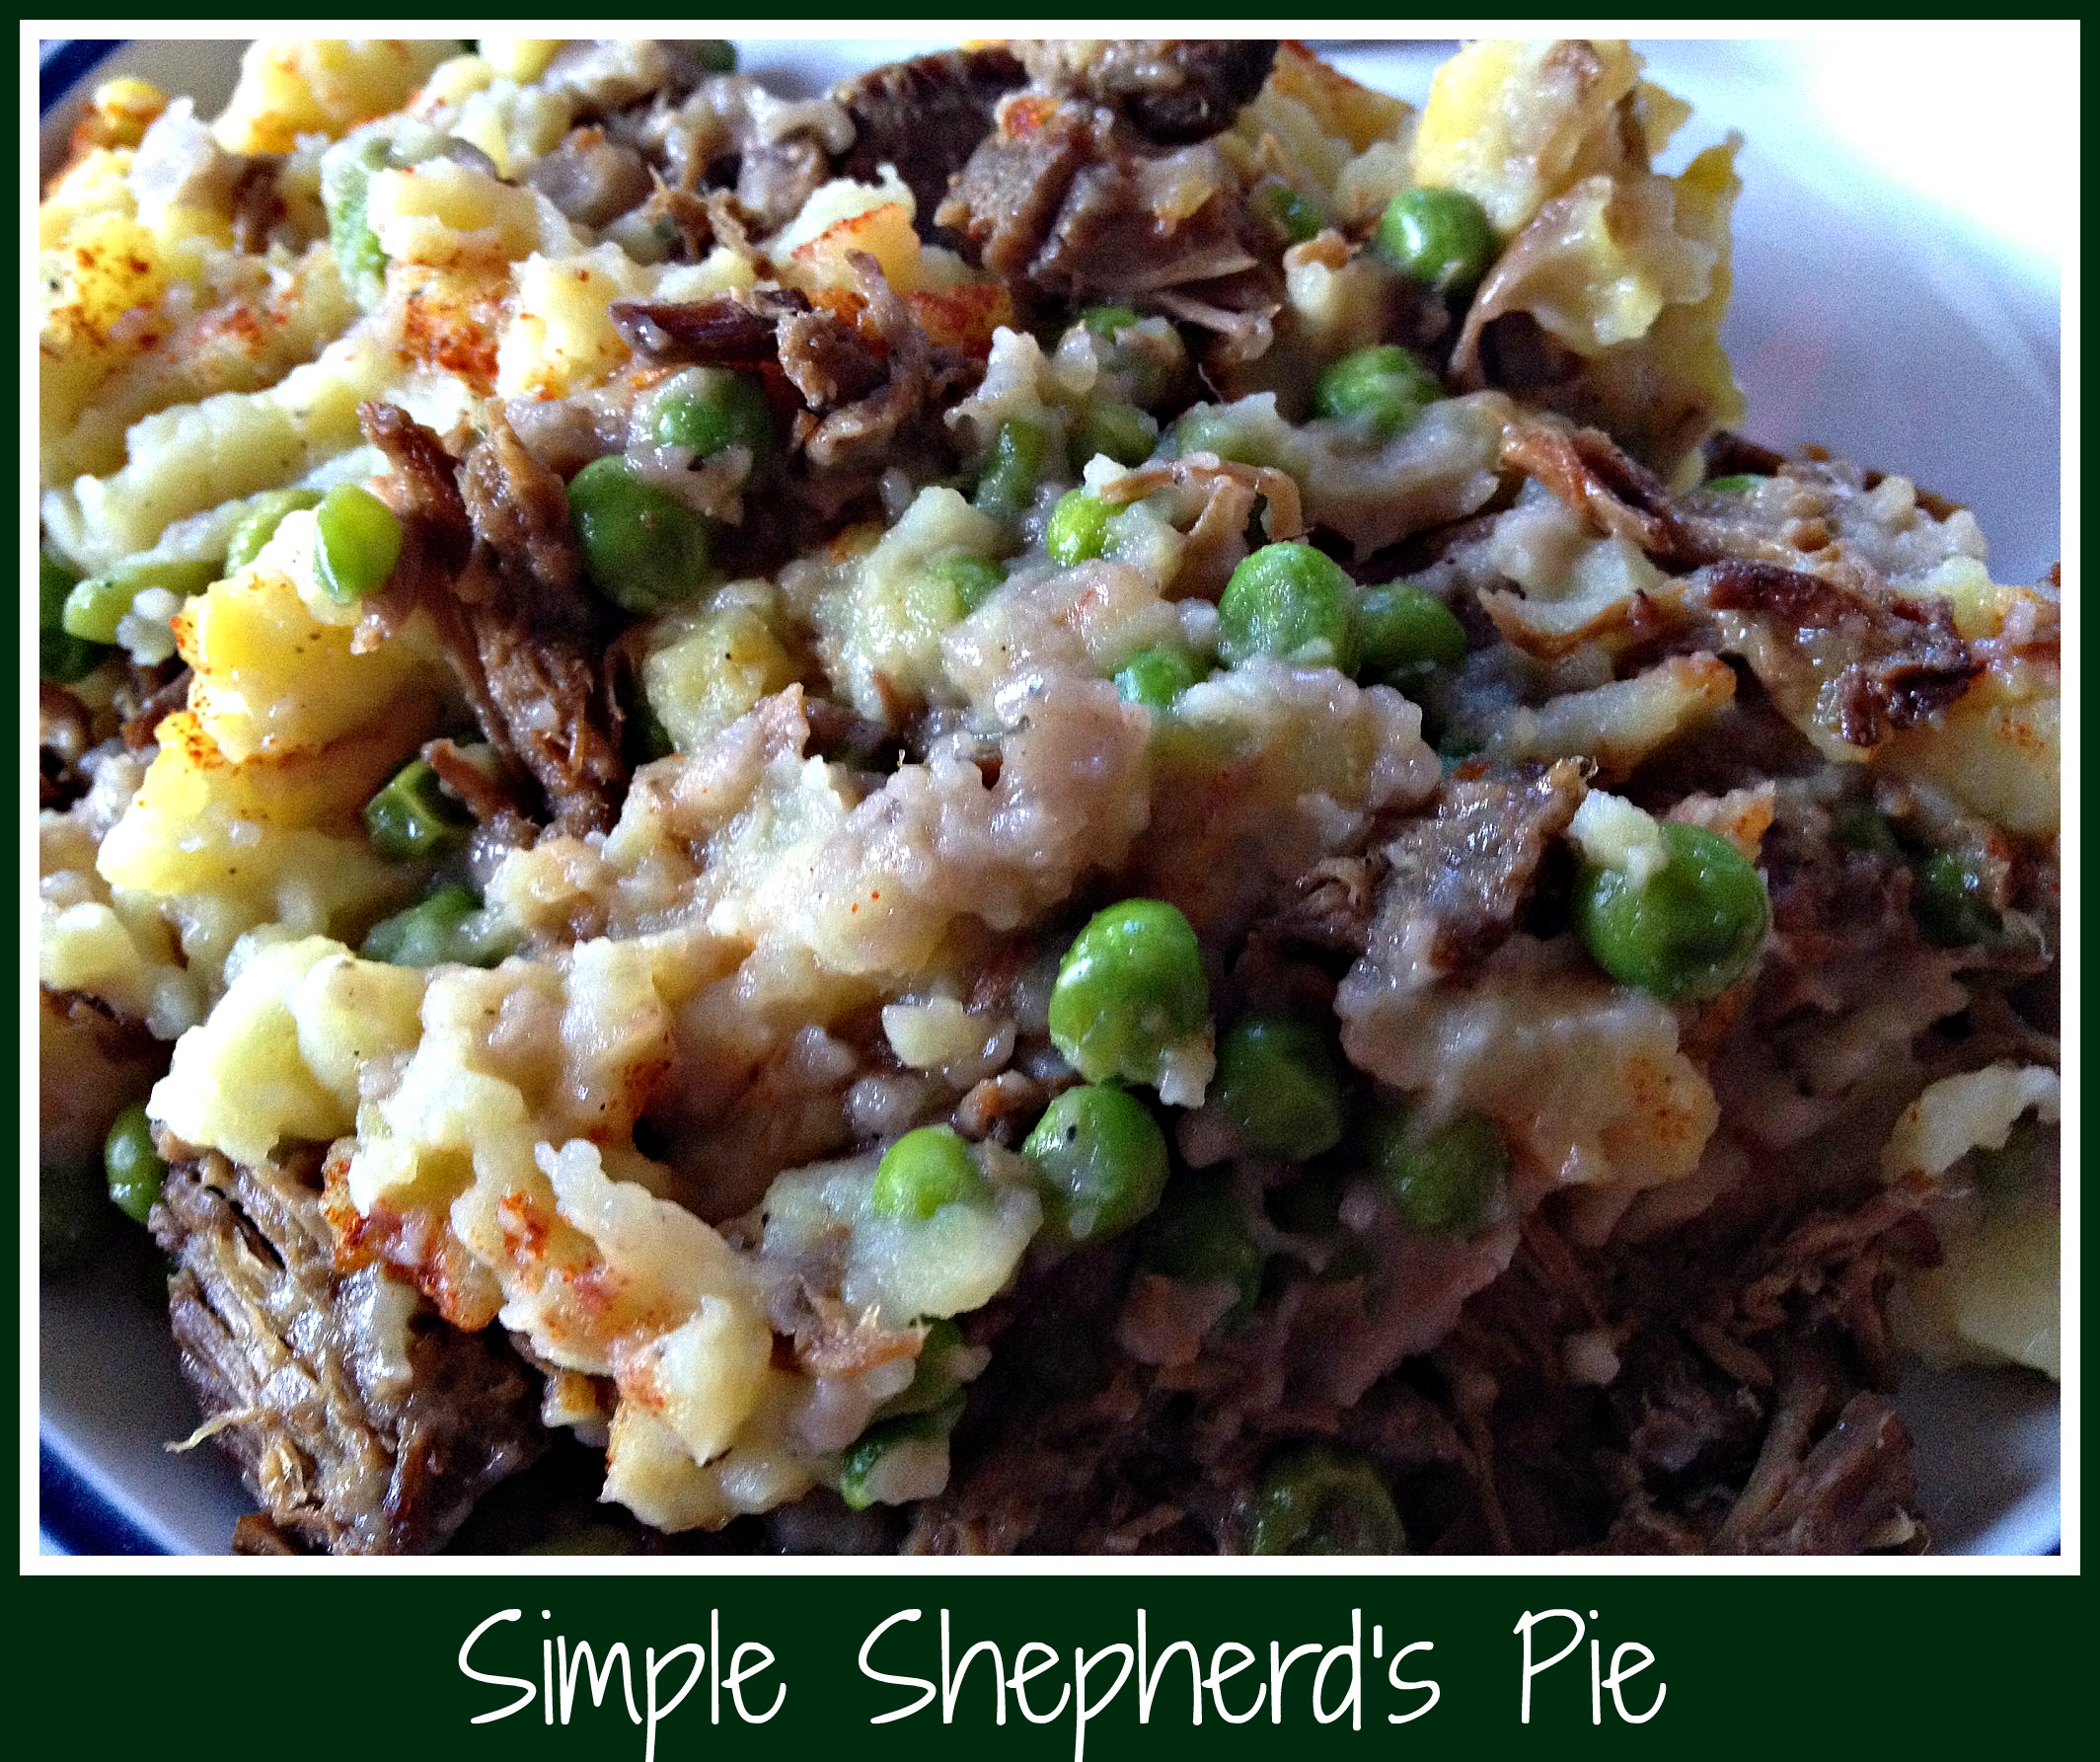
I made shredded beef sandwiches for dinner on Sunday night and, since I used a large London Broil, had lots of cooked beef left over.  I was coming up with lots of different ways to use this meat but the decision was made for me when I got a huge response from my guys when I suggested making a Shepherd’s Pie.  Unfortunately, for me, my husband’s idea of a Shepherd’s pie was “meat, peas, gravy, potatoes”, so that became my recipe.

The first thing I did was start making the mashed potatoes by dicing a few potatoes and putting them into a pot of water to boil.  While they cooked, I layered the beef in a casserole dish and topped it with frozen peas.  Now all I needed to do was make a gravy so dinner wouldn’t just be dry beef and cooked peas.

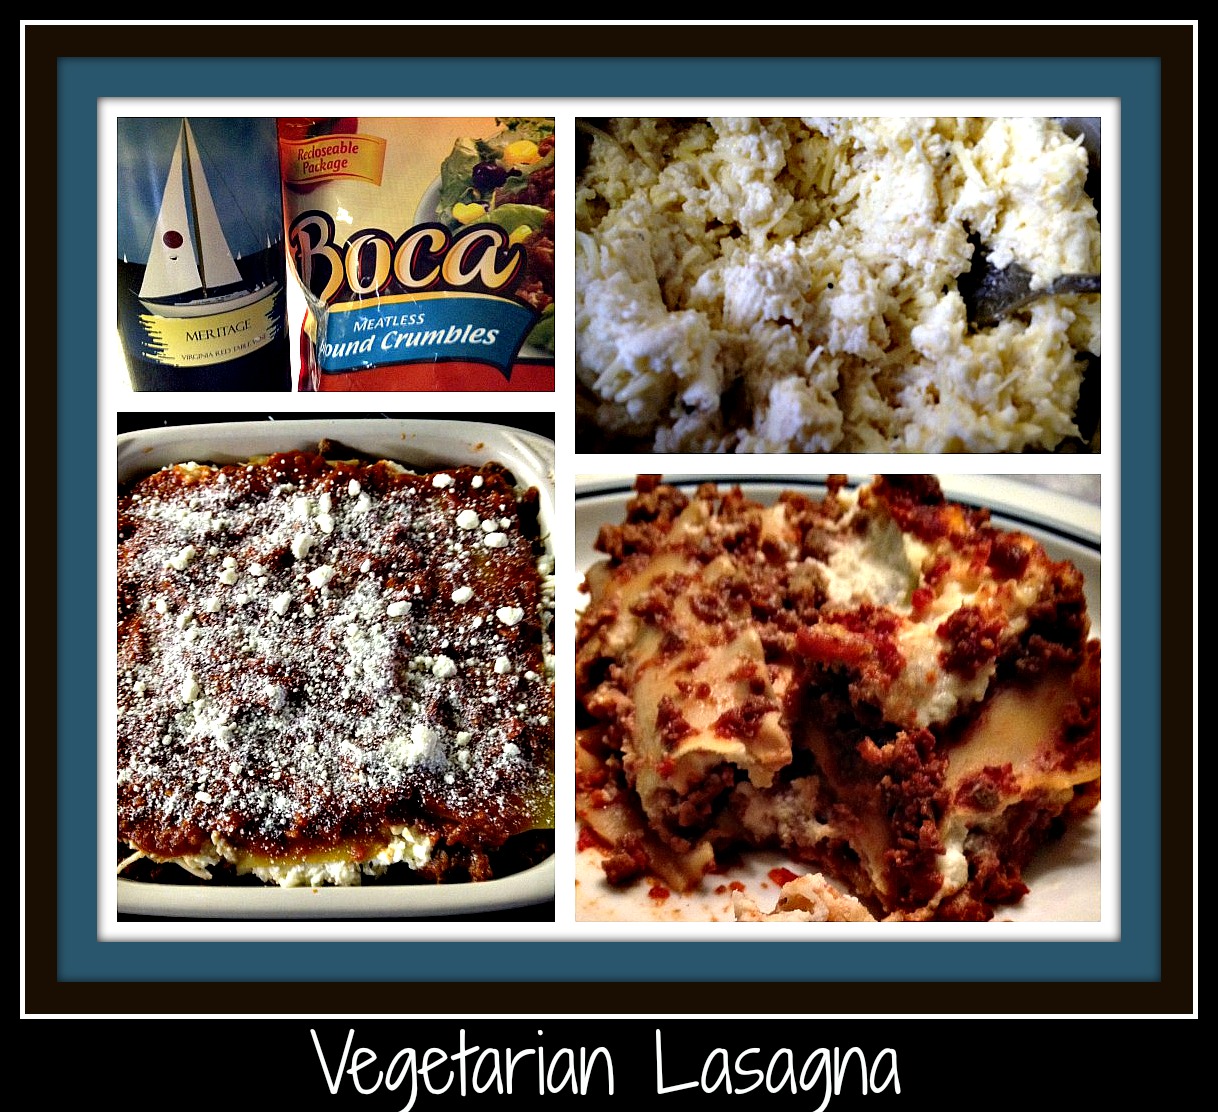
Making a gravy is so much easier if you start with the cooking liquid of the meat you’re using – it adds flavor without having to rely on bouillon packets.  Sadly, I totally forgot to reserve the liquid after dinner on Sunday, so I had to start from scratch.  Not my favorite way to do things, but not a huge deal.  I have learned to love making gravy, so it’s always a fun creative way to add my own little touch to dinner.  I always start with a roux…. equal parts butter (fat) and flour, simmered long enough to cook off the raw flour taste.  Liquid is the next ingredient.  I typically stick with the idea of using red wine for beef dishes and white wine for chicken or fish dishes, but this is definitely something I don’t mind mixing up.  For this gravy, I used a packet of beef bouillon, water, and James River Meritage red wine (‘cuz that’s what was in my fridge… I could have just as easily found James River Merlot or a random Pinot Noir from a recent trip to the Hilton Head Wine and Food Festival).   I seasoned the gravy with salt and pepper, and let it simmer a bit until it was thick enough.  I then poured the gravy over the beef/peas already layered in the casserole dish and got to work on making mashed potatoes.ShepherdsPie

Please know… if you prefer using instant mashed potatoes, this meal will be just as tasty.  I’m not really a purist that has to make homemade mashed potatoes anytime I need them… I just don’t have any instant potato flakes in my pantry.  Who knows… I might have used them instead.  Honestly, I tend to make mashed potatoes often enough that I almost always have potatoes available in my pantry, so it’s just easier to make them rather than search for a packet of the instant stuff.

For my homemade mashed potatoes, I use an old potato masher that my mom gave me instead of using my electric mixer – I like the chunky feel of the finished product better than the more whipped consistency I get when I put everything into my KitchenAid mixer.  I use varying amounts of margarineLaughing Cow light original cheesea touch of horseradish, salt, pepper, and maybe some milk.  It really depends on my mood when I’m cooking, so using The Force really comes into play on this recipe.   Once the mashed potatoes are finished, I spooned them on top of the casserole, sprinkled a bit of paprika for color, and then popped the casserole into the oven.  After 30-45 minutes in a 350 degree oven, this dinner is ready for the troops to dig in.

Feel free to experiment with this recipe to make your own family happy – if they like cooked carrots, feel free to add them.  Want a whole mess of veggies?  Go ahead!  Want to swap out the beef for chicken or a vegetarian option you like?  Try it!  There’s no “dinner police” who will come by and take your food from you, so enjoy coming up with your own options on this recipe.  I just like the tastes of beef, peas, and mashed potatoes all baked into a sublime concoction that makes my family happy.

Ultimately, that’s the goal… make something that will feed your family and keep a smile on their faces.  My heart is full every time my guys declare a “winner”… may you have the same experience with your dinners!

Comfort Foods

Just a quick note to say that, in my humble opinion, there’s nothing more comforting than soup and a sandwich for dinner when you’re sick.

My darling hubby has a cold. He’s not sick often, but when he gets a cold, it knocks him for a loop. Because of that, I pulled out my favorite recipe for Chicken Noodle Soup (see previous post on this blog) to get him on the road back to “healthy”. This recipe is a classic… Simple, clean, and full of chicken soup goodness.

Try it the next time someone in your household is feeling under-the-weather. Add in an easy grilled cheese sandwich and you’ve got a great meal full of love. Doesn’t it just look like it’ll make you feel better??

Wishing you health as we head into the middle of March!

20130315-195240.jpg

Recipe: Chardonnay Cassoulet

It was snowing yesterday and I wanted to make a stew that would make me feel warm.  Thinking about what always makes me think of roaring fires and home-cooked meals, I decided to make a chicken cassoulet.  For those who think that a cassoulet is something beyond their abilities, I would strongly suggest trying this recipe, then sit back and bask in the compliments.  This is a simple, stove-top casserole that has all the elements of a meal that would normally take all day to cook.  Thankfully, with a few simple substitutions, this dinner can come together fairly easily and be just as tasty (in my opinion).  I’ve adapted a recipe that I originally found through a weight-loss program cookbook, so it’s not quite as trim as it might be, but it IS pretty yummy.

Ingredients:ChardonnayCassoulet

  • 1 package (8 total) boneless, skinless chicken thighs
  • 1 package diced prosciutto (my grocery store sells this, pre-packaged, in the deli area)
  • 2 cups baby carrots, sliced
  • 2 cups celery, diced
  • 1 large leek, cleaned and sliced
  • garlic, chopped (I typically use 2-3 cloves)
  • 2 cans cannellini (white kidney) beans  (I use them with their liquid and smash one can for thickness)
  • 2 cups chicken stock/broth
  • 1 cup Chardonnay (I like to use James River Cellars Reserve Chardonnay – use your favorite)
  • 1T dried lemon thyme (I have a jar of this from a friend – use regular thyme if you prefer)
  • 1T dried poultry seasoning (the leafy stuff, not the ground variety)
  • 2 bay leaves
  • salt and pepper to taste

Directions:

  1. Preheat oven to 350 degrees.
  2. Using a stock pot sprayed with Pam, brown chicken thighs on both sides  and then transfer to a plate.  Set aside for a bit.
  3. In same large pot, saute prosciutto until lightly crispy.  Add veggies (carrots, celery, leek, and garlic) and saute until vegetables begin to wilt.
  4. Add remaining ingredients and bring everything to a simmer.  The meal will now look like a soup, even with the mashed can of beans.  (*First photo on the top left of the collage)
  5. Add the chicken and collected liquids to the mixture, push the meat deep into the broth, and put the lid on the pot.  (*Middle photo on top of the collage)
  6. Pop the stock pot into the oven and bake until the meat is falling apart and the broth has thickened, about 1 1/2 hours.  Remove the two bay leaves and discard.
  7. Using an immersion blender, blend 3-4 times in very short bursts to thicken the vegetables but not destroy the chicken.  You can also spoon a cup of the vegetables into a blender, pulse until smooth, and return to the dish.  This will also thicken the meal without destroying the meat. (*Right side photo on top of the collage)

I love the addition of a hearty sourdough bread with this meal (as shown in the bottom photo of the collage).   While this meal takes some time to make, it’s really the baking that takes the most time.  Skill-wise, it’s not much more difficult than making soup, so it’s definitely worth a trip to the store for a few special ingredients to make this for dinner.

I mean, really… how many times do you get to use a special french word to describe something so homey and comforting?  I could have easily called this dinner a “Chardonnay Casserole”, but it sounds so much more unique and mysterious when I get to use the word cassoulet.  Heck, even my computer wanted to change that word to casserole.

Silly computer…

I hope you’ll try making this dinner… and feel free to tell me all about your own trials and tribulations… sharing is what makes cooking so much darn fun to me!

Recipe: Vegetarian Lasagna

Don’t let the title of this recipe fool you into not trying it…. my older son just found out that his favorite lasagna recipe was actually good for him and he was not pleased.  He’s a true meat-and-potatoes kind of guy who only eats vegetables if they are expected of him… I don’t think he’s ever intentionally chosen to eat vegetables… but he loved this lasagna, which speaks volumes to it’s ability to turn heads and make believers out of meat-eaters.

Here’s how I made this delicious lasagna:VegetarianLasagna

“Meat” layer:

  • 1 package Boca crumbles
  • 1 cup Cabernet Franc
  • 2 ½ c marinara (plus ¼ cup + ½ cup marinara reserved – total needed 3 ¼ cups)

Cheese layer:

  • 1 package part-skim ricotta
  • 1 ½ c mozzarella
  • 1 egg, whipped slightly
  • Nutmeg, salt, and pepper to taste
  • Lasagna noodles (not cooked)
  • Parmesan (to sprinkle on top)

I started by making the “meat layer”.  In a medium bowl, mix the Boca Crumbles (see photo for package), marinara (in this case I used much of a Meritage Marinara that I had made earlier in the week), and James River Cellars Cabernet Franc red wine.  You want to make this part of the recipe fairly “wet” since you’re not cooking the noodles.

In a separate bowl, mix your “cheese layer” ingredients together.   Fresh nutmeg is key in this and you don’t need much… just a few sprinkles will do the trick – it adds a back note that is really lovely.

Now you’re going to layer your lasagna in a 9×9 pan. Start with your ¼ c reserved marinara,then add noodles, 1/3 meat, 1/3 cheese, noodles, 1/3 meat, 1/3 cheese, noodles, 1/3 meat, 1/3 cheese, noodles, ½ cup reserved marinara, and finally top with Parmesan.  I find it extremely helpful to turn the direction of the noodles at each layer so the lasagna cuts nicely.  Lay the first layer vertically in the pan, the second layer would then be placed horizontally the third layer would again be vertical so the final layer lays horizontal in the pan. Note: Your noodles will be longer than your pan – just break the noodles and use any pieces that aren’t the same length in the center and keep the longer pieces along the edges.

The last step is to bake your lasagna for 50-60 minutes at 350 degrees, until bubbly and cooked through.  Let set for 5 minutes before serving so the lasagna has time to let everything “pull back together” and cut beautifully.   I find that turning the noodles’ direction is key in being able to serve a nicely “square” piece of lasagna.

I hope you find this lasagna to be something that your entire family will enjoy… I also find that if I add a piece of garlic bread or Texas Toast, my guys are even happier.   

Buon Divertimento… Have Fun!