Recipe: Simple Wine Scones

I played with a recipe today… and ended up with the yummiest (and most simple) scones I’ve ever tasted.  A friend had posted this 3-ingredient scone recipe from TheMiniatureMoose.com on Facebook and I couldn’t help myself… I *had* to try it!  Of course, I just can’t make a plain scone, so I picked up some mini chocolate chips and decided to use some of the Chardonnay that I had in my fridge… it was a HIT!  I took most of the scones downstairs to the Leasing office and treated the ladies to an afternoon snack and they agreed with me.  Yummy & easy… wine & chocolate… two of my favorite combinations.

I started by preheating my oven to 425 degrees.  There were very specific (yet simple) directions in the original recipe, but my version ended up being totally tasty as well.  In a large bowl, I mixed 2 cups of self-rising flour with two Tablespoons of sugar and two palmsful of mini chocolate chips.  I then added 1 1/2 cups of canned coconut milk and stirred to combine.  NOTE: Canned coconut milk separates into two layers… a thin “milky” layer and a thick “greasy” layer.  You need to stir these two layers together to create the creamy coconut milk you want to use.  FYI… don’t poke the harder white layer on top too energetically or you’ll get spritzed with the milk that comes sporting up out of the can.  Trust me… I learned the hard (and messy) way on this one!  😉SimpleWineScones

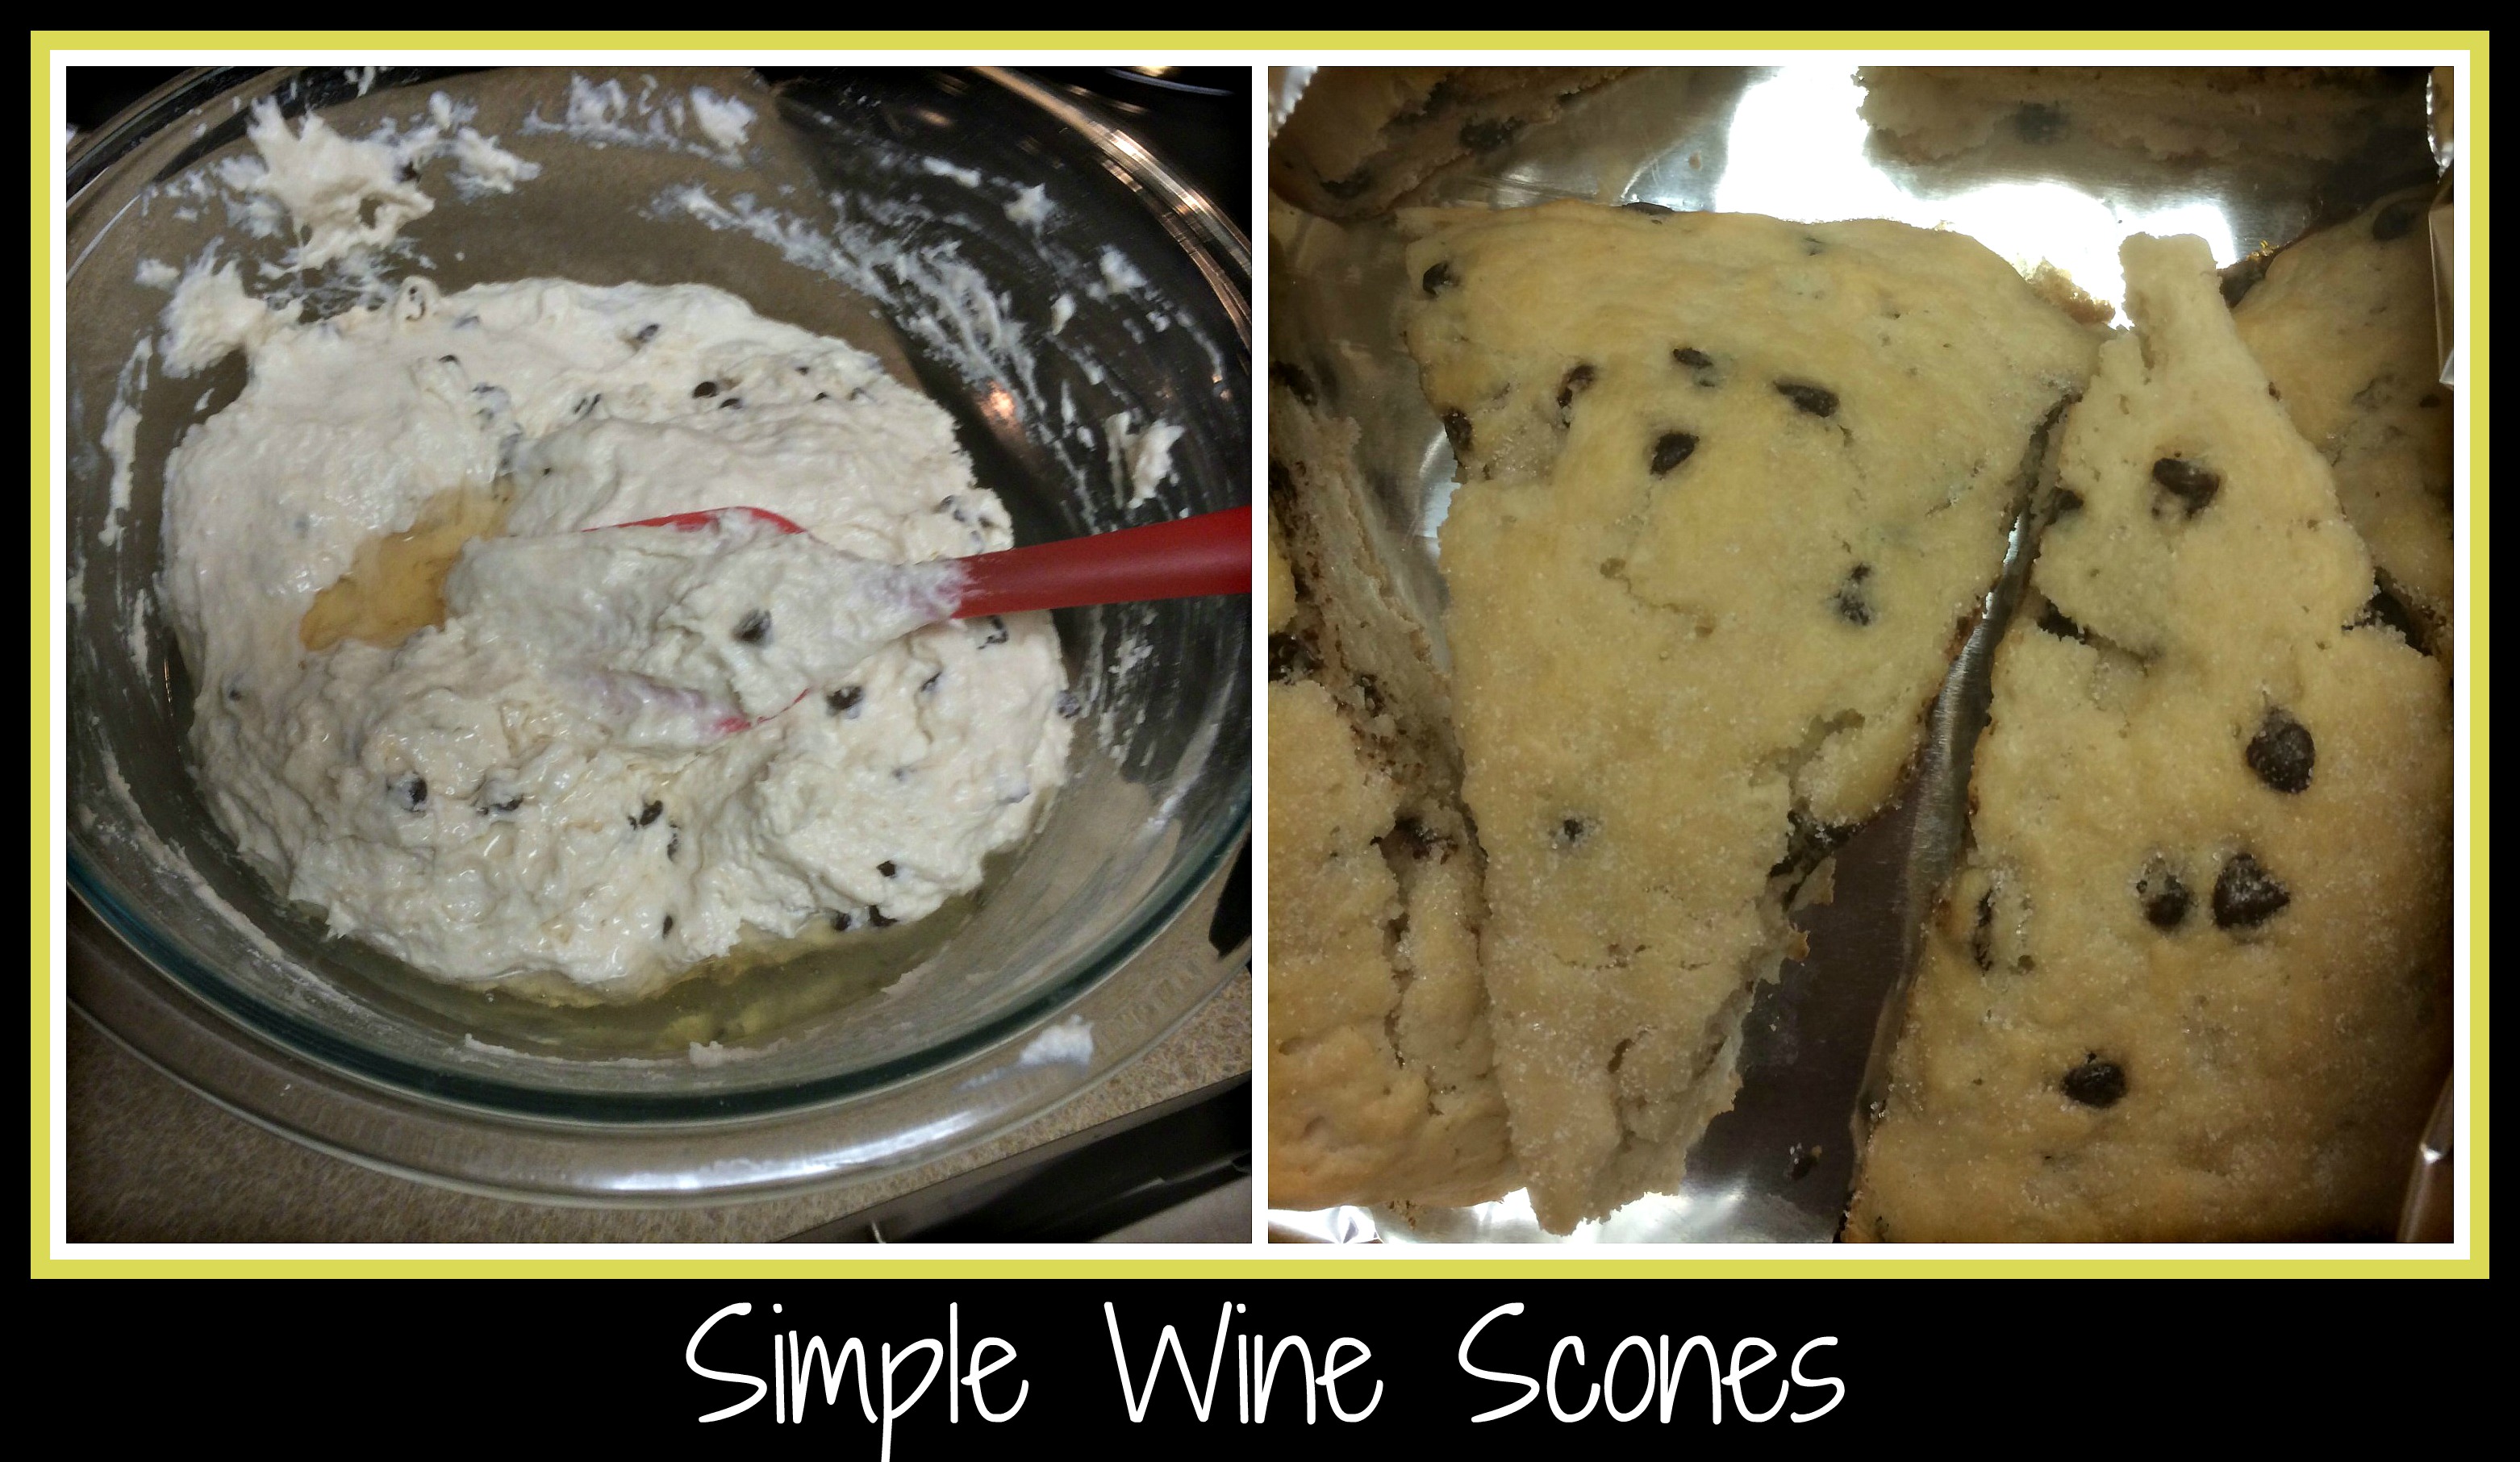
My version differs at this point with most recipes for scones.  Everyone else will say to be gentle with your dough and to kneed the dough and do all sorts of lovely things to form your scones.  I was simply lazy and wanted to see if this recipe would still work, so  I stirred in some Chardonnay (a bright stainless-steel Chardonnay is great in this recipe, especially if you choose to add any citrus to the mixture) and made sure that everything was well-combined.  I then spooned the scone dough (it was definitely not something that could be cut into forms at this point) onto a pan sprayed with cooking spray and sprinkled the dough with sugar.  I knew I was going to want to cut the dough into pie-shaped wedges, so I tried to make slight indentations into the top of the dough so I’d know where to cut.  Much more than this wouldn’t have worked with this version of the recipe.

baked the scone dough at 425 degrees for 17-20 minutes until the top started to look lightly browned and didn’t look like it was going to be gooey when it cooled.  Ok, this isn’t a very “scientific” way to describe it, but it’s the most honest way I can explain it.  I shook the pan and nothing moved… then I pressed the top of the dough and it felt pretty solid.  I figured it was good to go at this point.

I removed the large cooked scone to a cutting board and allowed it to cool for a few minutes.  I then took a knife and cut the dough, following the pie-shaped wedge marks that I’d originally made.  They came out nicely puffed and light – not dense or dry at all.  I might just bake them in small rounds next time…. they would be lovely as a dessert, broken open and drizzled with fresh strawberries and whipped cream.

See… even a diversion from a tried-and-true recipe can turn into something totally different and fun!  Let me know if you come up with a new way to play with this recipe… and I’ll be sure to add other versions as I play with this recipe on my own!

Wishing a Happy Summer to you all!

Advertisement

Recipe: Asian Chardonnay Chicken and Pasta

The inspiration for tonight’s dinner came by way of the salad dressing in my fridge… really!  I picked up a national brand Asian Sesame salad dressing recently and wondered how it would pair with chicken for dinner.  Thankfully, it paired beautifully and became the focus of this recipe.  NOTE: You can substitute your own favorite dressing in this recipe… if you like it, feel free to use it for more than a salad.AsianChardChickenNPasta

I started with two chicken breasts.  I made a foil packet (using two pieces of foil) in my baking dish and placed the breasts together  on the bottom of the dish.  I then poured some Chardonnay white wine (I love using James River Chardonnay for this sort of recipe) and drizzled the dressing on the breasts before closing up the packet.  I could have easily cooked the chicken for 30 minutes at 350 degrees,  but I wanted to cook dinner much slower, so I let the breasts steam in the packet at 250 degrees for an hour.  NOTE: Even at this much longer time frame, the breasts were tender and juicy… I love when an experiment goes well!

About 20 minutes before I wanted to serve dinner, I started making the bow tie pasta and added a touch of Chardonnay to the cooking liquid to flavor the pasta to mirror the chicken’s sauce.  After taking the chicken out of the oven and opening the packet, I realized that the sauce was much too thin to be “good enough”, so I had some work to do.

I removed the chicken to a plate and poured the cooking liquid into a saute pan.  Using a bit of the cooking liquid, I made a slurry with some flour, whisked the slurry into the pan, and cooked the sauce until it thickened (which happened really quickly).  For flavor, I added a few tablespoons of a garlic/herb light cheese, some salt and pepper, and a sprinkling of herbs de provence.  Then, using a spoon and a fork, I turned the cooked chicken breasts over twice to pick up the sauce and warm the chicken a bit.

Serving dinner was easy… I ladled pasta onto the plates, placed the chicken breast on top, then poured sauce over the entire meal.  A side salad or a vegetable would have added a bit more color and a great boost of nutrition, but we opted to go with a very simple meal tonight.  If my entire family was coming to dinner, I could have easily cooked more chicken/pasta and the additional vegetables/salad would have completed the meal.

It’s the little things that can add to your meal each night.  Adding your family’s favorite vegetable or some crusty bread to dinner can round things out quickly.  Follow your instincts when it comes to cooking… and wait to hear the sounds of happy, satisfied family members singing your praises.

Enjoy the food journey we all travel… it’s so much fun that way!

Recipe: Chardonnay Chicken Piccata

Wow… this recipe was a huge hit last night.  It’s not a difficult recipe, but it has such huge presence and flavor that it’s quickly going to become one of my favorite recipes to make for company.  I really hope that you’ll consider making this for your family… It’s hard to imagine any chicken fan *not* enjoying this dinner!

Again, I started by using an actual recipe that I found by flipping through allrecipes.com and searching out a basic recipe that would utilize the half bottle of chardonnay that I had in my fridge.  Of course, I had to alter the recipe to fit my family’s preferences, but isn’t that what I do with every recipe I make?  NOTE: Most Piccata recipes also call for capers, but since my family isn’t big on them, I left them out of this recipe.  Here are the basics of Chicken Piccata:

Ingredients:

ChardonnayChickenPiccata

  • 3 whole chicken breasts (one package from my freezer), sliced in half, lengthwise
  • Salt and Pepper, to taste
  • Flour – enough to dredge breasts, approximately 1/2 cup
  • 2 Tablespoons Butter
  • 2 Tablespoons Olive Oil
  • 1 cup White Wine (I used a half bottle of James River Cellars Chardonnay)
  • 1/2 cup chicken stock (I didn’t have any on hand, so I used 1 packet of G.Washington Golden bouillon and a little water)
  • 2 whole lemons (I used both juice AND zest)
  • Fresh Parsley
  • 3/4 cup heavy cream (I never have cream on hand, so I used 2 Tablespoons of nonfat plain greek yogurt instead)
  • Egg noodles or your favorite pasta

Instructions:

  1. Start by simmering your water so you can drop your pasta when your dinner is almost finished.
  2. Slice chicken breasts in half, lengthwise, so they are fairly thin and each person can have two breasts per serving and still not feel like they’re over eating.
  3. Sprinkle each chicken breast piece with salt/pepper and dredge in flour.
  4. Heat one Tablespoon of butter with one Tablespoon of olive oil in a large skillet over medium high heat.  Fry each chicken breast until golden brown on both sides, in batches as needed so as not to crowd the pan.  Once breasts are golden, remove to a separate plate and keep warm.  NOTE: I did this in two batches and used another Tablespoon of butter and olive oil each for the second batch.
  5. Once the chicken is done, reduce the heat in the skillet to medium low.  Pour wine into the skillet, add the juice and zest of both lemons, and use the liquid to stir in all the bits from the bottom of the skillet.  Add chopped parsley to the sauce and allow it to cook long enough for all the flavors to combine.  Add greek yogurt (or heavy cream, if you are so inclined) and whisk in to thoroughly incorporate.  This is when I taste the sauce and adjust the seasonings – add salt/pepper as needed while it’s cooking so you don’t have to add more when you’re serving your meal.  I also add a spoonful or so of pasta water to lighten up the sauce if it seems to be thickening too quickly.
  6. While you’re making the sauce, start your pasta so you have everything done at the same time.  Drain pasta and get it ready to serve.
  7. For this meal, I added a bag of green beans, so I microwaved the bag for about 5 minutes to cook them quickly.  My favorite way to serve beans (especially for company) is to put a sliver of butter in the bottom of the serving dish, top with salt/pepper/seasonings.  I then toss the hot beans in the serving dish, distributing the butter and seasonings throughout the beans and making them look impressive!
  8. As the sauce thickens, add the cooked chicken back into the sauce and flip them so both sides get covered in the sauce.
  9. To plate your dinner, put the egg noodles on the plate, top with two chicken breasts, and spoon a bit of sauce over both.  Add a serving of green beans on the side and you’ve got a well-rounded meal that will impress your friends and any company that may happen over for a special dinner.

I really did love this dinner.  I’m a fan of anything that has a great punch of flavor and still looks pretty when plated, so this recipe really fit the bill for me.  Add capers, heavy cream, or whatever else makes this recipe taste best to you.  The idea isn’t to follow *my* recipe exactly… it’s to create a meal for those you love.  Enjoy the process… it’s what makes cooking such a fun thing to do!

Recipe: Nutty Chicken Salad with Chardonnay

I love when a simple idea comes together to create a delicious and fairly healthy meal.  I had a roasted chicken in the fridge this week and needed to bring something to work for lunch… what came from those two separate ideas was a recipe that I will be repeating often.  Seriously, it’s *that* good.

NuttyChickenChardSalad

I started by cutting up some chicken breast – literally, I cut a portion of chicken breast off of the roasted chicken, diced it, and put it in a bowl.  I then diced two small scallions and added them to the mixture.  I emptied a mini box of raisins on top and added a handful of chopped walnuts and sunflower seeds.  The salad came together using a mixture of Miracle Whip light, a few spoons of non-fat, plain Greek yogurt, and some splashes of James River Cellars Chardonnay.  I seasoned it with salt, pepper, and a pinch of lemon thyme and let it sit overnight (or until lunchtime, whichever works for you.  Note:  Since I still have some dried lemon thyme in the cupboard from last summer, I like to add this anytime I want just a hint of that spice in a meal. 

When plating this salad, I certainly could have used any bread I had on hand or I could have used it to top some greens, if I didn’t want the bread at all.  Since we’d just been to the store,  I had a ciabatta roll in the pantry and used that for my lunch.  I actually had enough to make my own  lunch, plus share some with a co-worker, so that was a big plus in my book.   Feel free to play with this recipe and make it your own.

Alternative ingredients?  I’m sure it would be delicious with leftover turkey (yup, already planning for Thanksgiving and Christmas dinner leftovers), and craisins would be a fun change from the raisins I used here.  I also will plan to add some celery to this recipe, but that’s not included here since I didn’t have any when I was making this particular recipe.  If you come up with any other fun ideas, feel free to let me know what you’ve used.  I love hearing about ways others make this recipe into something their family will love.

Have fun playing with your food!

Recipe: Chardonnay Pesto Shrimp & Pasta

I started planning dinner before I left for work this morning.  I didn’t do anything as adventurous as get out the crock pot and start dinner… nope….  I just started thinking about what I wanted to make that evening.  Such is my life when I get to talk about wine all day.  Mind you, I’m definitely not complaining… just making an observation.  When I lead guests through a wine tasting at James River Cellars Winery, I gloss over recipe ideas and offer up ways to use the various wines we have to offer.  It’s the way I’ve always done wine tastings, but apparently it’s unique enough that people are stunned when I toss out recipe after recipe for our wines.  Thankfully, the winery owners have allowed my blog to be linked to the winery’s website, Facebook page, and Twitter account – guess I’m doing something right, huh?

I stopped off at the local grocery store to pick up a bag of shrimp on my wayChardonnayPestoShrimp&Pasta home and grabbed a tube of Pesto paste to use, along with some bow tie pasta.  I thawed, peeled, and sliced  the shrimp in half when I got home so that dinner prep would be as simple as possible.  Then I got out the rest of my ingredients:  a lemon, a pat of butter, olive oil, James River Cellars Winery Chardonnay, and a touch of half & half left over from another meal this week.  Once my husband got home, I was ready to start cooking.

I put some of the bow tie pasta into a pot with some salted water and got that started while I melted butter and olive oil in a large saute pan.  As soon as the butter/oil mixture was hot, I added the shrimp and allowed it to cook thoroughly – I had sliced the shrimp length-wise so the thin shrimp pieces curled up into little corkscrews.  Once the shrimp was cooked, it was time to start creating a sauce.

I made the sauce with the shrimp in the pan.  Sometimes I’ll remove the shrimp, but I was feeling a little lazy tonight and didn’t do this extra step.  I added some wine to the shrimp and let it sizzle for a bit until the chardonnay had almost been absorbed by the shrimp.  I then added the juice of the lemon, some pesto paste, a little more wine, a splash of half & half, and some of the pasta cooking liquid.  I allowed this to simmer until the sauce looked thick enough before I tossed everything with the cooked pasta.  It was quick and delicious!

The entire meal, cooking from start to finish, really only took about 15 minutes.  I even had enough time to defrost and toast a ciabatta roll so we could each have half to soak up the sauce.   While there are tons of different things I could have added or changed about this recipe, the clean taste of the wine, lemon, and shrimp paired with the pasta was just what I was looking for tonight.

I hope you’ll experiment with this recipe and come up with your own favorite version… it’s one of my favorite things to do.  Enjoy!

Recipe: Roasted Mustard Pesto Potatoes

I was really lazy last week and wanted to make dinner without going through too many extra steps.  This recipe was born from my laziness (if you want to call it “laziness”, cuz I was *still* making dinner).  I started with the idea of roasting some Yukon Gold potatoes and this recipe emerged.  Please remember that you can always use whatever ingredients you like when making one of my recipes… I am only attempting to give you ideas from which you can branch out and create your own family favorites.

I started with four Yukon Gold potatoes and one onion.  I cut the potatoes into same-size chunks and cut the onion in half before slicing it into half-moon shapes.  I sprayed a baking sheet with cooking spray and then laid the potatoes and onions in a single layer on the sheet pan.   Being lazy, I simply plopped the ingredients on top of the potatoes, but next time I will probably mix them in a bowl and pour the sauce over top.  For the “sauce”, I used olive oil, dijon mustard, kale pesto, salt and pepper.  I tossed the potatoes and onions with these ingredients and then “thumbed” some James River Cellars’ Chardonnay over the whole mixture.  RoastedMustardPestoPotatoes

At this point, I realized that I had totally neglected to add any meat for our dinner… and that would never fly.  Since I didn’t want to roast a package of chicken tenders separately, I just added the individual tenders into the potato/onion mixture and turned them in the “sauce” to pick up some flavor.  This was my “easy out” way of making a two course dinner without any extra effort.

I roasted the entire baking sheet at 375 degrees for about an hour – this really was too long, but I had started making dinner so early that I was getting hungry before we were planning to eat.   Next time, I’ll adjust the oven temp and the cooking time so things don’t get quite so crispy but even so, dinner turned out really well.

BONUS RECIPE:  I found out that my husband isn’t as big a fan of roasted onions as my son, so I had quite a few left over to go with my extra potatoes for the next day’s lunch.  Since I had leftovers, here’s a quick way to use them up in a simple lunch-for-one.  I cut the remaining potatoes into smaller pieces, added the roasted onions and cut up two of the leftover chicken tenders, tossing all in one of my favorite salad dressings.  This became a really easy and tasty lunch for me and I didn’t feel like I’d wasted food.  Always a plus in my book!

Have fun making this recipe your own.  Use a different mustard… leave out the pesto… use a salad dressing or add balsamic vinegar with the oil… this is when you can let your creative juices flow to make something entirely your own.  I wish you a delicious meal… as always!


Recipe: Kale’d Squash with Chardonnay

Just wanted to add a follow up recipe to the Kale Pesto recipe that I posted yesterday.  I shared lots of ways to use kale pesto, but here’s a recipe that I used for breakfast this morning.  This recipe would make a great side dish and can certainly be altered as needed if you are following a diet plan that doesn’t allow for wine or other ingredients.

Kale'd Squash

I had already roasted and cooled some spaghetti squash, so I started with this ingredient as my focus.  In a saute pan, I heated a small amount of olive oil, some crushed garlic, and a large spoonful of Kale Pesto.  Once this was sizzling, I added  2 cups of spaghetti squash, along with a nice amount of James River Cellars Chardonnay, and tossed all the ingredients together, cooking them until everything was toasty and fragrant.  

As I completed this recipe, I added some salt and pepper to taste and topped with a small amount of grated asiago cheese.  Since the alcohol in the wine had cooked out and I still had the back-taste of chardonnay in my food, this was a really tasty breakfast, but would have made an equally yummy lunch or even a full meal (if I added some protein).

 Isn’t that a great way to kick off a new day?  Enjoy!

Recipe: Chardonnay Broccoli Buds

Hey, James River Cellars’ Wine Club Members!  Are you looking for an interesting recipe that uses the Stainless-Steel Chardonnay that you got at tonight’s release party?  You’re in luck… I’ve got just the thing… Chardonnay Broccoli Buds.  It’s a recipe that can be either an appetizer or side dish (cold OR roasted).  YUM!

ChardonnayBroccoliBuds

I first had this recipe as a child, during Sunday picnics at summer camp with relatives and friends.  I had never had broccoli as a cold appetizer before and it was delicious… crisp, tangy, and flavorful.  I have made this recipe many times throughout my adulthood but it always seemed a bit too oily, so I decided to remake it.

Since I used an actual recipe to start, it’s only fair that I give you the new recipe as one with specific ingredients (but please realize that I’ll always alter things slightly when I remake a recipe, so even these are guidelines).

Start by mixing 1/2 cup cider vinegar, 1/2 cup oil (I used canola oil), 1/2 cup James River Cellars’ Chardonnay, 1/2 Tablespoon sugar, 1/2 Tablespoon dried dill, 1/3 Tablespoon accent, 3/4 teaspoon salt, 1/2 teaspoon fresh ground pepper, and 1/2 teaspoon garlic salt together in a large resealable bowl or resealable plastic bag.  Add 1 1/2 to 2 bags fresh broccoli florets and toss well.  Allow broccoli to marinate for 24-48 hours, re-tossing in the dressing occasionally.  Once the vinaigrette has thoroughly flavored the broccoli, they can be served cold (drained of any access vinaigrette) as seen in the left photo OR drained and roasted in a 350 degree oven for 12-15 minutes as seen in the right photo.

I hope you and your family enjoy this side dish/appetizer as much as I always do… it reminds me of the magical summers I spent in PA as a child and it makes me happy.  I hope it becomes a recipe that makes you happy as well!

Enjoy… from my childhood and family to yours!

Recipe: Chardonnay Cristo Benedict

When I was in college, I did an internship at a local “big name” hotel chain, spending a few days in each department and then writing up my findings, coming up with ideas to make things work better (reinventing the wheel, if you will), and generally being “free labor” for whichever manager needed some extra hands.  While I wasn’t wild about some of it when I was there, I realize now that I learned alot of great skills… like cooking!

I spent about a week in the kitchen, helping out with chopping, cooking, breaking eggs, and learning how the chef ran his kitchen.  After a particularly busy morning, he gave me the task of learning how to make his Monte Cristo sandwich, which is kinda like a marriage between french toast and ham & cheese sandwich.  We’re playing with a variation on a theme, after the Croque Monsieur posting yesterday,  but I suddenly had a craving for something like this for my morning meal today.  I didn’t really want to deal with the possible mess of dunking an entire sandwich into an egg batter (I really do not like “ick”), so I went with the alternative plating this sandwich as an open-faced one…  Easy, peasy, right?

Thankfully, it was!

I started by making an egg mixture for the “french toast” portion of this sandwich.  In a small mixing bowl, I put some fat free egg substitutea glug or two of James River Cellars Chardonnay, two thumbs-worth of fat free sour creamsalt, pepper, and paprika.  I added the sour cream because usually there’s an addition of cream to an egg mixture.  It wasn’t going to be the same (hell, I was using wine in something usually reserved for breakfast) but this was my way of coming up with a new and different spin on an old favorite sandwich, like this or this.  

Chardonnay Cristo Benedict

Once my egg mixture was done, I took a piece of sourdough bread (remember the bread I used the other day for the Croque Monsieur?  Same stuff… still chewy and yummy.), cut it in half, and soaked the bread before pan frying in on both sides.  I removed it to a baking sheet (covered in foil cuz I hate cleaning those things.. duh!) and popped the deli turkey slices in the pan to brown on each side.  While I was frying the bread, I shredded some sharp cheddar cheese (again, the same cheese from the other day) and doused it with a small amount of the Chardonnay.  When I finished browning the turkey, I laid the turkey on the bread and then thoroughly drained the cheese before topping the sandwich.

While I washed up the dishes, I popped the baking sheet into a 375 degree oven for a few minutes until the cheese melted.  Re-using the saute pan, I fried an egg in a small pat of butter and cooked it quickly, over easy.  I could have used one or two poached eggs instead, but I didn’t want to dirty another pan.  I put the fried egg on top of the cooked sandwich and broke the yolk to simulate the “benedict” taste of this sandwich.
IMHO, the best part of making dinner at home is being able to play with recipes to make them my own.  Have fun!If you’d rather not use the egg, that’s perfectly fine… that’s what so fun about cooking at home and making your own meals.  Add, subtract, play, and enjoy!  I toyed with adding some cooked spinach to this sandwich… I could have swapped out the deli turkey for some deli ham… I could have added some grilled onions or changed the type of cheese.

Recipe: Chardonnay Croque Monsieur

I made a very “fancy” dinner last night… Croque Monsieur, which is really just a fancy French name for a Grilled Ham and Cheese.  Sounded impressive, yes?  It kinda was… cuz I added wine.  Wait… it gets better… I put it on the CHEESE!

Chardonnay Croque Monsieur

I started with some really yummy sourdough bread from the local grocery store.  I sliced it and popped it into a hot oven to dry the bread thoroughly.  As the bread was drying, I tossed a few tablespoons of Chardonnay with some tasty shredded cheese.  Note:  I used a sharp cheddar with a little mild cheddar thrown in, but I could have just as easily used gruyere or swiss cheese.  Since sharp cheddar is what I had in the fridge, sharp cheddar is what I used.  This is my favorite rule of thumb… use what you’ve already got in the fridge if at all possible.  I really don’t like to have to make a separate trip to the store for one item… I always come home with too many “extras”!  I also made sure that I had some deli sliced ham already in the fridge to be able to use… Check!
The biggest addition to this meal really is just a simple condiment.  I’m not sure what you’d call it, but I stirred together about half a ramekin of fat free sour cream a glob of dijon mustard some garlicsalt and pepper.  I used this flavored sour cream as the “glue” to keep all the layers together during the cooking process.  It was a really tasty addition.  I was making dinner for my husband and myself, so I used enough of all the ingredients to make four open-faced sandwiches (two for each of us).  If you’re making dinner for more people, you’d obviously want to have more ingredients on hand to feed everyone.

Once I had everything ready, I drained the cheese on some paper towels and blotted it to remove any excess moisture.  This is important because the excess liquid ends up making the cheese a little soupy instead of getting browned and toasty as it broils.

Assembling the individual Croque Monsieurs was quite easy.  I spread a thin layer of flavored sour cream on the dry toasts, topped it with ham (I used a thinner amount of ham for myself and a thicker layer for my husband… see?  Individualizing your meal is easy when YOU”RE the cook!), then spread another thin layer of the sour cream mixture.  Check out the photo of this in the collage I’ve included… even at this point, it’s looking delicious!  I piled on enough cheese to make a mound on each sandwich.  The broiler really did all the heavy lifting on this dish… bubbly and hot, these sandwiches were really decadent.

When I told a friend of mine what I was making, she let me know that she really prefers a Croque-Madame… and that is a croque monsieur with a fried egg on top.  I might have to try that one the next time this makes it into my dinner rotation.

Feel free to play around with your favorite cheeses and different deli ham… maybe even try a heavier bread… whatever you do, I hope you’ll try this recipe and see how it’s received in your family.  Tweaking recipes to fit individual tastes is really what makes cooking so much fun.

I may not be a chef… but my family will never starve.  Of this, I am certain!

On a side note:  my darling husband said that he couldn’t look at the name of this dish without being reminded of an episode of Friends, where Joey tries to learn how to speak French.  Apparently, in our house, this dish will always be known as “Joey’s Grilled Ham and Cheese”.  :/  Enjoy this YouTube link!