Shrimp in Lemon Butter

Shrimp in Lemon Butter

This recipe is a favorite of my husband and one that I love to make during the week. It’s a simple meal to pull together and doesn’t take a lot of complicated ingredients.

Ingredients:
Raw Shrimp (I use Jumbo Shrimp)
3-4T Butter
2T Garlic Confit (or 3T crushed garlic cloves + 1T olive oil)
Juice of 1/2 lemon (reserve zest)
2T Parmesan
1/4 C White Wine (Use something you love to drink)
Splash of Half & Half
Pinch of sugar (if desired)
Salt, pepper, and parsley to taste
Brown Rice (or pasta)

Sauvignon Blanc by Boordy Vineyards

COOK YOUR SHRIMP:
Cook your shrimp, however you’d like. I shell my shrimp first, then bake shrimp on a piece of parchment on a baking sheet in a 400* oven until done.
NOTE: My husband likes his shrimp cooked longer than me, so I start cooking his shrimp in a 400* oven for about 15 minutes before adding mine to the baking sheet.

My husband’s shrimp on the bottom of the pic, mine on the top.

COOK YOUR SAUCE:
In a sauté pan, melt butter with garlic confit and lemon juice. Sprinkle with Parmesan and stir to combine. Add in the wine and half & half, then simmer until sauce thickens slightly, stirring frequently. Taste and add seasonings as desired.
NOTE: If sauce gets thick, add a little liquid (wine, water, stock, or pasta water) to thin.

Stirring to incorporate the butter into the sauce is key.

MAKE RICE (OR PASTA):
I use microwaveable brown rice. If you prefer to serve this meal on pasta, make your pasta so it’s ready to be plated when your shrimp are done.

ASSEMBLE DINNER:
You can either fold shrimp into the sauce (I do this with my husband’s shrimp) or place shrimp on rice and spoon sauce over top.

My husband’s shrimp, tossed with the sauce.
My shrimp, with sauce spooned over top.

ENJOY!

Recipe: Updated Chicken Prosciutto Roll

I know this is a re-do of a recipe that I posted in August, but honestly this  set of photos is much more informative than the first, so I decided to go ahead and add it… never hurts to show you more about a recipe than less, right?  I also adjusted this recipe a bit from the original, so please forgive my repetition… I want you to have as much info about recipes as I can provide, especially when I make something so tasty that doesn’t actually use a recipe.

I wanted to make a simple, yet elegant, dinner with James River Cellars’ Gewurztraminer wine.  Since we have found that the tastiest pairing of cheese-to-wine uses Bourcin cheese with this particular wine, my primary pairing was already set.  Sadly, though, my local grocery store was out of Bourcin Cheese, so I had to make due with a local goat cheese infused with garlic and herbs which turned out to be very tasty and worked just as well (in my humble opinion).

I started with three large chicken breasts from a sale package of chicken breasts.  Note: I don’t know what sort of giant chickens produced these breasts, but they were thick, meaty, and looked amazing.  I’m sure that they are genetically altered and I should have reached instead for the organic meat, but I was looking for value this time – I was able to get 5 breasts for the price of 2 organic breasts, so that made my decision for me yesterday.  I ran my knife through the meatiest part of the breast but didn’t cut all the way through, so I could open the breast like an envelope and make it as thin and wide as possible.  I used a mallet to pound the thicker spots down a bit so everything was even and got on with the recipe.

Making sure not to tear the meat, I separated a thin slice of prosciutto and laid it on top of the open chicken breast, then topped the breast with a thin line of garlic/herb goat cheese (here’s where I would have used the Bourcin Cheese, had I been able to find it at the store).  Once the layers were in place, I carefully rolled the chicken, beginning at the  side rather than from one of the ends, and then used a long skewer to secure the breast meat and keep all the toppings inside.  My goal was to make a long/thin roll as opposed to a short/fat roll so the meat would be able to cook thoroughly without being too overdone on the outside.  NewChickenPriscuittoRoll

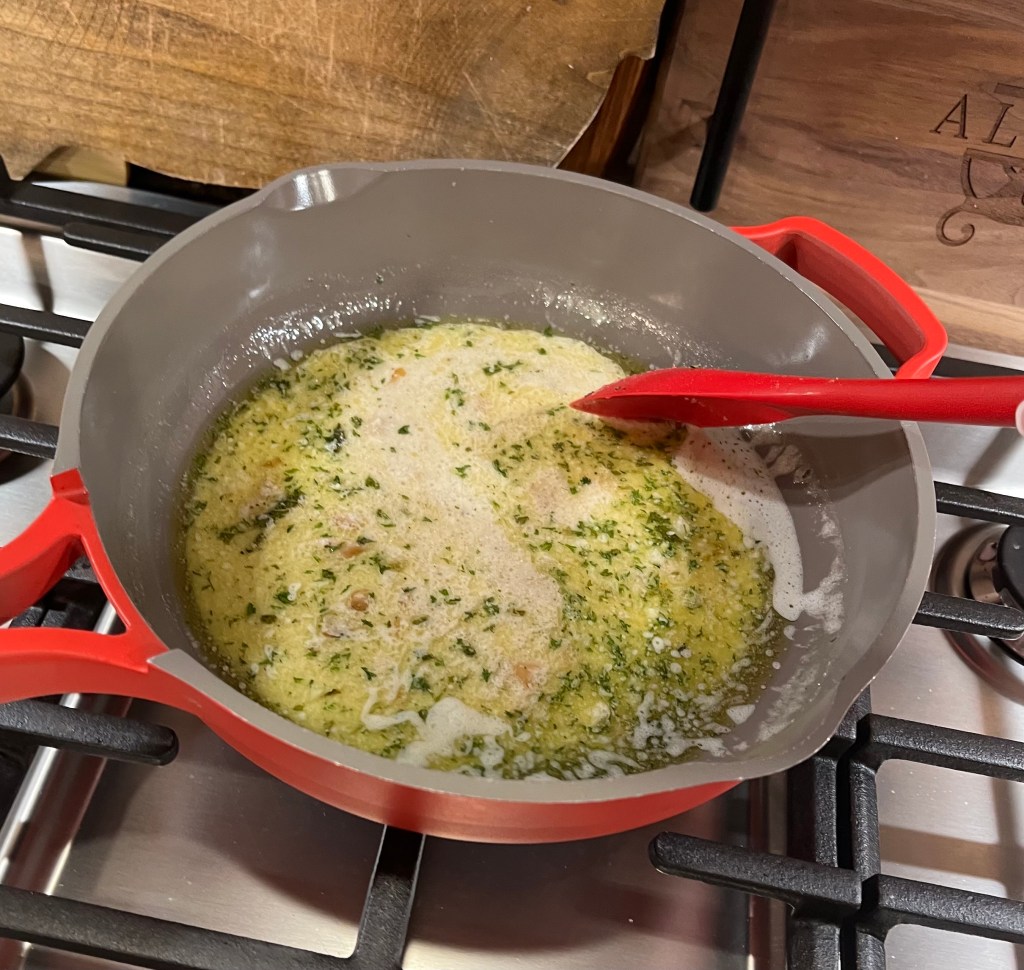
When you are ready to cook dinner,  add a pat of butter and a bit of olive oil to the pan and then sear the rolls on all sides until they are browned and crispy.  I actually made the rolls earlier in the day and let them sit in the fridge until I was ready to cook, but you’re welcome to make them whenever it works for you.  I definitely would have done this earlier in the day if I were making it for company.  Once the meat is seared along all edges, I added the remaining cheese (maybe the last inch of the roll of goat cheese) and Gewurztraminer wine to create a bit of sauce in which the rolls could cook.  Note:  Since I knew the inside of the rolls weren’t anywhere near ready, my plan was to bake them in the oven until my husband came home for dinner.  I’m not sure exactly how long I baked them (remember… I USE THE FORCE TO COOK) but I had set the oven at 350 degrees and popped the saute pan in the oven until things “smelled done” and we were ready to eat.

To finish this dish, I used a bag of green beans and a bag of brown rice.  I microwaved the beans first and tossed them with a little butter and salt before serving.  I microwaved the brown rice afterward and divided that out among the dinner plates.  Removing the skewer at this point wasn’t easy, but I used a fork to keep things steady as I gently pulled the skewer out of each chicken roll.  The final touch was to spoon the cooking sauce over the chicken and rice.  It looked as pretty as it tasted!

Extra idea… if you are serving a small group of people, you could make four of these rolls and then slice them to serve onto individual plates instead of offering each person their own chicken roll.

This is one of my favorite recipes to share with people when I do a wine tasting at James River Cellars.  I do hope that you’ll consider trying this recipe and make it your own.  That’s the essence of cooking… creating something delicious to feed the ones that you love.

Enjoy!

Recipe: Cabernet Franc Chili

Cab Franc ChiliThere’s something wonderful about having Chili on a cold winter’s day that just makes me feel warm inside.  The intoxicating smell of a simmering blend of onion, garlic, and green pepper gets me in the mood for a crackling fire, snow on the ground, and a big pot of chili.

Since I live in Virginia, “snow on the ground” typically isn’t going to happen very often, but once the temperature dips into the lower 40’s, I’m ready to start going through my winter repertoire and cooking up some wonderful hearty dinners.  This recipe is basic and allows for anyone to alter ingredients to suit their own particular tastes.  Here’s the general starting point:

Ingredients:

  • Olive oil
  • 1 package ground turkey
  • 1 large green pepper, chopped
  • 2 small (or 1 large) onion, chopped
  • Crushed garlic, to taste
  • 1 cup Cabernet Franc
  • ½ small can tomato paste
  • 1 Large can crushed tomatoes
  • 1 can diced tomatoes (with or without spices)
  • 1 can light kidney beans
  • 1 can dark kidney beans
  • 1 can black beans
  • 1 can cannellini beans (white beans)
  • Chili powder
  • Cumin
  • Salt/pepper

Brown the ground turkey in olive oil, using a large stock pot.  Add green pepper, onions, and garlic, sauteeing until vegetables are softened.  Add wine and tomato paste and cook until liquid is absorbed.  Add canned tomatoes and beans (I don’t drain or rinse my beans).  If desired, mash one of the cans of beans prior to adding, to thicken the chili.  Cook to warm everything thoroughly.  Add spices to taste.  If chili is still too thin, add remaining half can of tomato paste.

This is my most basic recipe.  If you want to make it hot, feel free to add some cayenne pepper… if you want it to be sweeter, feel free to add some honey or sugar.  This is a flexible recipe, so feel free to make it your own by adding or subtracting items as you see fit.

That’s the beauty of cooking… enjoy the process and revel in your results.

Recipe: Meritage Marinara Sauce

It’s always good to have a basic recipe in your cooking repertoire that can be used for lots of different dishes.  A basic marinara sauce is just such a recipe.  I used James River Cellars Meritage for this recipe, but you can just as easily use a Merlot, a Cabernet Franc, a Petit Verdot, or any other dry red wine that you prefer.  I based this recipe on one I found in the latest Cooking Light magazine (Slow-cooker Marinara) but I really didn’t want to take the time to use my crock-pot, so I altered the recipe and came up with something that make more sense for my current timetable and needs.  I hope you like it!

Ingredients:Meritage Marinara

  • Olive oil to coat the bottom of the pan
  • 2 onions, finely chopped
  • 1/2 bag of mini carrots, finely chopped
  • 4 stalks celery, finely chopped (I like the taste of celery, so I tend to go heavy on this veggie)
  • garlic, to taste (again, I like garlic, so I tend to use more than most – use as much as you like)
  • fresh oregano, finely chopped (I used a few stems from the plant I have – about 2-3 Tablespoons)
  • tomato paste (about 1/4 of a can)
  • red wine (I used James River Cellars Meritage, since that’s what I had on hand)
  • 2 large cans of crushed tomatoes

Directions:

  • In a large stockpot, heat the olive oil before adding the onions, carrots, celery, and garlic.  Saute’ all until the vegetables are softened.  *See #1 on the photo
  • Add oregano and tomato paste and cook until fragrant.  *See #2 on the photo
  • Add wine to the sauce and simmer until most of the liquid evaporates.  I used The Force with regards to the amount I used, but it was equal to two turns around the pan.  *See #3 on the photo
  • Once the wine is incorporated, add the tomatoes and stir to combine.  *See #4 on the photo.  At this point, I covered the pan with foil and popped it into a 200 degree oven for about 2 hours.
  • After baking the sauce, I removed it from the oven and used an immersion blender to smooth out the sauce.  *See the final photo marked “YUM!”.  I adjusted the seasonings by adding some salt/pepper and a little sugar to sweeten the sauce a touch, since our family likes a sweeter marinara.  It’s now ready to use for a myriad of different dishes.

Ideas for Marinara Sauce use:

  • Meatball sandwiches:  For each sandwich, fill hoagie roll with meatballs (homemade or store-bought), top with marinara and sprinkle with mozzarella cheese.  Broil sandwiches to melt cheese and serve.
  • Portabella Mushroom sandwiches:  For each sandwich, fill hoagie roll with sauteed portabella mushroom/spinach mixture, top with marinara and ricotta cheese, then broil to warm before serving.
  • Veggie Mexican Pizza:  On pizza crust, smear marinara sauce as you would tomato sauce, top with black bean and corn salsa and sprinkle cheddar cheese on top.  Bake as desired and serve.
  • Simple Italian dinner:  Top pasta (macaroni) with Meritage marinara sauce and Parmesan cheese.  Serve with garlic bread.
  • Eggplant, chicken, or veal Parmesan:  substitute Meritage marinara sauce for standard tomato sauce under your eggplant/chicken cutlet/veal cutlet and top with mozzarella cheese

This sauce is incredibly versatile and really tasty.  Try it in any dish where you’d typically use a canned or jarred tomato sauce.  It’s a great way to sneak vegetables into your family’s favorite meals and you can feel good that you’d made something healthy AND tasty.  It’s one of my favorite things… making healthy foods that my family will love.  Enjoy!