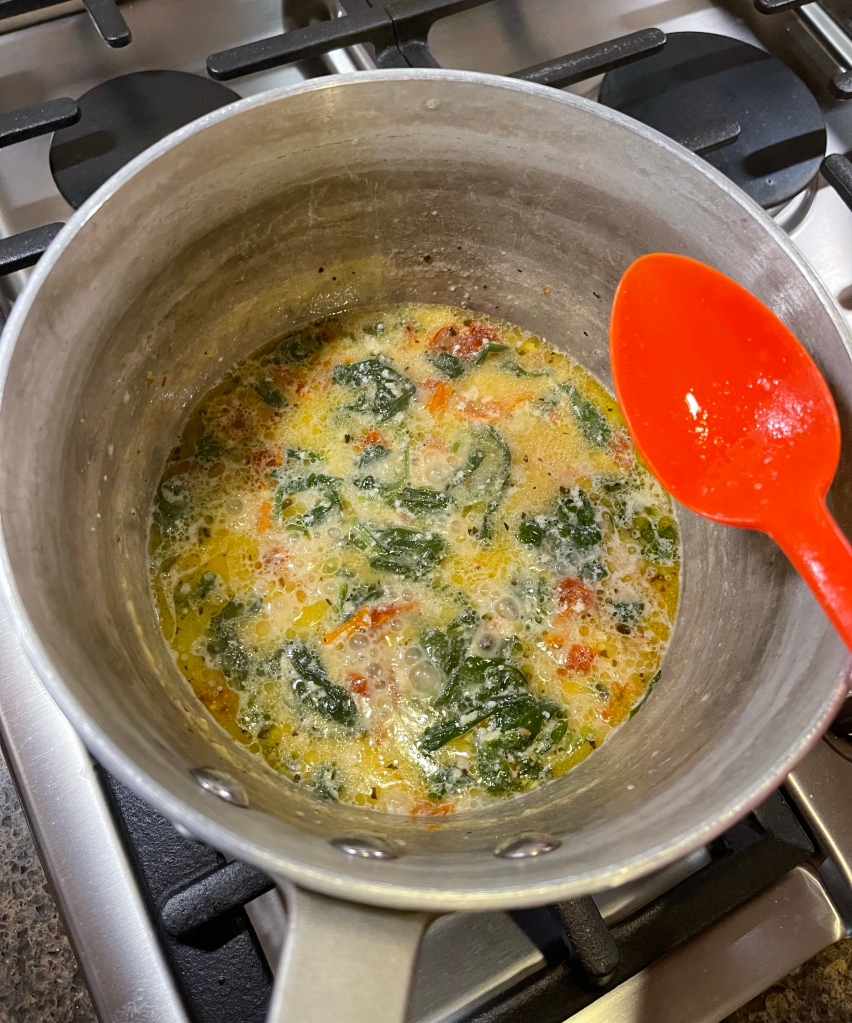
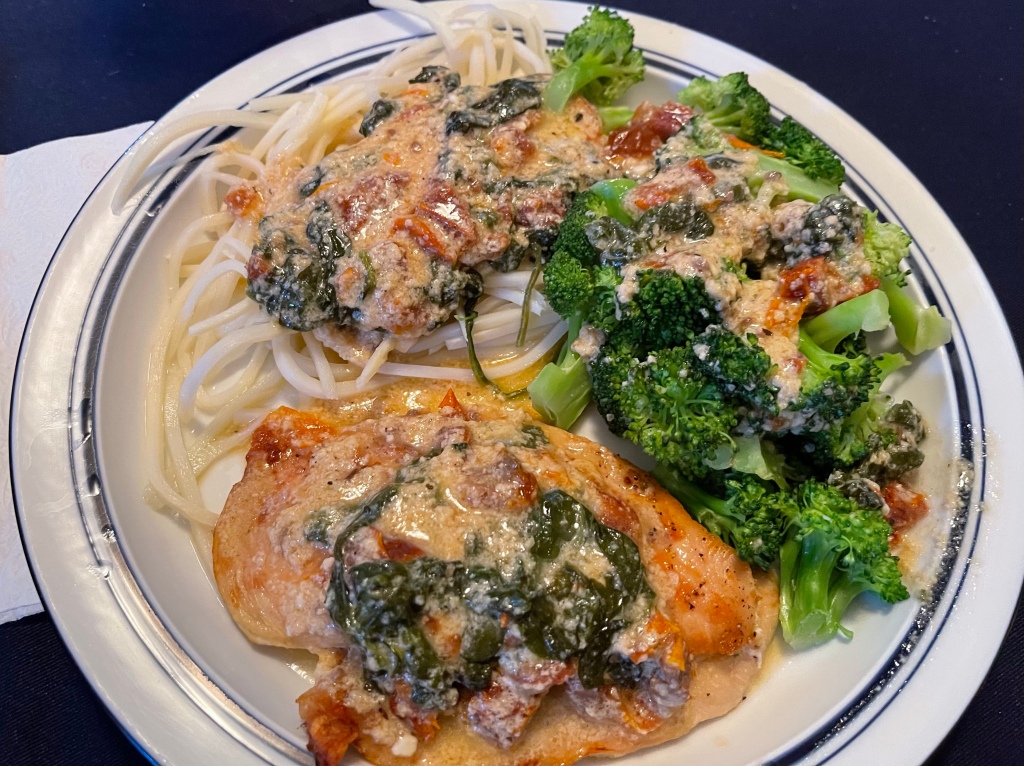
Tuscan-style sauce

Oh, my goodness…. this sauce is so delicious! A friend recently mentioned a crock pot dinner that she’d made that sounded good, but I didn’t want to use my crock pot. I got the basics of the recipe from her, looked at a few other recipes, and went to “work”.

INGREDIENTS:

  • 2 TBSP butter
  • 1/3 cup half & half (fat-free is fine)
  • 2-3 forks of julienned sun dried tomatoes *I like to add a spoonful of the oil to this sauce as well
  • 2 handfuls of spinach
  • 1 TBSP Parmesan
  • 1 wedge Laughing Cow light cheese
  • 1-2 T white wine (I used Boordy Vineyards Vidal Blanc)
  • Salt and pepper to taste
  • Pasta water, as needed/if available, to thin or extend sauce

DIRECTIONS:

  • In a heavy sauce pan, simmer butter with half & half until butter melts.
  • Add sun dried tomato and fresh spinach, stir and allow spinach time to wilt.
  • Add Parmesan and Laughing Cow, stir to combine and allow the flavors to meld.
  • Add wine, salt & pepper, then taste sauce, adjusting flavors as needed. Add pasta water, if needed.

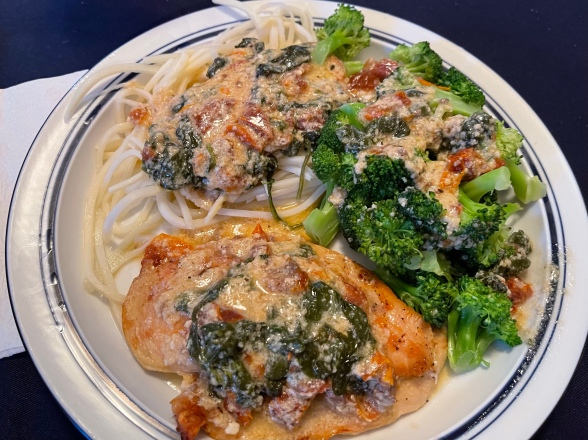
I typically spoon this sauce over baked chicken, pasta, and broccoli, as seen in the photo. I’ve also served this sauce over shrimp. It’s a delicious addition to enhance that plain chicken and vegetable dinner. It doesn’t take long to make this sauce and makes for a beautiful dinner plate!

White Veggie Cups

I’ve now made two or three different renditions of this recipe and it’s become one of my favorites. It’s a great way to use up any leftover vegetables in your fridge and is healthier than most of the things I can come up with to eat for a quick meal. Veggie cups (made with some white wine) are delicious, versatile, and even freeze-able!

Ingredients: 

  • A leafy green vegetable (I’ve used a bunch of Swiss Chard, Spinach, or even Kale), chopped fairly fine
  • Onion (I like to use 1/4-1/3 of a sweet onion), chopped fine
  • Leftover vegetables from the fridge, chopped.  I used a small yellow pepper in these photos, but I chopped up a tomato recently and it was equally delicious
  • Shredded Cheese (I sprinkled a small amount on each muffin cup – it totalled about 3/4 of a cup).  I have used Monterey Jack and Cheddar cheese – use your favorite
  • 2 cups of egg mixture (I used 1 1/2 cups of fat-free egg substitute, 1/4 cup egg whites, and 1/4 cup white wine
  • Seasonings (I like simple salt and pepper, but go wild and use what you like!)WhiteVeggieCups

DIrections:

  1. Chop all your veggies, put your egg mixture together, spray your muffin tin with cooking spray, and pre-heat your oven to 375 degrees.
  2. Into each muffin cup, place some chopped greens, chopped onion, chopped veggie (yellow pepper, tomato, whatever you’re using), and top each with a sprinkling of cheese.  Add seasonings.
  3. Ladle a bit of the egg mixture into each muffin cup, using the ladle to push the veggies and cheese into the egg mixture.  If you have extra egg mixture left over, add it to the cups so everything is as equal as possible but DO NOT overfill the cups.  They should be about 3/4 full since they will puff up as they cook.
  4. Cook the Veggie Cups at 375 degrees for 18-20 minutes until the egg is set.  Allow the veggie cups to cook slightly before removing them from the pan and serving.

This recipe is extremely versatile.  You can add bacon, sausage, or ham to the veggie cups if you’d like.  You can substitute vegetables as you prefer.  This is a great way to make a quick breakfast sandwich but simply toasting an english muffin and putting one veggie cup in the middle.  Play with this recipe and see if it doesn’t become one of your favorites as well.

Enjoy!

Cheesy Red Chicken Enchiladas

In case I’ve never mentioned this, you should know that I love rotisserie chickens.  I take advantage of any chance I get, to pick one up and throw it into my freezer for use at another time.  It truly calms me to know that I can pull one out to make dinner on any given day.  I’m not sure when that started, but a full freezer and pantry can make me feel ready to tackle any obstacle that life may throw at me.  Maybe that’s why I love heading off to Sam’s Club or the local grocery store… but I digress… I want to share a great, easy recipe for chicken enchiladas that can be made from a rotisserie chicken and some staples from the pantry/fridge.  Doesn’t this look delicious??CheesyRedChickenEnchiladas (1)

Here are the ingredients:

  • a chicken from the freezer
  • dry red wine (use what you like or have on hand)
  • one can of pinto beans (or refried beans, your choice)
  • your favorite salsa – one jar
  • chili powder
  • cumin
  • salt/pepper
  • flour tortillas (regular size, your favorite type)
  • cheese (I used an entire bag of 2% milk shredded sharp cheddar)

I pulled one of my frozen chickens out of the fridge and popped it into a large saucepan.  I added about an inch of water and about the same amount of red wine and let the liquid simmer around the chicken (flipping the bird over once or twice) until the meat was warmed and the liquid was nicely seasoned from the chicken.  I then lifted the chicken out of the liquid and allowed it to cool a bit before picking/shredding all the meat off the bones and poured the (now) broth into a measuring up for later use. NOTE: You can also use leftover chicken for this recipe.

I began to make the chicken mixture for inside the enchiladas.  Since I didn’t have a can of refried beans, I popped a can of pinto beans into a small chopper and pulverized the beans until they were *mostly* smooth. Since I had already used the large saucepan to cook the chicken (and so I didn’t have another pan/bowl to wash), I put all the shredded chicken back into the pan. I then added the smashed beans, some salsa, a little of the reserved broth mixture, and seasonings to complete the mixture for inside the enchiladas.

To assemble the dish, I put a bit of salsa and broth mixture on the bottom of a 9×13 baking dish to keep the enchiladas from sticking.  Put a heaping 1/3 cup of the chicken mixture in the center of a flour tortilla, fold the close end over the mixture and pull it back to make a “roll”.  Fold each side in, toward the center, and then roll the enchilada over to enclose the filling.  Place the enchilada, seam-side down, in the coated baking dish and repeat until all the chicken mixture is used and the baking dish is full.  I was able to make a total of 6 enchiladas with this amount of chicken/bean filling, but much will depend on how much you want to put inside each enchilada.  Once all the individual enchiladas are in the baking dish, coat lightly with salsa and sprinkle with lots of cheese (I used an entire bag of shredded cheddar).

You can pop this dish in the freezer at this point if you’d like.  I made this dinner in the morning and my family popped it into the oven so they had a hot dinner while I was at work.  You’ll pop this dish into a preheated 350 degree oven and cook it for 30-40 minutes… cover with foil to bake and remove foil for the last 5 minutes of baking to brown the cheese a bit.

You can serve this dish with a side salad, if you like.  My guys prefer to simply eat the enchiladas by themselves, so they each ate two, while I ate one when I got home.  It was great to have a home-cooked meal after work and I was so glad to have taken the time to put things together.  If you have the time, feel free to make this dinner in two separate dishes and pop one into the freezer for cooking later.  I’ve done this often and it’s a huge help to have a meal available for those days when you don’t feel like cooking or if you want to share a meal with a friend or neighbor.

Remember… I’m never far away if you’re having trouble with one of my recipes.  You can message me on Facebook (From the Bottom of a Wine Bottle) or via Twitter (@alisportshots) and I’ll get back to you asap!  Enjoy!

Starter Recipe: Easy Mazetti

Another one of our family “staple” recipes is this easy and simple Mazetti, a recipe that my mother-in-law gave me early in my marriage.  Over the years, I’ve adjusted the recipe she gave me to either include lots of “hidden vegetables” or to use whatever quick ingredients I had on hand.  NOTE:  for those who are interested in the history of the name of this recipe, I would point you toward my friend, Jenna, at The Gleeful Gourmand, who wrote up this version of “Johnny Marzetti“.  I was fascinated to read the back-story of this great recipe, including her own recipe.  Back to my simple Mazetti… here’s the “down and dirty” of making a quick, hearty meal using just a few ingredients.EasyMazetti

Main Ingredients:

  • One package of ground turkey
  • 1-2 cans tomato soup (I would use one can soup and one can of red wine)
  • 1 1/2 cups of your favorite pasta
  • Cheese (for topping, as desired)

Directions:

  1. Brown your ground turkey in a large skillet in a small amount of olive oil or margarine (whatever you have on hand).  I also like to add 1/2-1 whole diced onion or some green pepper if I have things on hand and want to stretch the food a bit.  I typically will add some red wine and brown the turkey and veggies until the liquid is totally absorbed.
  2. Once the turkey is browned and starting to get a bit crispy, add your tomato soup (or soup and water/wine) and your pasta.  I really like to use large elbow macaroni, but have used ziti, bow tie pasta, or even small shells… use your favorite pasta shape but don’t use egg noodles as they won’t hold up to the cooking process.  NOTE:  You are welcome to cook your pasta separately, but I like the way the sauce flavors the pasta pieces.  Again, it’s entirely up to you.
  3. I enjoy playing with flavors at this point, so I have the unique flavor that I want from each mazetti dish.  I have been known to add more red wine at this point, but I’ve also added a shot of espresso (this darkens the flavor considerably), or just some stock or water.  If the liquid is absorbed and the pasta isn’t thoroughly cooked, you just need to add more liquid.  The pasta will soak up the liquid and become more al dente’… don’t ever give up on the dish as you’re cooking.
  4. To serve, you can pop this into a casserole dish, top it with some shredded cheese and warm it up in a 350 degree oven for 20-30 minutes until everything is bubbly.  If you’re serving from the skillet, you can either omit the cheese or add it on top just before serving and put the lid on your pan to give the cheese time to melt.  Either way is delicious… my boys have eaten this dish in many different variations and have loved it each time.

An extra way to make this dish special is to top it with buttered bread crumbs.  I have a recipe for making buttered bread crumbs on my website as a “bonus recipe”, included with “How to make a sauce“.  Both of these recipes would qualify as “starter recipes”, so please feel free to check this one out as well. I’ve just added the “starter recipe” tag, so you should be able to find it that way as well.

I hope you’ll check out Jenna’s recipe and her history of this recipe… it’s so interesting to find out where recipes originate! Since my Mother-in-Law lives in Michigan and is originally from Rhode Island, her recipe could be a variation of Johnny Marzetti, but it will forever be one of my favorites from her.  I was so touched when she shared one of her favorite recipes with me… it always reminds me of her, no matter how I actually end up making the final dish… it’s comfort food to me.


Leftover Recipe: Sausage Muffin Breakfast Casserole

Have you ever had leftover Sausage Muffins and not known what to do with them?  It  *is* a dilemma, right?  I really hate to waste food, so when I purchased too many sandwiches one Sunday morning (and ended up bringing five of them home that evening), I knew I needed to come up with a workable solution.  After thinking about the composition of the sandwiches for a bit, I came up with a great way to use these tasty treats in a way that changed them into something relatively healthy and totally yummy… a breakfast casserole!

NOTE:  This is a recipe that is best made the night before you plan to bake it, so the bread has time to soak up SausageMuffinBreakfastthe liquid.  I actually put this casserole together when I brought the cold sandwiches home from work on Sunday night so I would have something ready for breakfast that I could also take into work to share with co-workers on Monday. 

I started with five sausage muffin sandwiches.  The ones I purchased simply had english muffins, a sausage patty, and some cheese, so I diced them into bite-sized pieces and loaded them into a pie plate, sprayed with cooking spray.  I then made a mixture of 3/4 cup egg substitute, 1 cup unsweetened vanilla almond milk  (you could certainly substitute any milk product you like, but I really like almond milk for baking… and for the low calorie count), 1/2 cup shredded 2% cheddar cheese, 1/2 cup shredded 2% colby cheese, 1 Tablespoon dry mustard, 1 teaspoon each of parsley and herbs de provence, and 1/2 cup James River Cellars Reserve Chardonnay white wine.  As with all my recipes, you’re welcome to substitute your favorite ingredients wherever you see something you’d prefer.  Different flavored cheeses and any sort of white wine you like (or have open) is a great way to personalize this recipe.

I whisked the liquids and cheeses together and poured them over the sausage muffins in the pie plate.  I then pressed the muffins down into the liquid so they would have the best chance to become thoroughly soaked before I baked the casserole in the morning.  I covered the casserole with some plastic wrap and allowed the dish to sit overnight.  NOTE: You can also place a weighted plate on top to continue the pressure on the casserole until you bake it.  I ended up adding an additional drizzle of 1/4 egg substitute before baking in the morning because mine just didn’t look quite “soaked” enough.  Just before baking the casserole, I garnished the top with some smoked paprika and popped the dish into a preheated 350 degree oven for 35-40 minutes.

This was a really delicious casserole.  I shared it with my co-workers and it got rave reviews from everyone, which made me very happy.  I was able to create something that tasted totally “new”, using something that otherwise might have gone to waste.  To me, that counts as a win-win!

I hope you’ll try this recipe sometime.  Being able to make a totally new meal with a leftover ingredient is pretty fun!

Leftover Recipe: Leftover Breakfast Hash

Dinner recently consisted of roasted potatoes, chicken tenders, shrimp, bacon, and a few other items but I ended up with enough leftovers to play a bit with breakfast the next morning.  As you can see in the photo, this is a rendition of my previously posted Breakfast Hash recipe.  I didn’t have to run to the store for anything and it was a great start to my day.  Hopefully, you’ll find this to be a recipe that you can re-create for your family.

LeftoverBreakfastHash (1)

I started by sauteing a singe leftover piece of bacon (honest… it really was left over) until it was crispy.  I then added a cup of leftover roasted potato and allowed it to crisp a bit.  The “fun” addition here was a bit of James River Cellars Petit Verdot red wine and some frozen pieces of peppers (red, yellow, and green).  Once I let the wine incorporate into the potato and the peppers cooked, I added 1/4 cup fat-free egg substitute and tossed that with everything so the cooked egg would end up all over the recipe.  The final addition was 1/8 cup of 2% milk shredded mild cheddar cheese.  Once the cheese melted, I plated my breakfast.

This was a fun and tasty way to use up leftovers.  Chopped peppers freeze very nicely, so it’s easy to have them on hand for a touch of color in a dish.  This is something that I’ll be incorporating more often, since I love seeing the bright additions to dishes that can sometimes become a bit bland.

Next time someone tells you the old joke, “what do you call a meal without wine… Breakfast”, feel free to share this idea for a yummy turn on using wine in your cooking.  Enjoy!


Recipe: Pinot’d Pizza

Ok… I’m almost embarrassed at how easy and simple this pizza was… well, almost.  The wine portion of this meal came from simply “thumbing” some Pinot Noir over the pizza that I put together tonight for dinner.  Honest!  It’s a lazy, Friday night, so here’s my favorite way to make a homemade dinner without a huge amount of effort… and here’s how I put everything together.

I started with a trip to my local pizza place and purchased a medium size pizza dough for $4.00.  Seriously… $4.00 and I had enough dough to split into 2/3 dough for my hubby’s pizza and 1/3 dough for my own pizza.  It’s the perfect “single-serve” amount of pizza for dinner for me and the cost is totally worth it.  NOTE:  if I’m planning on feeding more people, I would obviously purchase more dough.  My boys like thicker pizzas, so I would have picked up a medium size for each of them and do our 1/3:2/3 split for us.  See if your favorite pizza place sells dough… it’s a huge timesaver!PinotPizza

I had thrown the dough in the fridge when I got home, so I pulled it out to rest for about an hour before starting to make our dinner.  M and I have things down pat when making pizza for dinner.  I make the crusts for everyone and then, together, he/I add all the toppings and such.  My pizza tonight consisted of jarred pasta sauce (go cheap if you like… it’s getting covered after all), a large handful of spinach/arugula mix, cut in thin strips  (this is called a chiffonade), crumbled gouda cheese, mozzarella cheese, and  garlic salt.  I layered everything in order mentioned and added as much or as little as looked right to me at the moment.  The “pre-oven” pizza pic is on the left.  NOTE: for those of you wondering, my husband makes a mean pepperoni pizza with light sauce and light cheese… and NO wine.  LOL.

At the last moment,  I pulled out a bottle of Pinot Noir red wine that I had just opened and used my thumb to sprinkle the wine over my pizza.  Weird, I know, but it was one of those “why not” moments.  The pizza went into a pre-heated 475 degree oven for 10-15 minutes.  Don’t leave the house or plan to be too far away… this pizza can go from “almost perfect” to “burned” fairly quickly if you’re not watching.

With the extra liquid on top of my pizza, I needed to let it rest for a few minutes before cutting it into 8 pieces and inhaling… I mean, eating… my dinner.  It was a wonderful way to end the week.

May your evening meal be as entertaining AND delicious as ours!

How to make a sauce… and a bonus recipe

Have you ever been frustrated when trying to make a sauce (or even a simple gravy) for dinner?  Here’s a basic sauce recipe that you can personalize to fit any meal… and it’s easy!  I’m also including a mash-up of step-by-step photos so you get a feel for how each stage should look… hopefully that will help as you create your own masterpiece.

Start with butter, olive oil, and flour.  I typically will start with a 1:1 ratio of fat to flour, so if I’m using one tablespoon of butter and one tablespoon of oil, I’ll use 2 tablespoons of flour.  Note:  Much of this is driven by the amount of sauce you want to make, so if you’re hoping for a large amount of sauce for a casserole, feel free to double these amounts.   Saute’ your fat/flour in a pan until it’s bubbling and gets just a slight bit “toasty” looking… you’re making a simple roux to start this sauce.  (This is the first photo I’ve included in the upper left corner.)

SauceBasics

Once you’ve given the flour some time to cook, you’ll begin adding your liquids.  I like start by adding wine first.  I use whichever wine I feel will go nicely with the end product.  I used James River Cellars’ Montpelier (a Cabernet Franc “Blanc”, if you will) and thought it paired well with the cheese I was using.  (The second photo, below the first shot)  Feel free to use red wine if you’re making a sauce for something heartier than chicken or fish.  I always use a whisk and make sure to thoroughly incorporate the liquid into the sauce at each point before moving on to the next.  How much wine you add is entirely up to you.  I like to add about a cup at the beginning (use your morning coffee cup if you’d rather not get another thing dirty).  Whisk the wine into the sauce and as it starts to tighten up, you’ll begin to recognize when to add more liquid.

After adding wine, I like to then add stock to my sauce.  I try to always have some chicken stock (or broth) in the fridge but feel free to use whatever flavor you feel will best fit the rest of the meal.  When taking the photos for this post, I was making a sauce for my Chicken Divan casserole, so I used chicken stock.  If I were making a sauce to top a steak or piece of beef, I would have used beef stock.  Try to always keep your final product in mind while making segments of a meal so that everything coordinates nicely.

At this point, you’ve got a lovely, smooth gravy.  Add some Worchestershire sauce, liquid smoke, or a dash of Liquid Aminos and you’ll have a great way to bring some pizzazz to your meal.  Since I was making a sauce for a casserole, I needed more “heft” to this sauce and decided to add 4oz of grated cheese.  I used a Monetary Jack cheese to pair with the Montpelier wine I used earlier, but sharp cheddar would pair nicely with a big red wine and a mild colby or creamy goat cheese can accent the crisp taste of a bright Chardonnay or Vidal Blanc.  Choose your favorite and make the sauce your own!

Once the cheese is incorporated, and the sauce is smooth and creamy, add your spices at the last moment.  Again, I was making a Chicken Divan, so I chose to add a palmful of curry powder and some dried parsley.  This is another opportunity to personalize your sauce and make it taste the way *you* want.   Allow the sauce to cook for a moment, whisking as you go, and use it however you like.  In this case, I poured the sauce over a casserole of chicken and broccoli – it was the perfect piece to pull all the flavors together.  YUM!

Now, I *DID* promise you a “bonus recipe”… here it is:  Buttered Bread Crumbs!

ButteredBreadCrumbs

I’ll admit that “Buttered Bread Crumbs” doesn’t sound like much of a bonus, but if you’ve never made this wonderful topping for a casserole, you have no idea what you’re missing.

I reused the pan in which I had just made the curry sauce and warmed some olive oil, butter, garlic, and salt.  I simmered this mixture a bit while I cubed up four potato rolls that I had on hand.  I have made this using chiabatta bread… homemade bread… leftover rolls… I’ve even used a few slices of a simple white bread.  Use what you have on hand… this is a topping and meant to be a way to use leftover loaves of bread.  No matter what you use, it’s a really tasty addition.

Once your butter mixture is warm and your bread is cubed, add the two together and toss them over medium heat until they pick up some crispy edges.  They don’t have to be entirely cooked… they’ll toast up in the oven after you put them on top of the casserole.  NOTE: If you’re making bread crumbs for a salad, you *will* want to toast them long enough to get them crispy on all sides.

Simple, right?  I adore this bread crumb topping… it’s something from my childhood that brings back wonderful memories of comfort foods and family meals.  I hope you enjoy trying this topping for your family casseroles!

Helpful hint:  If you’re reheating a casserole, you can add some fresh buttered bread crumbs to the top and toast it in the oven before serving… no one will guess that you’re serving leftovers!

Enjoy!
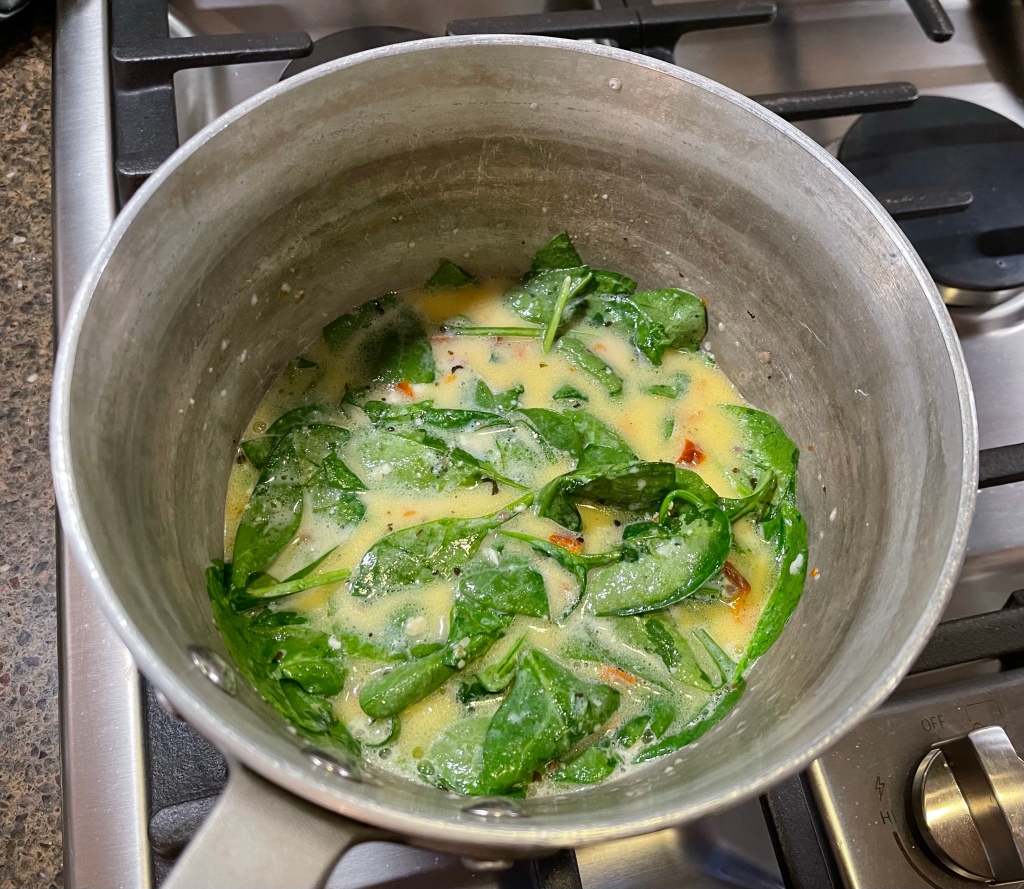
Recipe: Taco Wine Braid

Here’s a recipe that is has it ALL.  It tastes fabulous, it’s simple to make, and it looks really impressive… what more could you want?!  I made this for my family this weekend and everyone agreed that it was a terrific recipe that I had to share as soon as possible.  I’ll admit that the name of this recipe sounds a bit odd, but it really is a good descriptor, if you look at the photos.   I was using the base from a previous post (Weeknight Taco Pie) and then got a little creative after watching our cousin Ann whip up a delicious lunch that looked like something from a magazine.

Since I wasn’t going to have a lot of time for dinner prep on Sunday, I decided to cook the “taco meat” part of this meal a day ahead of time.  I started with one package of ground turkey, one packet of taco seasoning and some red wine.  I cooked the ground turkey, added the entire packet of taco seasoning, and then added the red wine.  I substituted approximately the same amount of red wine as the packet called for water (ok… I guestimated, since I didn’t want to use a measuring cup) and allowed the browned ground turkey to soak up every ounce of liquid and taco seasoning before adding one jar of black bean salsa (of the “medium-heat” variety).

NOTE: Since I wasn’t at home and didn’t have any James River Cellars wine on hand, I used a bottle of Malbec that I chose at the local market.  I like Malbec, as a general rule of thumb, so this was an easy call for me.  Remember… use the wine you like to drink or have on hand.  If I’d had an open bottle of Pinot Noir, I could certainly have used that.  The flavor will differ slightly from varietal to varietal, but that’s what makes cooking so much fun.  You can also leave the wine out entirely and just use water OR you can add beef stock/broth in place of the water.  USE THE FORCE… be brave!

TacoWineBraidI cooked the taco/salsa mixture until it was very dry and allowed it to cool a bit before storing it in the fridge for the night.  I don’t always do this, but it actually allowed the flavors to meld and mellow a bit, which was welcome surprise.  If you like your food spicy, feel free to use more seasoning or amp up the flavor using a different salsa.  That’s the beauty of making your own food… you can do what you like!

The fun part of this dish came when I decided not to put the taco mixture into a pie plate and bake it.  On a cookie sheet lined with foil (and sprayed with cooking spray), I laid out two packages of refrigerated crescent dough beside one another (so it looked like a really long rectangle.  I then spooned the taco/salsa mixture down the center and topped it with one package of shredded Mexican-style cheese (again… use what you like here).  Using a knife, I made slits along each side (making sure they matched), starting at the meat mixture and going to the outside edge of the dough (but don’t cut through the foil).

Here’s where it got COOL.  Gather up corresponding edges of dough, bring them to the center, twist them, and lay them back down in line (or slightly overlapped… YOUR CHOICE).  Repeat this with all the strips of dough until you get to the end, then pinch the ends closed.  It should look like the photo on the bottom left-hand corner.  If you want to be really fancy, top with cheese (like I did in the photo), brush with a simple egg wash (easy if you use some egg substitute and a little water), or just spray with cooking spray.  Pop your Taco Wine Braid into a 375 degree oven for 15-20 minutes, until the dough is nicely browned and you can see some bubbling of the taco meat peeking through the holes in the braid.  Let it sit for a few minutes while you gather the plates to serve this gorgeous dinner to your adoring public.

I like to serve this dinner with some lettuce, tomato, and sour cream… again, this is all personal preference.  For our dinner, I used one head of butter lettuce (because the romaine looked like it would be too much), a small container of grape tomatoes, and a tiny package of light sour cream.  Whatever you choose will be wonderful as long as you use what you like or have on hand.

This was a dinner that was a huge hit with everyone in my family.    See if you don’t get some rave reviews of your own if you make it sometime soon for your own family.  Enjoy!

Recipe: Easy Enchiladas

This is a recipe that I first saw on another blog (kevinandamanda.com) and knew I just HAD to try!  The original recipe called for a lot more cheese and enchilada sauce than I knew my family would like… plus, there was no wine in the recipe.  I just *had* to re-work it into something that would work for me and my wine-inspired blog.  Thankfully, it was a huge hit and has already been made numerous times to great positive acclaim.

EasyEnchiladas

What I love most about this recipe is that it truly is incredibly easy.  I’d always been a bit intimidated by enchiladas for some reason, but not any more when I use this recipe.  Much of this meal was done by simply assembling the ingredients, but first, I had to make some rice.

I used James River Cellars Gewurztraminer wine but could have easily used another favorite wine (Chardonnel, Vidal Blanc, or even Chardonay) to make the rice for this dish.  I used 1 cup of wine, 1 cup of water, and 1 cup of Arborio rice.  I simmered the rice until the liquid was absorbed and the rice was fluffy.  I did add some parsley, salt and pepper, but feel free to add whatever flavors you like in your rice.  Just remember that the rice is a fairly tame part of this assembly line, so don’t go too crazy with the seasonings.

I also decided to use a pre-roasted chicken in this recipe.   I pulled off both chicken breasts and diced the meat small enough to layer in the enchiladas.

Overall, your ingredients are as follows:  tortillas, hummus, rice, chicken, cheese, and enchilada sauce.  As with all my recipes, please feel free to personalize things to your family’s tastes.  Red Pepper Hummus instead of a Garlic Hummus, Mexican cheese in place of Cheddar, Whole Wheat Tortillas as opposed to bulk purchased tortillas or even homemade tortillas. . .  it’s all about making a meal that will make you and your family happy.

Assembling your enchiladas. . . here’s where the fun starts!  Place the tortilla on a cutting board and begin the layering with hummus, a layer of rice (mine is fairly sticky and soft), some chicken, and a sprinkle of cheese.  You can see an example in the second photo from the left… I throw on a fair amount of cheese, but do whatever will make you happy.  I made all the enchiladas, laying them in the baking dish, then poured some enchilada sauce over top and finished by sprinkling on more cheese.  Note:  I loved the Cheesy Enchilada recipe that inspired this alteration but know that my guys would have balked if I had followed her recipe exactly. . .  hence the need for an “Easy Enchilada” recipe of my own.

Once your enchiladas are assembled and ready, you can wait a bit to bake them if you must.  I had a hard time not popping them directly into the oven (I was already hungry by this point) but I was “good” and waited until my darling hubby and son got home from work.  Once they arrived, I popped the baking dish into a 350 degree oven for 30-40 minutes, until the cheese was melty, I could hear sizzling, and there was visible steam rising from the enchiladas.  Seriously. . . I don’t usually use “exact times”, so use your best guess on cooking time, based on your own oven.

As you can see by the large photo of an enchilada, above, these things were really filling.  I thought everyone would end up eating two enchiladas each, but we could barely make it through one.  If you’re making this for a crowd, feel free to expect football players to eat two, but the average person will probably only make it through one.  They are aa-maze-ing!

Hope you find this recipe to be as amazing as we did. . . and, as always, be sure to alter the ingredients to make your own “family favorite”!