Recipe: Weeknight Chicken and Potatoes

I really love meals that don’t take a huge amount of effort on my part.  The oven does most of the work and I just transfer things from one place to another until dinner just “comes together”.  Such was the case with this meal.

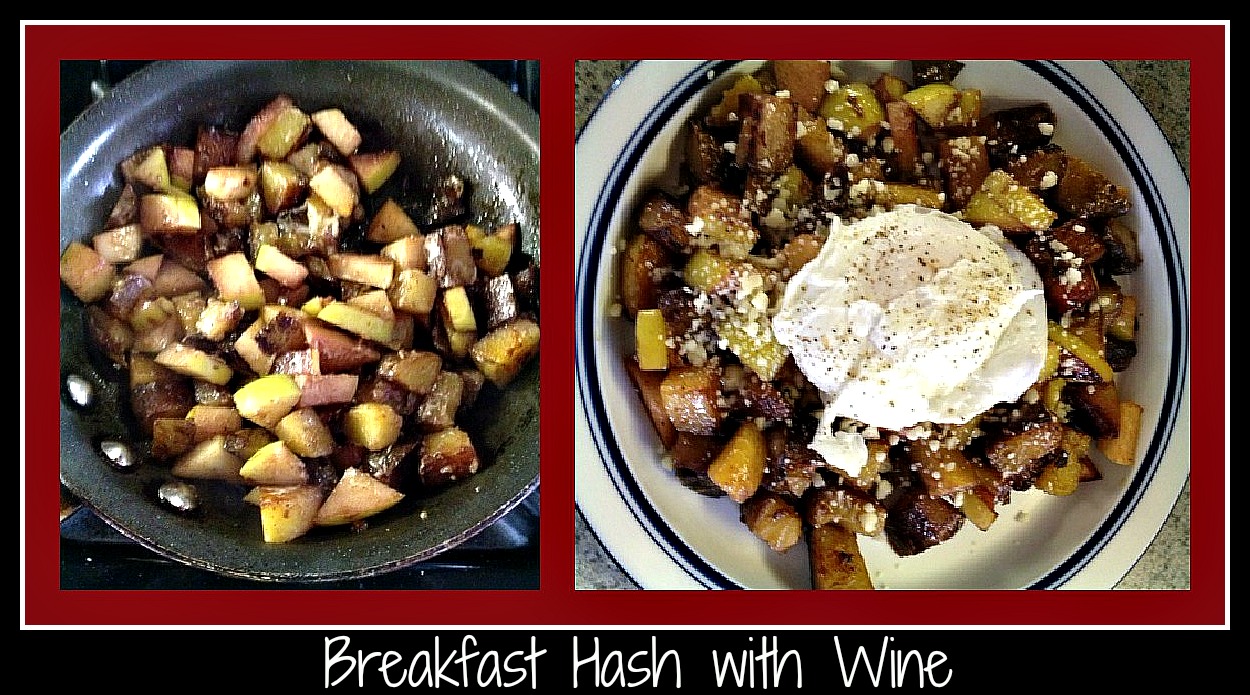
I started with a few potatoes.  Much depends on how many mouths I’m feeding at any given meal, but I usually try to stick with the “one-and-a-half potato per person” rule if I’m just roasting these bad boys.  I diced them into chunks and then diced a half an onion to add some flavor.  Once these were done, I tossed both in a bowl with some balsamic salad dressing and laid them out on a baking sheet to roast for an hour or so in a 375 degree oven.

Since the potatoes were going to take awhile, I started the chicken a little after I had the potatoes in the oven.  I had purchased “thin cut chicken breasts” from the store, with the intention of using them for my chicken prosciutto rolls, but totally forgot to pick up the Boursin cheese.  Instead, I had 6 lovely thin chicken breasts that I decided to simply saute on the stove top.  I seasoned them, using more of the same balsamic salad dressing that I’d put on the potatoes, and then added more salt and pepper for good measure.  Using a heavy skillet, I sauteed the breasts in a little olive oil and butter until they were nicely browned and cooked through.  Since there were six breasts in the package, I did them in two shifts so they didn’t crowd the pan and cooked more evenly.  Once the outsides were nicely caramelized and toasty, I removed them to a platter and popped some foil on top to keep them warm. Note: I also put the platter into the oven for about 5-7 minutes before dinner was ready to reheat just a touch.

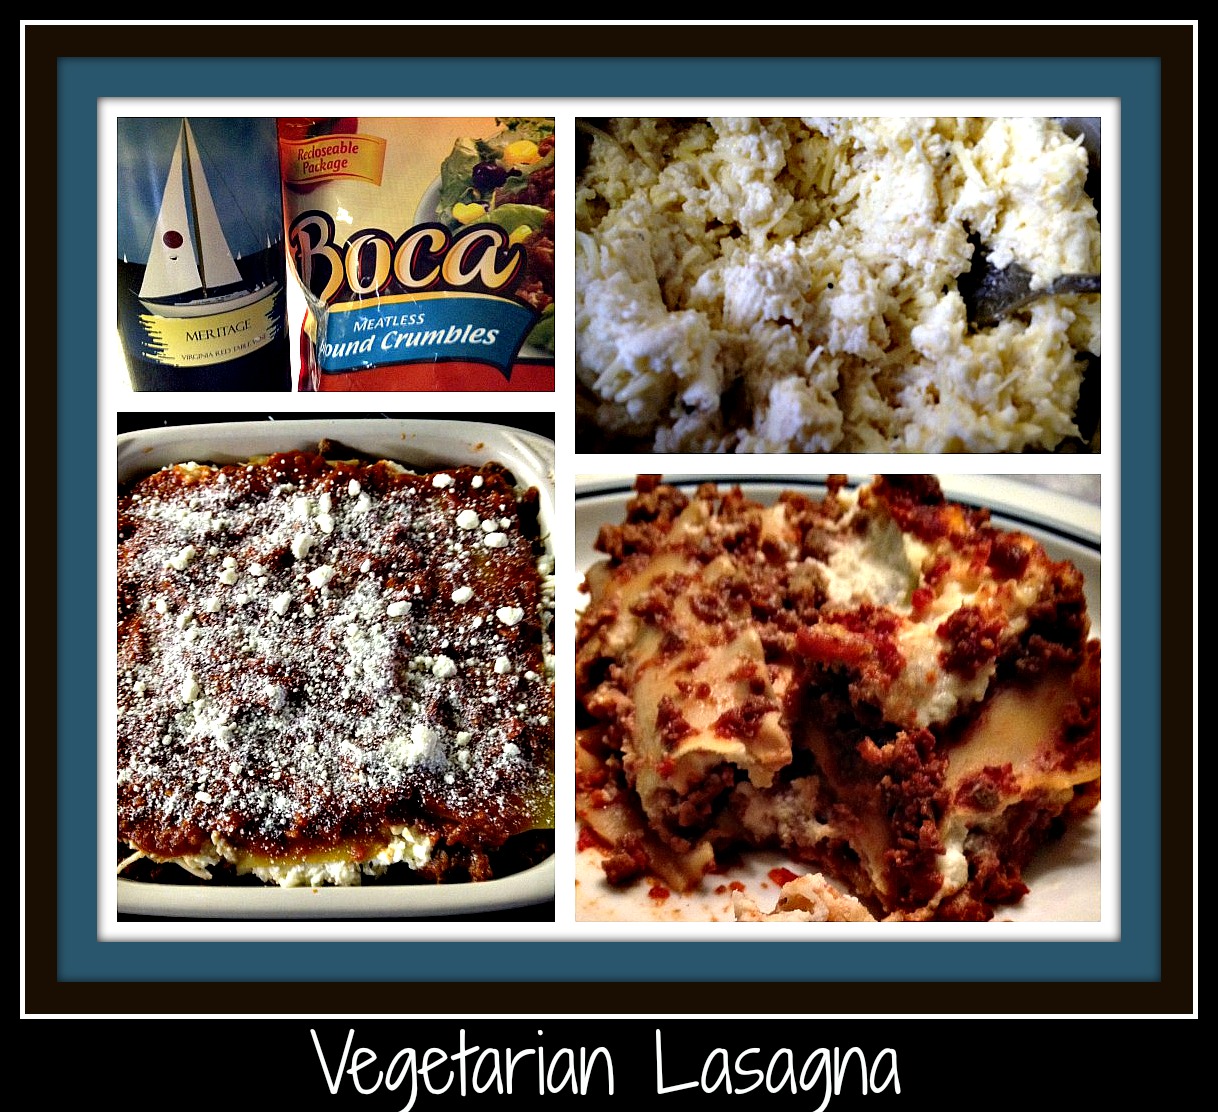
With all the yummy bits that were left in the pan, I thought a nice gravy was in order to make dinner to come together.  I put a pat of butter and a spoonful of flour into the skillet and let the fat/flour combine and sizzle a bit to cook off the raw floWeeknight ChickenNpotatoesur taste.  I then added a healthy helping of James River Meritage Red Wine (I chose the Meritage simply because that’s what I had in the fridge… I could have just as easily switched out the red wine for James River Reserve Chardonnay.  Use what you have available or what you like best) and whisked the gravy together to incorporate the flavors and pick up all the bits that had been left in the pan from the sauteed chicken.  After tasting the gravy, I adjusted the seasonings with some salt, pepper, and dry Italian seasonings until I was satisfied.

Oh, and I had thrown some broccoli florets on top of the potatoes (after the potatoes were almost finished) so we’d have a green vegetable for dinner… this was purely for my benefit, since none of my guys have any interest in eating green vegetables unless they’re coerced.

For serving, I put a single layer of the roasted potatoes/onions on the plate and topped them with a chicken breast and some pan gravy.   Obviously, this picture is of the plate I made up for my son, since there are two breasts on the plate and not a speck of green to be seen.   It was a really tasty dinner, even if I was the only one to eat the green stuff.  Maybe you’ll have better luck with your family if you top their broccoli with a little gravy?


Recipe: Pantry Spaghetti Sauce

I needed to make a quick and healthy dinner tonight and decided to simply search through my pantry and see what I could find.

First, I opened the freezer and found some meatballs that I’d totally forgotten. What goes best with meatballs in our house is spaghetti… but I didn’t have enough sauce to cover everything. I put the meatballs into a 375 degree oven and let them roast until they were browned and toasty. Mmmm…. now for the rest of the story…er… dinner?PantrySpaghettiSauce

To make the sauce, I started with some leftover onion (I had about 1/4 of a Vidalia onion left in the fridge),olive oil, and a touch of butter. I sauteed the onion and then added 2 chopped garlic cloves and about 2 cups of thinly chopped spinach.

Once the sauteed vegetables were soft, I added in a large can of crushed tomatoes and some red wine (like James River Cellars Rad Red wine), then let the sauce simmer for a bit. Salt and pepper, along with some Italian seasonings, had the sauce tasting really wonderful, but it was still missing something.

That something turned out to be a packet of pitted black olives. Once chopped, they added a fabulously salty bit of yumminess that took the entire dinner to a new height. I popped the baked meatballs into the sauce and cooked the pasta (I used about 1/3 of a package of vermicelli) so everything would come together quickly when we were ready for dinner. Hint: Stir in a few ice cubes in with the pasta in the pot when it’s cooked to your liking, to stop the cooking process. I’ve found that it also keeps the pasta from sticking together. Weird, huh?

I hope you’ll consider trying something like this for your next “quick” dinner… it’s amazing when things come together to make something so tasty AND healthy. Enjoy!


Comfort Foods

Just a quick note to say that, in my humble opinion, there’s nothing more comforting than soup and a sandwich for dinner when you’re sick.

My darling hubby has a cold. He’s not sick often, but when he gets a cold, it knocks him for a loop. Because of that, I pulled out my favorite recipe for Chicken Noodle Soup (see previous post on this blog) to get him on the road back to “healthy”. This recipe is a classic… Simple, clean, and full of chicken soup goodness.

Try it the next time someone in your household is feeling under-the-weather. Add in an easy grilled cheese sandwich and you’ve got a great meal full of love. Doesn’t it just look like it’ll make you feel better??

Wishing you health as we head into the middle of March!

20130315-195240.jpg

Recipe: Easy Beef Stew

I love making a dinner that cooks long on its own…. something that takes short bursts of attention and ends up being incredibly tasty. This recipe could probably have been done in the crockpot, but I chose to start it in my large Calphalon skillet and just cooked it that way for the afternoon.

I started with two packages of “sale beef” – one was a packet of beef strips for stir-fry and the other was a packet of stew beef. Since I pulled both out of the freezer in the morning, I chose to slice the beef while things were partially frozen so the cutting would go faster. Once the beef was sliced, I sliced a vidalia onion and left both items on my cutting board for a moment.

Using my large Calphalon skillet, I heated one T of butter and one T of olive oil. When this was sizzling, I popped both the beef and onions in the skillet to brown. The kitchen started to smell wonderful, so I popped in three or four garlic cloves and then put the skillet into the oven at 350 degrees for an hour or so.

When I went back to the skillet a little later, the meat and onions had started to carmelize, so I added some James River Cellars Rad Red (you can just as easily use a Cabernet Sauvignon, a Cabernet Franc, or a Meritage for this dinner), as well as some salt and pepper, and popped it back in the oven. At the next look, dinner was looking a little soup-y, so I shook a spoonful of flour over top and stirred it into the sauce. Note: make sure to taste your food along the way – it’s much easier to adjust the flavors throughout the cooking process than to dump in a spoonful of garlic salt at the end.

When dinner was almost complete, I tossed in some frozen peas, stirred them into the sauce, and returned the skillet to the oven until the peas were cooked and dinner tasted “ready”. I warmed up some rolls, but you could also use pre-made rolls or breadsticks, depending on your family’s preference.

My favorite part of this dinner was the fact that I could be doing other things throughout the afternoon and dinner still turned out fabulously. The beef had a rich, deep flavor and the sauce that I had at the end was perfect when served over a baked potato (as pictured) or over pasta (as my husband preferred). Either way, dinner was a success and this recipe became an instant favorite. I hope you’ll try making this for your own family and see if it doesn’t become a favorite for you as well. Enjoy!

20130228-134859.jpg

Recipe: Breakfast Hash with Wine

People have been joking with me for years about pairing wine and breakfast… so that’s been my latest challenge.  To create a tasty breakfast food that somehow incorporates wine?  I couldn’t imagine it… until this morning.

I started with a pre-baked potato.  I diced the potato and began to saute it in a mixture of olive oil and margarine.  As it browned, I diced about 1/3 of a granny smith apple and added that to the pan.  In the meantime, I boiled water with a bit of white vinegar to cook a quick poached egg.   The picture on the left is of the potato/apple mixture as it cooked and browned.

To add a kick of flavor to this simple dish, I added 1/4 cup of James River Cellars Petit Verdot as well as a spoonful of House Sauce (from Take It Away in Charlottesville.  Note: this sauce can also be found at The Cheese Shop in Williamsburg).  The wine added a lovely tinge of pink to the potato and apple pieces and the House sauce brought its own smokey mayonnaise touch.  Using both in combination created a wonderful flavor that otherwise might have relegated this dish to the “ho-hum” list.

As I plated my breakfast, I sprinkled the potato/apple mixture with 1T of Asiago cheese crumbles.  I gently laid the poached egg on top and added a bit of cracked pepper.  It was amazing.Breakfast Hash

Nothing is “out of bounds” when it comes to cooking… try it and see how you like adding wine as a flavoring agent.  You might be inspired and totally surprised with a new favorite.   I certainly did!

Recipe: Shrimp Puttanesca

I have to caveat this post by saying that this sauce is not a true Puttanesca… it has none of the tomatoes, olives, and capers one would expect in a traditional puttanesca sauce, should you place an order for this in a restaurant.  My darling husband isn’t a fan of olives and capers, but I was hungry for something along the same lines of a puttanesca sauce with shrimp, so this is the recipe that came about.  I hope you enjoy it as much as we did!

I started with a frozen package of Extra Jumbo Shrimp from my local grocery store.  I love to pick up packages of shrimp any time they’re on sale, so this is always a “go to” for me… especially since my husband and I both love shrimp.  I thawed and shelled the shrimp while they were still partially frozen, so they were easy to peel.  I also put a pot of pasta on to cook… cook as much as you’d like for your meal.  We like either bowties, rotini, or ziti as any of these hold the sauce nicely and are easy to eat with a fork.  If you like spaghetti or linguini, this would be a great recipe to use as well.ShrimpPuttanesca

Once the pasta is almost cooked, I warmed up some olive oil and then sauteed a large amount of finely chopped garlic and shallots until softened and lightly browned.  Into the pan, I then added two anchovy fillets (I used the ones packed in oil, because that’s what I had in the cupboard – I’ll use anchovies packed in water for the next rendition) and allowed them to melt into a sauce.  SIDE NOTE:  Anchovies are fun to cook with because they really do melt into the sauce when exposed to heat and bring a salty back note to any sauce.  I find them fun to use, as long as my family isn’t aware that I’m using them… they’re a little finicky about fish in their sauces.  Once the base of the sauce was cooked and the anchovies were incorporated, I added the shrimp.  As you can see in the photo, I sliced the shrimp length-wise so they would curl up and look pretty in the dish.  This also allowed the shrimp to cook pretty quickly and pick up the sauce even better than if they were whole.

With the shrimp were in the pan and starting to cook, I added some James River Cellars’ Chardonnay to fill out the sauce.  If I were trying to make a meal without wine (why would anyone DO that??), I’d simply substitute chicken stock for the wine.  I allowed the wine to cook into the shrimp and add a lovely taste to the seafood before topping the entire dish with some chopped parsley.  If the sauce is still a little thick, you can add more wine OR you can add a little pasta water.   The pasta water will end up thickening the sauce as well, so adding both is not a bad idea either.

For plating purposes, I drained the pasta and then tossed it into the shrimp and sauce.  This dinner was a huge hit and will definitely be seen often in my “easy/go-to” line up of recipes.  Try it yourself and see if you don’t add it to your own family’s favorites!

If you’re thinking about making a Valentine’s dinner, this is wonderful for a seafood lover.  Just add some crusty bread and a decadent dessert, and your loved one will be putty in your hands.  Happy Valentine’s Day!

Recipe: Meritage Cheddar Bread

I pulled out one of my Bread Machine cookbooks recently and was taken with the idea of creating a wine and cheese bread. I had apparently tried this recipe before, as evidenced by some ancient notes I’d written, but was bound and determined to try it again. Since I had some extra sharp cheddar in the fridge and a small amount of red wine from work, I decided it was worth the time to see how this experiment would come out.

I started with a bottle of Veritas’ Vintner’s Reserve red wine. I had helped work the recent Governor’s Cup Seminar and was given the remains of one of the medal winners. This wine is a meritage-like blend that I really enjoyed, so it was a good wine to use, in my opinion. I wanted to use something similar to the James River Cellars’ Meritage and this wine fit the bill for me. I also had some extra sharp cheddar cheese that was leftover from a recent event at the winery, so I really was killing two birds with one stone, so to speak.

20130205-153536.jpg

As you can see by the photos across the top of the collage, I used my bread machine for the dough portion of this recipe. It made my life so much easier. Here are the directions for making this bread, using a machine such as the Zojirushi that I have.

Ingredients:
3/4 cup wine
2/3 cup sharp cheddar cheese, shredded
1 1/2T margarine
1/2 t salt
3/4 t sugar
2 1/4 c flour
1 1/2 t yeast

Directions:
I put all the ingredients into the machine and allowed it to do it’s work. Once the dough was ready, I separated it into two sections and rolled each as if for French bread. I placed each length on my baking tray and allowed them to rise for 30-45 minutes. Once they had risen sufficiently, I sprayed them with water and baked them in a 375 degree oven for 30 minutes or so. I also turned the pan around mid-way through the baking process and sprayed the loaves with water again. As you can see in the photo, the loaves split, so next time I’ll make sure to slice them a few times to allow for steam to vent.

This experiment turned out fairly well, although I might just let the loaves bake in the machine next time to see how they differ. This would be a nice base for a simple garlic toast to accompany a dinner or used as an appetizer under a fresh tomato/basil topping. Try it and see how you’d like to use it… I’d love to hear your feedback!

Recipe: Chardonnay Cassoulet

It was snowing yesterday and I wanted to make a stew that would make me feel warm.  Thinking about what always makes me think of roaring fires and home-cooked meals, I decided to make a chicken cassoulet.  For those who think that a cassoulet is something beyond their abilities, I would strongly suggest trying this recipe, then sit back and bask in the compliments.  This is a simple, stove-top casserole that has all the elements of a meal that would normally take all day to cook.  Thankfully, with a few simple substitutions, this dinner can come together fairly easily and be just as tasty (in my opinion).  I’ve adapted a recipe that I originally found through a weight-loss program cookbook, so it’s not quite as trim as it might be, but it IS pretty yummy.

Ingredients:ChardonnayCassoulet

  • 1 package (8 total) boneless, skinless chicken thighs
  • 1 package diced prosciutto (my grocery store sells this, pre-packaged, in the deli area)
  • 2 cups baby carrots, sliced
  • 2 cups celery, diced
  • 1 large leek, cleaned and sliced
  • garlic, chopped (I typically use 2-3 cloves)
  • 2 cans cannellini (white kidney) beans  (I use them with their liquid and smash one can for thickness)
  • 2 cups chicken stock/broth
  • 1 cup Chardonnay (I like to use James River Cellars Reserve Chardonnay – use your favorite)
  • 1T dried lemon thyme (I have a jar of this from a friend – use regular thyme if you prefer)
  • 1T dried poultry seasoning (the leafy stuff, not the ground variety)
  • 2 bay leaves
  • salt and pepper to taste

Directions:

  1. Preheat oven to 350 degrees.
  2. Using a stock pot sprayed with Pam, brown chicken thighs on both sides  and then transfer to a plate.  Set aside for a bit.
  3. In same large pot, saute prosciutto until lightly crispy.  Add veggies (carrots, celery, leek, and garlic) and saute until vegetables begin to wilt.
  4. Add remaining ingredients and bring everything to a simmer.  The meal will now look like a soup, even with the mashed can of beans.  (*First photo on the top left of the collage)
  5. Add the chicken and collected liquids to the mixture, push the meat deep into the broth, and put the lid on the pot.  (*Middle photo on top of the collage)
  6. Pop the stock pot into the oven and bake until the meat is falling apart and the broth has thickened, about 1 1/2 hours.  Remove the two bay leaves and discard.
  7. Using an immersion blender, blend 3-4 times in very short bursts to thicken the vegetables but not destroy the chicken.  You can also spoon a cup of the vegetables into a blender, pulse until smooth, and return to the dish.  This will also thicken the meal without destroying the meat. (*Right side photo on top of the collage)

I love the addition of a hearty sourdough bread with this meal (as shown in the bottom photo of the collage).   While this meal takes some time to make, it’s really the baking that takes the most time.  Skill-wise, it’s not much more difficult than making soup, so it’s definitely worth a trip to the store for a few special ingredients to make this for dinner.

I mean, really… how many times do you get to use a special french word to describe something so homey and comforting?  I could have easily called this dinner a “Chardonnay Casserole”, but it sounds so much more unique and mysterious when I get to use the word cassoulet.  Heck, even my computer wanted to change that word to casserole.

Silly computer…

I hope you’ll try making this dinner… and feel free to tell me all about your own trials and tribulations… sharing is what makes cooking so much darn fun to me!

Recipe: Vegetarian Lasagna

Don’t let the title of this recipe fool you into not trying it…. my older son just found out that his favorite lasagna recipe was actually good for him and he was not pleased.  He’s a true meat-and-potatoes kind of guy who only eats vegetables if they are expected of him… I don’t think he’s ever intentionally chosen to eat vegetables… but he loved this lasagna, which speaks volumes to it’s ability to turn heads and make believers out of meat-eaters.

Here’s how I made this delicious lasagna:VegetarianLasagna

“Meat” layer:

  • 1 package Boca crumbles
  • 1 cup Cabernet Franc
  • 2 ½ c marinara (plus ¼ cup + ½ cup marinara reserved – total needed 3 ¼ cups)

Cheese layer:

  • 1 package part-skim ricotta
  • 1 ½ c mozzarella
  • 1 egg, whipped slightly
  • Nutmeg, salt, and pepper to taste
  • Lasagna noodles (not cooked)
  • Parmesan (to sprinkle on top)

I started by making the “meat layer”.  In a medium bowl, mix the Boca Crumbles (see photo for package), marinara (in this case I used much of a Meritage Marinara that I had made earlier in the week), and James River Cellars Cabernet Franc red wine.  You want to make this part of the recipe fairly “wet” since you’re not cooking the noodles.

In a separate bowl, mix your “cheese layer” ingredients together.   Fresh nutmeg is key in this and you don’t need much… just a few sprinkles will do the trick – it adds a back note that is really lovely.

Now you’re going to layer your lasagna in a 9×9 pan. Start with your ¼ c reserved marinara,then add noodles, 1/3 meat, 1/3 cheese, noodles, 1/3 meat, 1/3 cheese, noodles, 1/3 meat, 1/3 cheese, noodles, ½ cup reserved marinara, and finally top with Parmesan.  I find it extremely helpful to turn the direction of the noodles at each layer so the lasagna cuts nicely.  Lay the first layer vertically in the pan, the second layer would then be placed horizontally the third layer would again be vertical so the final layer lays horizontal in the pan. Note: Your noodles will be longer than your pan – just break the noodles and use any pieces that aren’t the same length in the center and keep the longer pieces along the edges.

The last step is to bake your lasagna for 50-60 minutes at 350 degrees, until bubbly and cooked through.  Let set for 5 minutes before serving so the lasagna has time to let everything “pull back together” and cut beautifully.   I find that turning the noodles’ direction is key in being able to serve a nicely “square” piece of lasagna.

I hope you find this lasagna to be something that your entire family will enjoy… I also find that if I add a piece of garlic bread or Texas Toast, my guys are even happier.   

Buon Divertimento… Have Fun!

Recipe: Cabernet Franc Chili

Cab Franc ChiliThere’s something wonderful about having Chili on a cold winter’s day that just makes me feel warm inside.  The intoxicating smell of a simmering blend of onion, garlic, and green pepper gets me in the mood for a crackling fire, snow on the ground, and a big pot of chili.

Since I live in Virginia, “snow on the ground” typically isn’t going to happen very often, but once the temperature dips into the lower 40’s, I’m ready to start going through my winter repertoire and cooking up some wonderful hearty dinners.  This recipe is basic and allows for anyone to alter ingredients to suit their own particular tastes.  Here’s the general starting point:

Ingredients:

  • Olive oil
  • 1 package ground turkey
  • 1 large green pepper, chopped
  • 2 small (or 1 large) onion, chopped
  • Crushed garlic, to taste
  • 1 cup Cabernet Franc
  • ½ small can tomato paste
  • 1 Large can crushed tomatoes
  • 1 can diced tomatoes (with or without spices)
  • 1 can light kidney beans
  • 1 can dark kidney beans
  • 1 can black beans
  • 1 can cannellini beans (white beans)
  • Chili powder
  • Cumin
  • Salt/pepper

Brown the ground turkey in olive oil, using a large stock pot.  Add green pepper, onions, and garlic, sauteeing until vegetables are softened.  Add wine and tomato paste and cook until liquid is absorbed.  Add canned tomatoes and beans (I don’t drain or rinse my beans).  If desired, mash one of the cans of beans prior to adding, to thicken the chili.  Cook to warm everything thoroughly.  Add spices to taste.  If chili is still too thin, add remaining half can of tomato paste.

This is my most basic recipe.  If you want to make it hot, feel free to add some cayenne pepper… if you want it to be sweeter, feel free to add some honey or sugar.  This is a flexible recipe, so feel free to make it your own by adding or subtracting items as you see fit.

That’s the beauty of cooking… enjoy the process and revel in your results.