I’m really not sure when I got this basic recipe from my sister, but it was the perfect one to use when making a quick bread to give to the guys who are out plowing our neighborhood in today’s snow storm. I, of course, added a little white wine, but you can certainly omit that if you prefer. Here’s how to make this delicious quick bread:
Ingredients:
- 2 c flour
- 1/2 c sugar
- 1 T baking powder
- 1/2 t salt
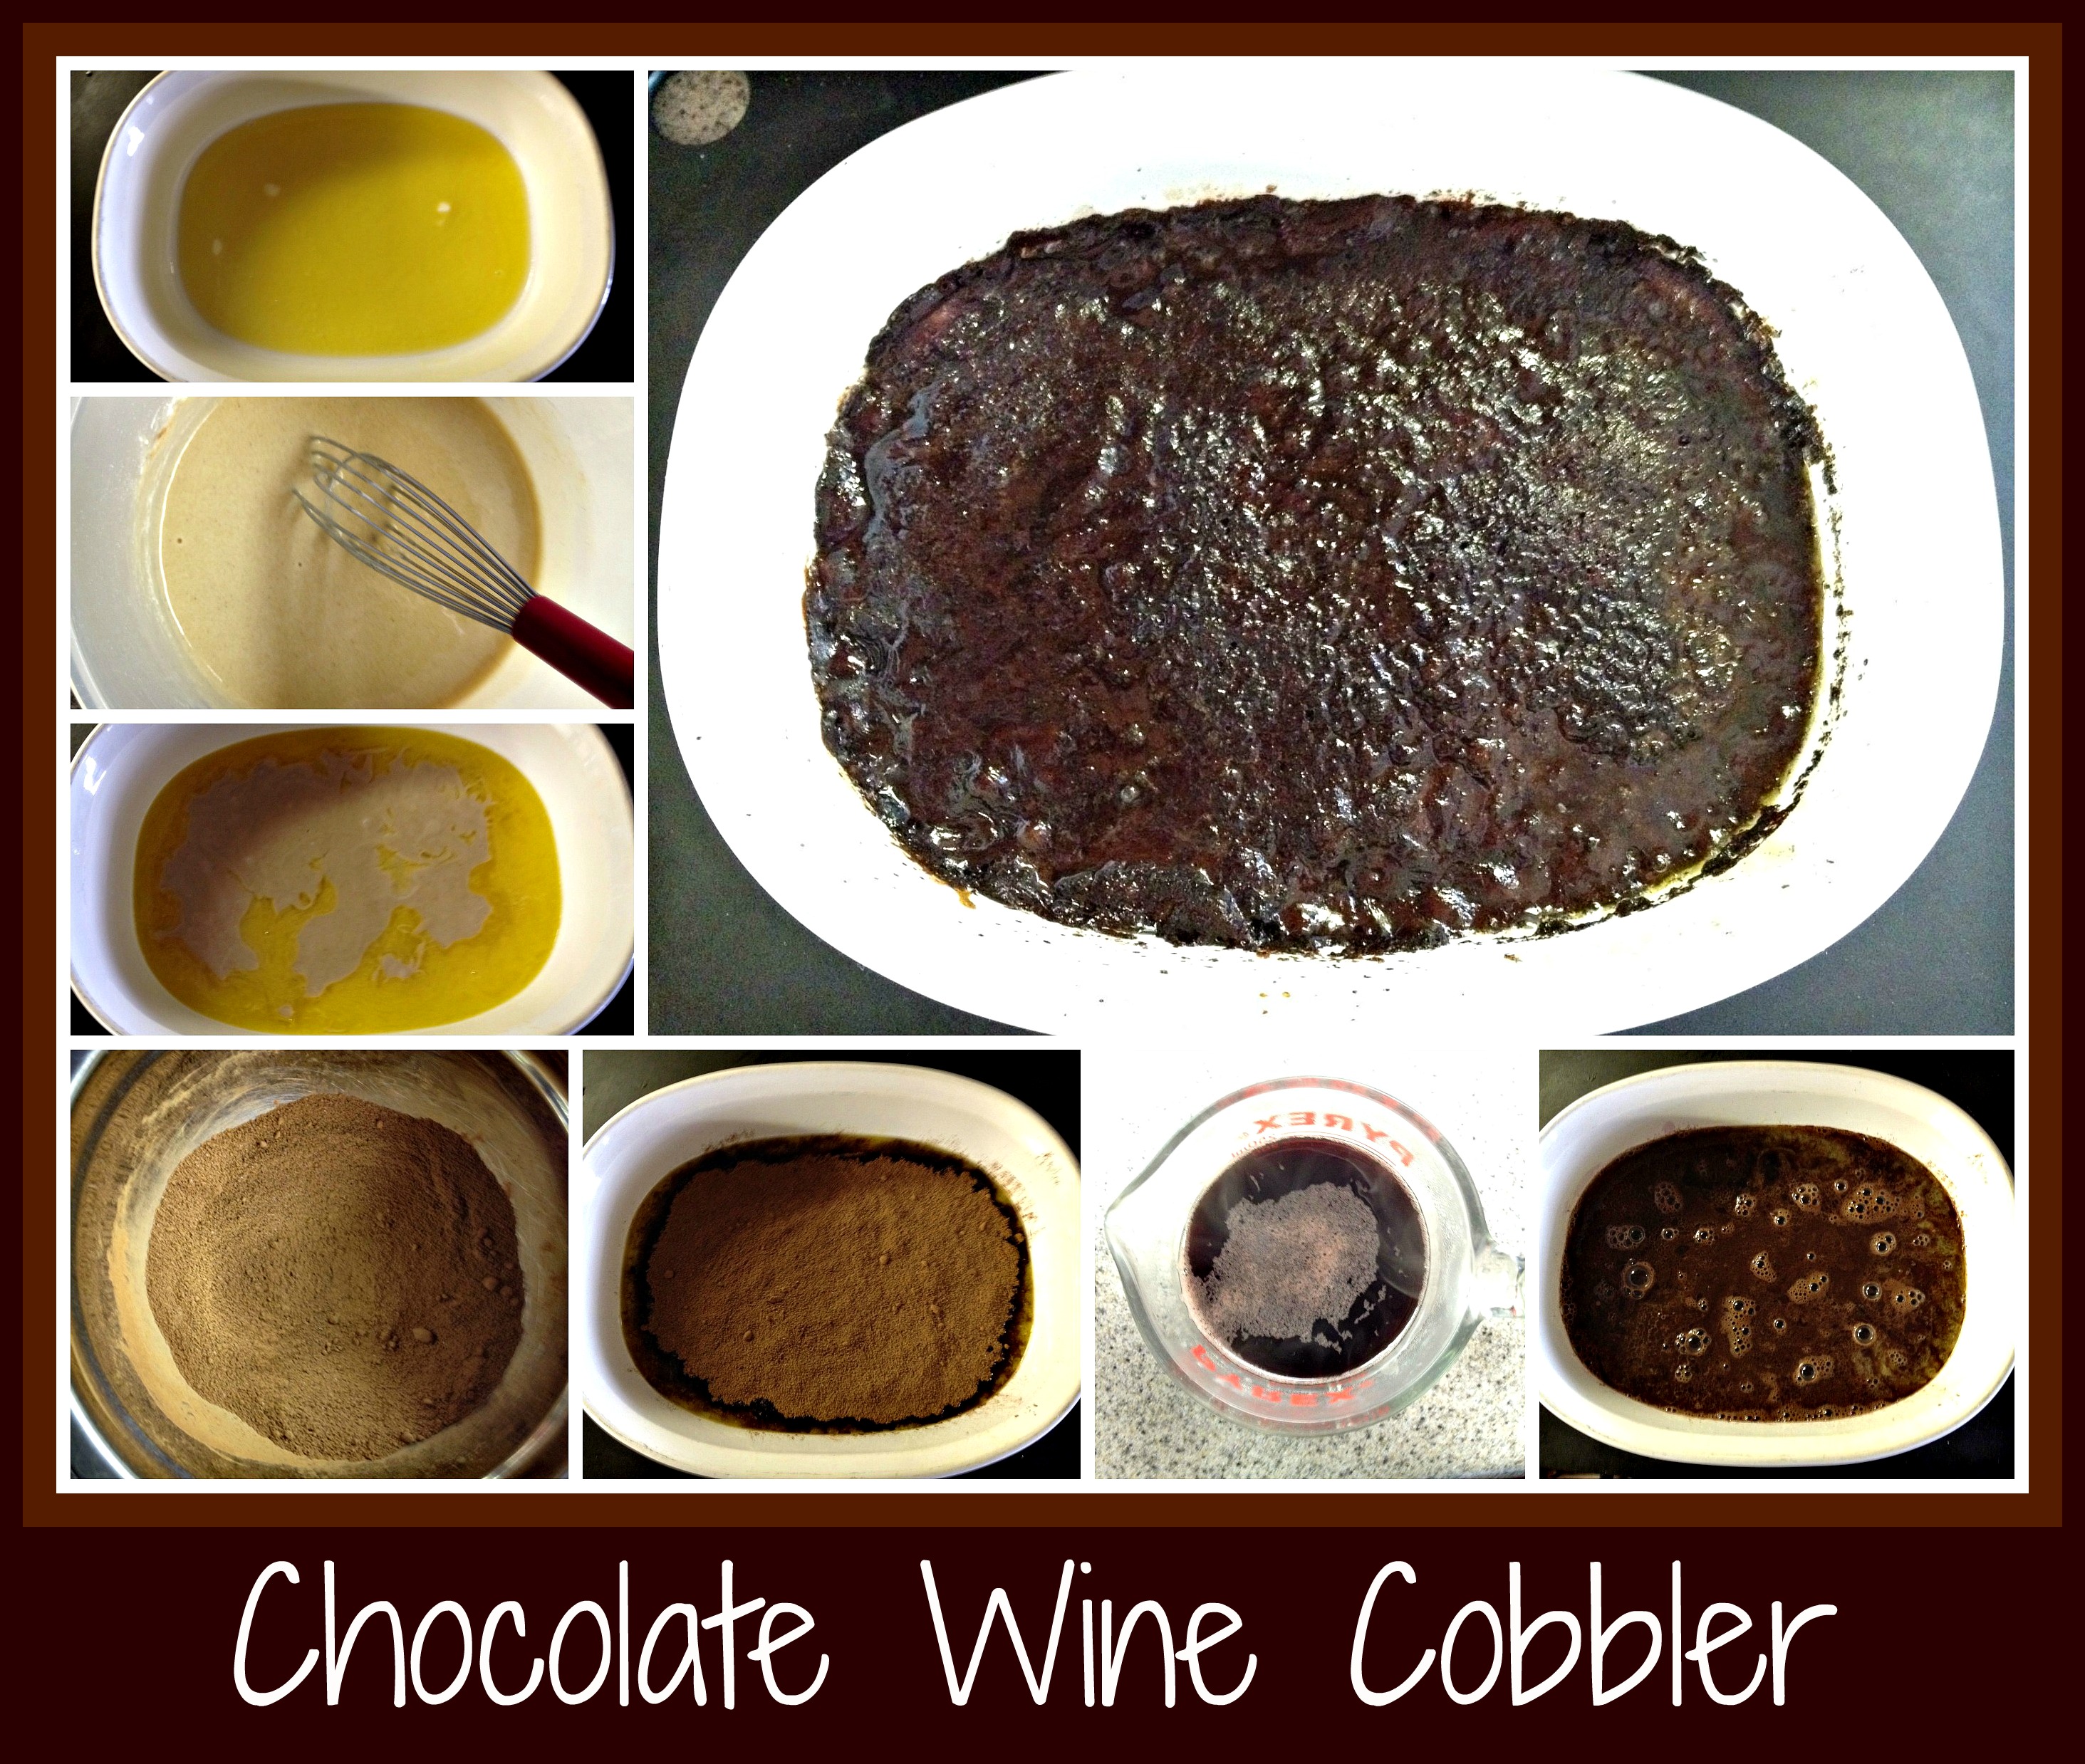
- 2/3 c orange juice
- 2 T white wine
- 2 eggs, slightly beaten
- 3 T melted butter
- 1/2 c coconut
- 1 cup craisins (or chopped fresh cranberries)
- 1/3 cup mini chocolate chips
- 1 T chia seeds
- 2 t orange rind, freshly ground is preferred
- NOTE: original recipe called for 1/3 c pecans and NO chips or seeds)
- 1/2 confectioners sugar
- 1 t margarine
- 1 t almond milk (more, if needed)
Directions:
- Preheat oven to 350*. Grease a loaf pan and lightly coat with sugar (I used cinnamon sugar)
- In large bowl, sift together flour, sugar, baking powder, and salt. In a microwave-safe bowl, melt butter and then mix in orange juice and wine. In separate bowl mix coconut, craisins, chips, and seeds – toss together with a spoon of flour to prevent clumping.
- Make a well in the center of flour mixture and pour in the liquids Mix well. Add coconut/craisin mixture and blend everything together until just combined.
- Pour mixture into prepared loaf pan and bake for 50 minutes or until a knife inserted into the center comes out clean.
- Blend confectioners sugar, margarine, and milk to make a thin glaze. Use your best judgement and feel free to use orange juice or wine instead of milk for a different taste, if desired.
- Pour glaze over the entire bread while still warm. Remove from pan when slightly cooled and slice as desired to serve. Great when warm but equally good cold.
This recipe is quick to put together and looks amazing when cut. You can leave it as a whole loaf if giving as a gift (we used to do this for teachers) but it’s moist and full of flavor. Best part, in my opinion, is that it makes the kitchen smell heavenly!
Enjoy this recipe and please, stay safe in this blizzard we’re experiencing on the East Coast!