Shrimp in Lemon Butter

Shrimp in Lemon Butter

This recipe is a favorite of my husband and one that I love to make during the week. It’s a simple meal to pull together and doesn’t take a lot of complicated ingredients.

Ingredients:
Raw Shrimp (I use Jumbo Shrimp)
3-4T Butter
2T Garlic Confit (or 3T crushed garlic cloves + 1T olive oil)
Juice of 1/2 lemon (reserve zest)
2T Parmesan
1/4 C White Wine (Use something you love to drink)
Splash of Half & Half
Pinch of sugar (if desired)
Salt, pepper, and parsley to taste
Brown Rice (or pasta)

Sauvignon Blanc by Boordy Vineyards

COOK YOUR SHRIMP:
Cook your shrimp, however you’d like. I shell my shrimp first, then bake shrimp on a piece of parchment on a baking sheet in a 400* oven until done.
NOTE: My husband likes his shrimp cooked longer than me, so I start cooking his shrimp in a 400* oven for about 15 minutes before adding mine to the baking sheet.

My husband’s shrimp on the bottom of the pic, mine on the top.

COOK YOUR SAUCE:
In a sauté pan, melt butter with garlic confit and lemon juice. Sprinkle with Parmesan and stir to combine. Add in the wine and half & half, then simmer until sauce thickens slightly, stirring frequently. Taste and add seasonings as desired.
NOTE: If sauce gets thick, add a little liquid (wine, water, stock, or pasta water) to thin.

Stirring to incorporate the butter into the sauce is key.

MAKE RICE (OR PASTA):
I use microwaveable brown rice. If you prefer to serve this meal on pasta, make your pasta so it’s ready to be plated when your shrimp are done.

ASSEMBLE DINNER:
You can either fold shrimp into the sauce (I do this with my husband’s shrimp) or place shrimp on rice and spoon sauce over top.

My husband’s shrimp, tossed with the sauce.
My shrimp, with sauce spooned over top.

ENJOY!

Advertisement

Easy Pulled Pork

Ingredients:

My favorite thing to make, when friends come to visit, is anything that will make my house smell amazing while it’s cooking. This recipe fits the bill perfectly!
NOTE: While I roasted this pork in the oven, you could easily make this into a crock pot recipe.

  • Boneless Pork Shoulder – Mine was just under 5 pounds
  • Dry onion soup mix
  • Red wine – I used Boordy Vineyards Cabernet
This is the pork I used for this recipe

Directions:

  • Remove netting from pork shoulder and toss in a gallon ziploc bag with dry onion soup mix and 1/2 cup red wine.
  • Marinate pork overnight.
Pork in marinade of onion soup mix and red wine
  • Remove pork from bag and sear on stovetop in cast iron pot.
  • Once all sides are browned, add another splash of red wine and cover.
  • Place pot in 300* oven to roast.
Pork, after 2 hours of roasting. This is my mother’s cast iron pot.
  • Roast, low and slow, until pork shreds easily.
  • Serve on homemade rolls for a delicious and easy dinner
Easy Pulled Pork, ready to eat!

I love to use my mom’s heavy cast iron pot. This is my favorite pot to use for low/slow cooking (pulled pork, pulled chicken, roasts of any sort) but I also love using it for soups and stews. While there are many options for a large pot, this specific one always reminds me of cooking with my mom.

This recipe is a great one to keep on hand for feeding a crowd. I’ll make it again in a few weeks when my son and his friends come for the weekend, but I’ll add a large pork butt roast so there’s enough food to go around. I like to make homemade kaiser rolls to complete the meal.

I hope you enjoy this recipe – let me know if you ever try it!

Chicken Divan Casserole

I have very fond memories of my mom making Chicken Divan casserole throughout my childhood. The recipe she used was based on one from Aunt Treva, my grandfather’s sister, and had lots of “cream of” soups included to make the sauce. It was always yummy, but I decided that I wanted to create a healthier version.

When searching for a similar recipe as the one from my childhood, I found a fabulous one created by Natasha Bull of http://www.saltandlavendar.com. Her original recipe can be found here: https://www.saltandlavender.com/chicken-divan/ but I needed to adjust the flavors to match what I was trying to recreate. If you’re looking for a cheesy, creamy chicken and broccoli casserole, look no further… this one is terrific.

For me, simply adding curry powder to the recipe above wasn’t quite what I wanted, so I played around with it until I created something that made sense for me. I also trimmed everything down to make an easy meal for two + 1 leftover serving. This recipe will make 3 servings in a 9×9 baking dish.

INGREDIENTS:

  • Broccoli florets – I used a small bag from the local store
  • Chicken Breast – I shredded two breasts from a rotisserie chicken but you can also use leftover chicken or even turkey
  • 2 T butter
  • 2 T flour
  • 3/4 c almond milk – you can use a mixture of almond milk and half & half if you prefer
  • 2 T whipped cream cheese
  • 1 tsp Dijon mustard
  • 1 tsp Worcestershire sauce
  • 1 tsp white wine – use what you have available/open but I also use this wine to thin the sauce before adding the cheese
  • 1 tsp curry powder
  • 1/4 tsp onion powder
  • 1/4 tsp garlic powder
  • 1 cup grated cheddar cheese – separate in half
  • 1/4 cup grated Parmesan
  • 10 Ritz crackers (approximate)

DIRECTIONS:

Preheat your oven to 375*F.

Prepare your broccoli for the casserole. After trimming down the broccoli into bite-size pieces, put all the florets in the bottom of the 9×9 baking dish. Lay a piece of paper towel over the broccoli and lightly dampen it with some white wine. Microwave the broccoli on HIGH for 2-3 minutes or until the broccoli is lightly cooked and still crisp. NOTE: if you’re using a metal dish, you can microwave the broccoli in the original bag and layer the cooked broccoli onto the bottom of the baking dish.

Layer your shredded chicken on top of the broccoli.

Make your sauce. Start by melting the butter in a sauce pan. Add the flour and whisk until combined and the mixture starts to bubble. Let the butter/flour mixture cook until it begins to get slightly toasty. Slowly add your milk and whisk to combine, then cook this mixture until it begins to thicken. Add the cream cheese (I like the whipped version b/c it’s light and combines fairly easily – if you use a block of cream cheese, I would decrease to 1T), whisking to combine. Add in your spices (mustard, Worcestershire, wine, curry powder, onion powder, garlic powder) and taste the sauce, adjusting as needed. Add salt and pepper if desired. NOTE: if sauce is too thick, add a splash of wine or almond milk. I have been known to add 1/4c-1/2 cup of wine to thin the sauce. Be aware that the sauce will thicken when you add the cheese. Remove the sauce from stove top and stir in 1/2 cup cheddar cheese.

Pour sauce over the chicken/broccoli mixture in your baking dish. Top with remaining cheddar cheese and Parmesan cheese then crush Ritz crackers over the entire casserole.

Bake casserole, uncovered, for 30-35 minutes. Cheese should be melted, crackers should be browned, and the sauce should be bubbling. Let casserole sit for 5 minutes before portioning out and serving.

Recipe: Easy Wine’d Guacamole

Since yesterday was the Super Bowl, I wasn’t in the mood for a big meal for dinner.  Maybe it’s just conditioning, but I felt like having “snack food” for dinner and decided to try my hand at making a quick guacamole.  Surprisingly, it came together much quicker than I expected and was so tasty that I’ll probably try it again soon.  See what you think of this “recipe”…

EasyWinedGuacamole (1)

I started with one whole avocado. I sliced it in half, removed the seed, and scooped out all the flesh of the avocado into a bowl.  Using a fork, I mashed the avocado until there were just a few chunks left.  I drizzled a touch of lemon juice, some James River Cellars Petit Verdot (since I didn’t have any tomato on hand), a touch of hot sauce, finely chopped cilantro, and finally some salt and pepper to taste.   I let it rest until the sliced crustini were warm and toasty, then served the bread as “dippers” for the guacamole.  It was delicious!

To those who make guacamole all the time, I do know that this recipe is not a good representation of a traditional guacamole.  There should be pieces of tomato and onion, bits of other unique flavors, and whatever else people put into guacamole to make it spicy, flavorful and tasty.  For me, however, this was a great way to get the basic flavor of the dip without having to make a special trip to the store for extra ingredients that I didn’t have on hand.  Feel free to play with this recipe, if you’re so inclined.  I loved it and thought it was “just enough”.  Happy Dipping!


“Using The Force” for the first time

I was talking with a friend yesterday about what to make for dinner, when we stumbled upon the idea of having him “use The Force” to create a meal for him and his girlfriend.  We talked about a few recipes, contemplated different degrees of difficulty, and came up with the plan to use my Chicken Prosciutto Roll recipe.  He didn’t want to spend an inordinate amount of time on dinner, so we discussed ways he could “shortcut” the recipe and tailor it to their tastes.  I was so excited for him that I had to write a quick blog post to share this with you all.

AMUsingTheForce

Here’s his final product:

Doesn’t it look terrific?  THIS is what I mean when I say, if you’re planning to use one of my recipes,  that you should alter the original to fit what your family likes best, using the flavors and spices that you most enjoy.  He made his own version of a Chicken Prosciutto Roll and it turned out wonderfully.  He *did* use chicken breasts, Bourcin Cheese, and James River Cellars Gewurztraminer white wine, but swapped out ham for the prosciutto, since that’s what he had on hand.  More importantly than simply following the recipe, he used what he had at his disposal and took the time to prepare a meal that he and his girlfriend would enjoy.

My friend, AM, did a fabulous job of tailoring a basic recipe to make it his own.  I hope you’ll consider trying this same sort of thing in your own home.  It’s not hard to make dinner… it just takes a little thought and the ability to let your efforts shine as your own.

If you want me to blog about it and share your steps, just send me a message and take a few pics of the beginning/middle/end of your efforts so you can send them to me.  I’d be more than happy to help as you create dinners for your friends and loved ones… after all, it’s just food!

Enjoy the process…

Recipe: Stuffed Pork Chops with Gewurztraminer Gravy

This dinner really had a great “wow” factor… the flavors were big, the presentation looked good, and the taste was amazing.  I really thought it was stellar, especially since much of it was simple “Use The Force” type cooking…. my favorite kind, right?!

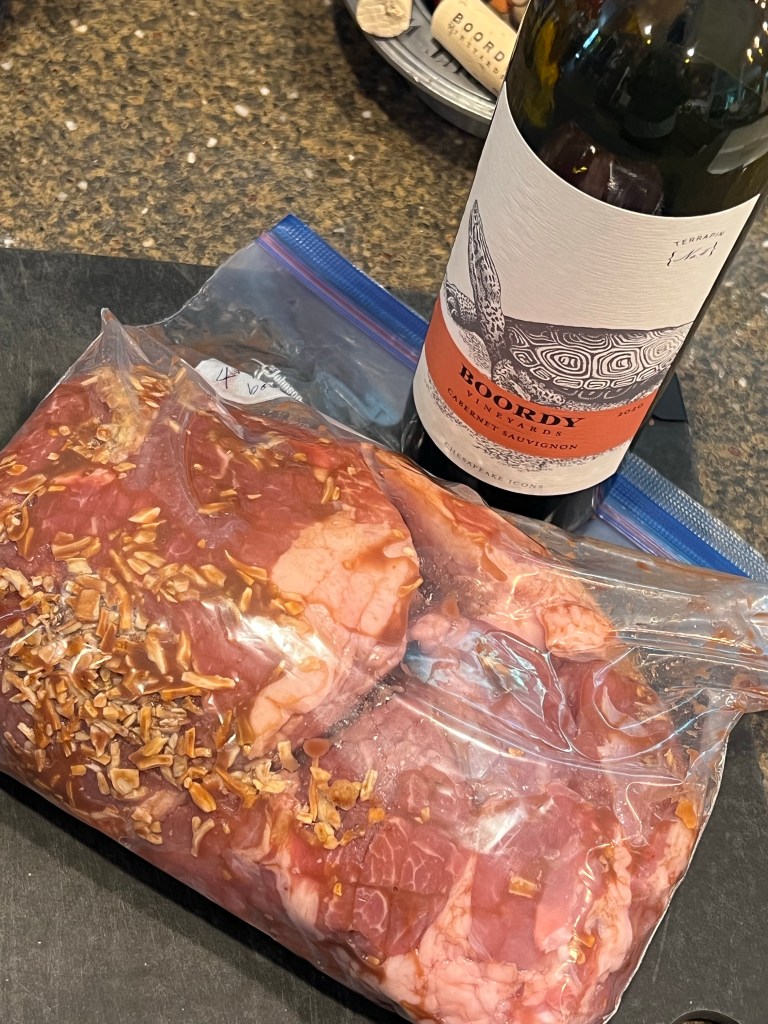
I had purchased two thick-cut pork chops when they were on sale at my local grocery store a few weeks ago and popped them in the freezer.  Since tonight was supposed to be  “just the two of us” dinner evening, I thought they’d be perfect.  They didn’t take a tremendous amount of time to thaw (especially since I wasn’t planning on letting them thaw completely) and I was able to put things together fairly easily.

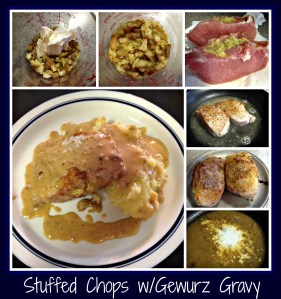
While the chops defrosted a bit in the microwave, I made a tiny batch of stuffing.  For things like this, I really do like to use a packaged container of stuffing.  I keep a container of dry stuffing mix in my pantry and can use as little or as much as needed… very convenient!  I scooped out about half of what was left in the container (just under 1/3 cup) and added a little margarine (maybe a thumb’s worth?) and some wine (rocking the Gewurztraminer theme, this was my wine of choice for the night… James River Cellars Gewurztraminer… Mmmmm) and tossed it together in a measuring cup.  I warmed up the mixture in the microwave for about 15-20 seconds (until the margarine was melted) and then stirred to get all the crusty bread into the liquid to soften and re-hydrate.

My biggest challenge with this meal was to stuff the pork chops.  This (to me) seems much easier when the chops are still slightly frozen.  I use a thin paring knife and make a small slit in one side, then wiggle the knife back and forth to make an open pocket in the chop, being careful not to make the original slit too big.  I like to check the size of the pocket with my fingers before attempting to insert the stuffing.  **Make sure not to cut the entire way through the chop but try and get the pocket as close to the edges as possible.

StuffedChops&GewurzGravy

Once the pocket seems deep enough, divide the stuffing into both chops, doing your best to push it around to fill all the edges.  I then let the chops rest until I was ready to start making dinner.

Using a medium saute’ pan, I added a small pat of butter, and a drizzle of olive oil, heating them in the pan until bubbling.  I seasoned the chops on each side with salt, pepper, and a touch of cracker crumbs.  Panko bread crumbs would work well here, but I used crushed saltines since that’s what I had in the cupboard.  I let the chops cook on medium-high heat in the butter/oil mixture until all sides were slightly toasty.

At this point, I poured a generous amount of Gewurztraminer wine into the pan, sprinkled some Hungarian Paprika over the chops, and popped the entire pan into a pre-heated 375 degree oven while I finished mashing and seasoning some golden potatoes that had been simmering on the stove top.  You can serve these chops with any sort of side dish you want (or none at all, if you prefer) but I love mashed potatoes and gravy, so this was “it” for me.  Egg noodles, pasta, macaroni, or even rice would all be fine accompaniments with this dish… make what you and your family like.

I didn’t really time the chops while they were in the oven.  You can see how much wine I poured into the pan before I put the pan in the oven and it had cooked into the chops by the time I pulled them out, so my best guess would be that they roasted for about 20 minutes or so.  Seriously… I really make dinner this way… The Force is my friend… 🙂

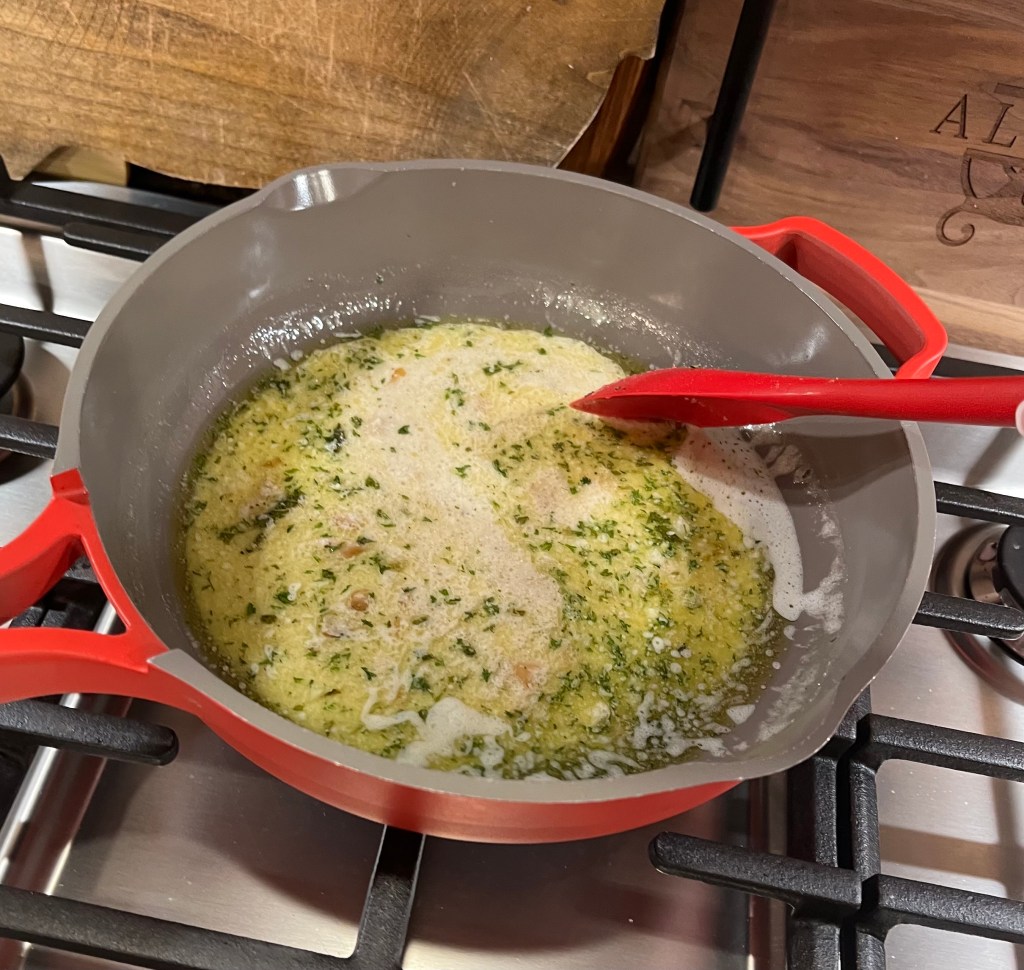
Once the chops looked done, I removed them from the pan, put them on a pewter dish, and put them back in the oven for a few minutes while I made the gravy.  Here’s my favorite way to make gravy… I put the saute’ pan on medium heat and added a pat of butter and use that to help lift off the “bits” from the bottom of the pan.  Once melted, I added a spoonful of flour and let it bubble together and start to get toasty.  Before it starts to burn, add your wine (ok…. you can use stock at this point if you’d prefer… I just prefer to use wine) and slowly whisk and add more wine until the mixture thickens and “looks” like gravy.  I seasoned the mixture with a little salt and pepper, as well as a splash of cream.  I had some leftover heavy cream, so I used that, but normally I would have just used the skim milk that is a staple in my fridge.  Once everything is whisked together and the gravy tastes “just right”, I plated our dinner.

Mashed potatoes, a stuffed pork chop, and gravy drizzled around to look pretty… delicious, no?  The chops hadn’t overcooked… the potatoes were fluffy and lightly seasoned… the gravy had enough texture and taste to hold everything together… it was a wonderful thing.

A homemade dinner to share with my husband is balm to my soul… and I am always glad that he enjoys eating the meals I make.  Sometimes, it’s all about the simple pleasures in life.

May you find, and feed, the simple pleasures in your own life…

Recipe: Simple Shepherd’s Pie

Maybe I’m just strange, but I really love the challenge of making a totally new meal out of leftovers from a previous meal.  Such was the case with how this dinner came about.

I made shredded beef sandwiches for dinner on Sunday night and, since I used a large London Broil, had lots of cooked beef left over.  I was coming up with lots of different ways to use this meat but the decision was made for me when I got a huge response from my guys when I suggested making a Shepherd’s Pie.  Unfortunately, for me, my husband’s idea of a Shepherd’s pie was “meat, peas, gravy, potatoes”, so that became my recipe.

The first thing I did was start making the mashed potatoes by dicing a few potatoes and putting them into a pot of water to boil.  While they cooked, I layered the beef in a casserole dish and topped it with frozen peas.  Now all I needed to do was make a gravy so dinner wouldn’t just be dry beef and cooked peas.

Making a gravy is so much easier if you start with the cooking liquid of the meat you’re using – it adds flavor without having to rely on bouillon packets.  Sadly, I totally forgot to reserve the liquid after dinner on Sunday, so I had to start from scratch.  Not my favorite way to do things, but not a huge deal.  I have learned to love making gravy, so it’s always a fun creative way to add my own little touch to dinner.  I always start with a roux…. equal parts butter (fat) and flour, simmered long enough to cook off the raw flour taste.  Liquid is the next ingredient.  I typically stick with the idea of using red wine for beef dishes and white wine for chicken or fish dishes, but this is definitely something I don’t mind mixing up.  For this gravy, I used a packet of beef bouillon, water, and James River Meritage red wine (‘cuz that’s what was in my fridge… I could have just as easily found James River Merlot or a random Pinot Noir from a recent trip to the Hilton Head Wine and Food Festival).   I seasoned the gravy with salt and pepper, and let it simmer a bit until it was thick enough.  I then poured the gravy over the beef/peas already layered in the casserole dish and got to work on making mashed potatoes.ShepherdsPie

Please know… if you prefer using instant mashed potatoes, this meal will be just as tasty.  I’m not really a purist that has to make homemade mashed potatoes anytime I need them… I just don’t have any instant potato flakes in my pantry.  Who knows… I might have used them instead.  Honestly, I tend to make mashed potatoes often enough that I almost always have potatoes available in my pantry, so it’s just easier to make them rather than search for a packet of the instant stuff.

For my homemade mashed potatoes, I use an old potato masher that my mom gave me instead of using my electric mixer – I like the chunky feel of the finished product better than the more whipped consistency I get when I put everything into my KitchenAid mixer.  I use varying amounts of margarineLaughing Cow light original cheesea touch of horseradish, salt, pepper, and maybe some milk.  It really depends on my mood when I’m cooking, so using The Force really comes into play on this recipe.   Once the mashed potatoes are finished, I spooned them on top of the casserole, sprinkled a bit of paprika for color, and then popped the casserole into the oven.  After 30-45 minutes in a 350 degree oven, this dinner is ready for the troops to dig in.

Feel free to experiment with this recipe to make your own family happy – if they like cooked carrots, feel free to add them.  Want a whole mess of veggies?  Go ahead!  Want to swap out the beef for chicken or a vegetarian option you like?  Try it!  There’s no “dinner police” who will come by and take your food from you, so enjoy coming up with your own options on this recipe.  I just like the tastes of beef, peas, and mashed potatoes all baked into a sublime concoction that makes my family happy.

Ultimately, that’s the goal… make something that will feed your family and keep a smile on their faces.  My heart is full every time my guys declare a “winner”… may you have the same experience with your dinners!

Recipe: Taco Pasta Bake

Are you looking for a quick and easy “go to” dinner for the holiday season that doesn’t involve turkey?  Are you stumped when it comes to making something for your family that everyone will eat without complaint?  If you’re like me and have a household of big eaters, I want to share one of my favorite dinners with you… a Taco Pasta Bake.

You may remember that I’ve mentioned my niece a few times – she writes a fitness and lifestyle blog called “Peanut Butter Fingers” or PBFingers?  She posted a recipe that my husband raved about… but he wanted me to make it “exactly like the recipe says”, which meant “no wine involved”… but what was the fun in that for me?  After mulling over the recipe for a few days, I came up with a version that could make everyone in my household happy… my guys (because they would get a dinner that tasted yummy) and me (because I could experiment and play with wine in my cooking).   I hope you find it as tasty as we do!

I started by browning a package of ground turkey.   If you can get away with it, this is where I would add diced onion and some diced green pepper if my family liked that Taco Pasta Bakesort of thing.  Once the turkey is nicely browned, I sprinkle the meat heavily with taco seasoning and a nice dry red wine (like James River Cellars’ Rad Red) and let everything cook until it’s nice and dark.  Next, I add some salsa and some more red wine so your food is a bit soupy.  At this point, I add in some dry pasta.  My hubby likes bowtie-shaped pasta, so I try and do things that he likes.  I’ve also made this recipe with jumbo elbow macaroni and it’s also tasty.

Now you need to cover the skillet and allow the liquid to be absorbed by the pasta… I know it’s hard not to peek and keep checking on the dinner, but try  and resist so the pasta has ample time to plump up and become al dente and just right.  If all the liquid gets absorbed and the pasta is still underdone, feel free to add more wine (or broth) and then allow time for the pasta to cook until it reaches the right taste for your family.

At this point, you have a few options.  If you’re ready to have dinner, feel free to serve this straight from the skillet.  If you’ve got some time, I would suggest putting your dinner into a casserole dish, spooning in (and on) some shredded cheese and then popping into a 350 degree oven for 30 minutes when you’re almost ready for dinner.   It totally depends on what you want to do… hence; this is a great example of using The Force when making your dinner.

I hope you try this recipe sometime and let me know how it turned out for you.  It’s similar to the mazetti recipe that my mother-in-law makes, with a tasty taco twist.  It’s simple… it’s easy… and it’s a recipe that you can adjust to please everyone in your family.  What more could you want?

Seriously…. what more would you want from a recipe?  Enjoy!

Recipe: Pumpkin Wine Brownies

Yup… you read that right… there’s pumpkin in these things.  PumpkinWineBrownies  If you can possibly get past the idea of adding pumpkin into something that is supposed to be a chocolatey, yummy treat, you’ll be pleasantly surprised at the results.  That is, of course, if you can get past the idea that you’re adding a vegetable into your treat.  Can you??

I was hungry for brownies last night.   I wanted to use some red wine in the baking process but I also wanted to experiment with making something yummy.   I’ve made brownie muffins using only pumpkin and chocolate cake mix (Hungry Girl, Lisa Lillian, calls them “Yum Yum Brownie Muffins”) but I wasn’t sure about adding red wine to the mix… so I experimented, I used The Force, and came up with this dessert.

I started with a box of brownie mix.  I poured in some red wine and then added a half can of pumpkin (that solid pack pumpkin stuff… not the “pumpkin pie mix” stuff) but it was still a bit too thick, so I added some more red wine to the mixture.  Once it looked smooth enough, I poured it into a 9 x 13 pan and baked it at 350 degrees for about 30 minutes.

See?  The Force in its truest form… helping me make dessert that tastes so good!

As always, when using The Force, I’ll tweak this recipe when I make it the next time.  I’m going to try making this recipe in a 9 x 9 pan so the brownies are a bit thicker (which means I’ll be cooking them a little longer).  I’ll probably find another box of brownie mix that I want to try, especially since this was the box mix that my darling hubby had picked up to make for his own work event.  I may even come up with some other crazy ingredient to add and see how it turns out.

Whatever I do, I’ll do my best to always share my experiments with you on this blog.  Isn’t that what writing a blog is all about?

Enjoy the experiments in life… they are what can make things fun, unique, enjoyable, and ultimately your own.

Take time to try different things and don’t be afraid of failing… sometimes its the failures that allow you to be the most creative!

Oh… and have a brownie!

Recipe: Wine for Dessert

There are some really wonderful dessert wines out there.  Have you taken a moment to taste them or do you pass by this unique offering in favor of something you think will be less like “sugar-overload”?   While I’m not a huge fan of the uber-sweet, I do enjoy using them for cooking or sipping after a meal.  They aren’t something I would typically choose to drink, but I certainly try everything offered when I’m on the tasting side of the bar.

One of my favorite dessert wines is Noche from Cooper Vineyard in Louisa, VA.  Here’s their description, as quoted from Cooper’s website:

Noche Chocolate- Silver 2012 VA Governor’s Cup, Silver Atlantic Seaboard Wine Association. A Virginia Norton dessert wine infused with chocolate, Noche is a decadent treat. Hints of black cherry and raspberry complement rich aromas of cocoa with a chocolate ganache finish.

I used this wine for a dessert I made a few months ago and it’s just wonderful.  I started by making a Noche Reduction.  Using the entire bottle of Noche, I cooked the wine until it had reduced by half, until a spatula left a slight line when drawn across the bottom of the saucepan., stirring frequently.  I then added about a thumb (“The Force” at work) of butter and a spoonful of sugar or so.  I also added a tiny dash of vanilla, more to satisfy my thoughts that I was actually “cooking” instead of just throwing stuff in a pot.  I allowed the sauce to simmer a bit until the sugar and butter had melted and been thoroughly incorporated.  Once this was done, I removed the pan from the stove top and waited (impatiently) for the sauce to cool thoroughly.

Once cooled, my new sauce was ready for use.  I decided to make a Hot Milk Sponge cake, cooked in a Baker’s Secret pan that was made to look like a cross between a trifle and a pie… it’s apparently called a Duncan Hines’  Tiara Dessert pan.    The sides are fluted, there’s a high edge and then a lower cake level so you could put “something” on top of the cake and not have it dribble over the edge.  If I remember correctly, they marketed this pan for use with a thick pudding mixture you would pour in the center and then top with whipped cream.


For this specific dessert, I made the Hot Milk Sponge cake (only a half recipe was needed), cooled the cake, then filled the “inside” with frozen whole cherries before drizzling the sauce over top.  Dusting it with powdered sugar was all I needed to make the dessert look magical.  While it was beautiful, it wasn’t the easiest to cut… the next time I made this dessert, I topped the entire cake with whipped topping before drizzling the sauce, thereby allowing the berries to remain in place and giving some height to the dessert.  Either way you decide to make it, this sauce was a knockout.

If you’re looking for an easier thing to do with this sauce, just slice pound cake (you can pick it up in the freezer section of your local grocery store), top with fresh fruit, and drizzle with sauce.  Simple and delicious!

An even easier option would be to drizzle the chocolate wine (sans cooking at all) over ice cream or pound cake or angelfood cake or…  you get the idea, right?

Using The Force when you create desserts can be a lot of fun.  Try to imagine the taste of what you’re creating and then see if you can break that taste down into ingredients.  Even using a store-bought chocolate sauce and adding some of Cooper’s Noche to thin it out can take your dessert to a whole new level.

Eating wine for dessert instead of drinking it… quite a different concept, yes?  Enjoy!