Shrimp in Lemon Butter

Shrimp in Lemon Butter

This recipe is a favorite of my husband and one that I love to make during the week. It’s a simple meal to pull together and doesn’t take a lot of complicated ingredients.

Ingredients:
Raw Shrimp (I use Jumbo Shrimp)
3-4T Butter
2T Garlic Confit (or 3T crushed garlic cloves + 1T olive oil)
Juice of 1/2 lemon (reserve zest)
2T Parmesan
1/4 C White Wine (Use something you love to drink)
Splash of Half & Half
Pinch of sugar (if desired)
Salt, pepper, and parsley to taste
Brown Rice (or pasta)

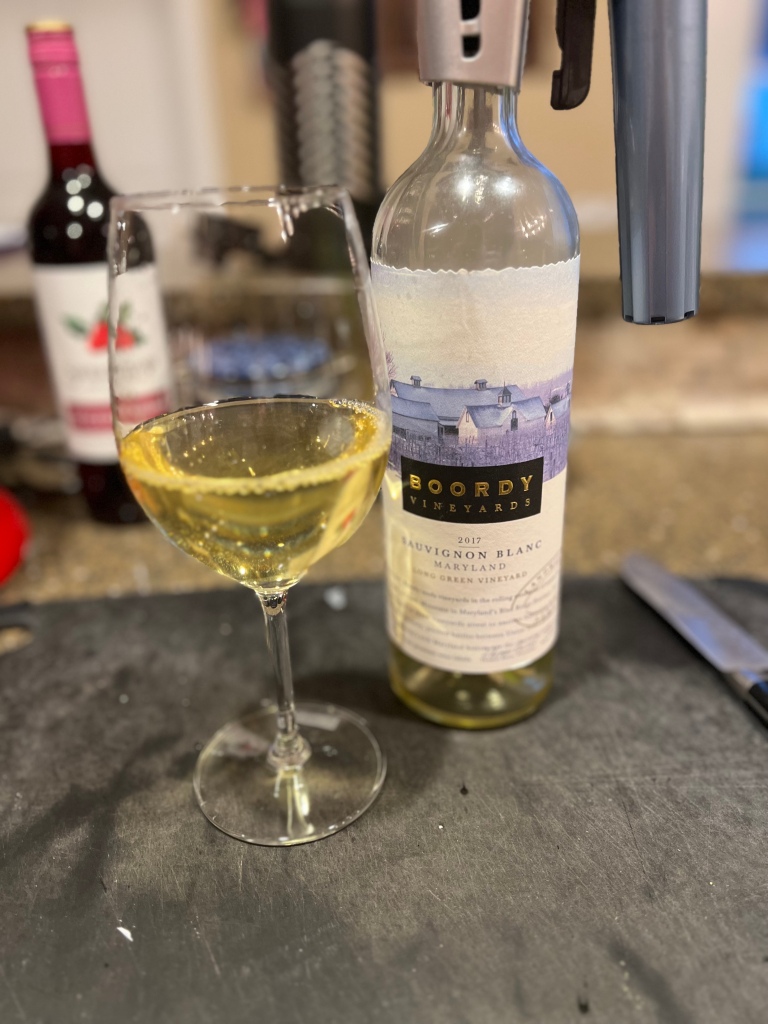
Sauvignon Blanc by Boordy Vineyards

COOK YOUR SHRIMP:
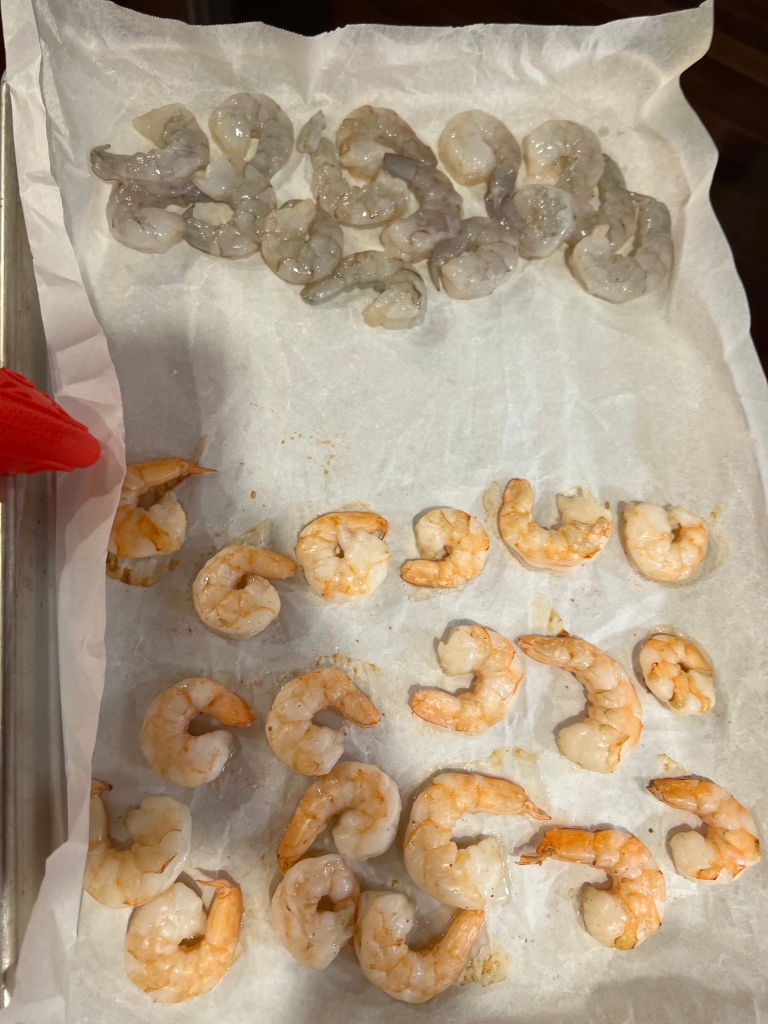
Cook your shrimp, however you’d like. I shell my shrimp first, then bake shrimp on a piece of parchment on a baking sheet in a 400* oven until done.
NOTE: My husband likes his shrimp cooked longer than me, so I start cooking his shrimp in a 400* oven for about 15 minutes before adding mine to the baking sheet.

My husband’s shrimp on the bottom of the pic, mine on the top.

COOK YOUR SAUCE:
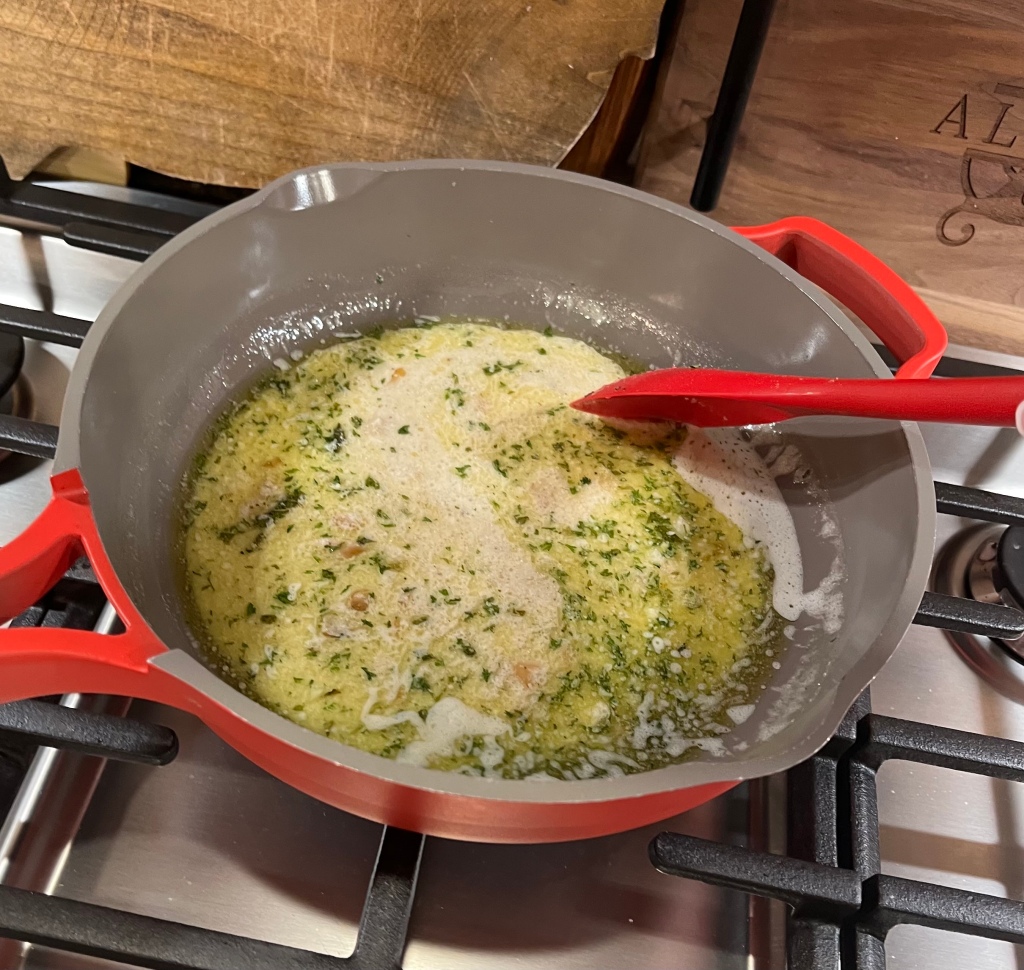
In a sauté pan, melt butter with garlic confit and lemon juice. Sprinkle with Parmesan and stir to combine. Add in the wine and half & half, then simmer until sauce thickens slightly, stirring frequently. Taste and add seasonings as desired.
NOTE: If sauce gets thick, add a little liquid (wine, water, stock, or pasta water) to thin.

Stirring to incorporate the butter into the sauce is key.

MAKE RICE (OR PASTA):
I use microwaveable brown rice. If you prefer to serve this meal on pasta, make your pasta so it’s ready to be plated when your shrimp are done.

ASSEMBLE DINNER:
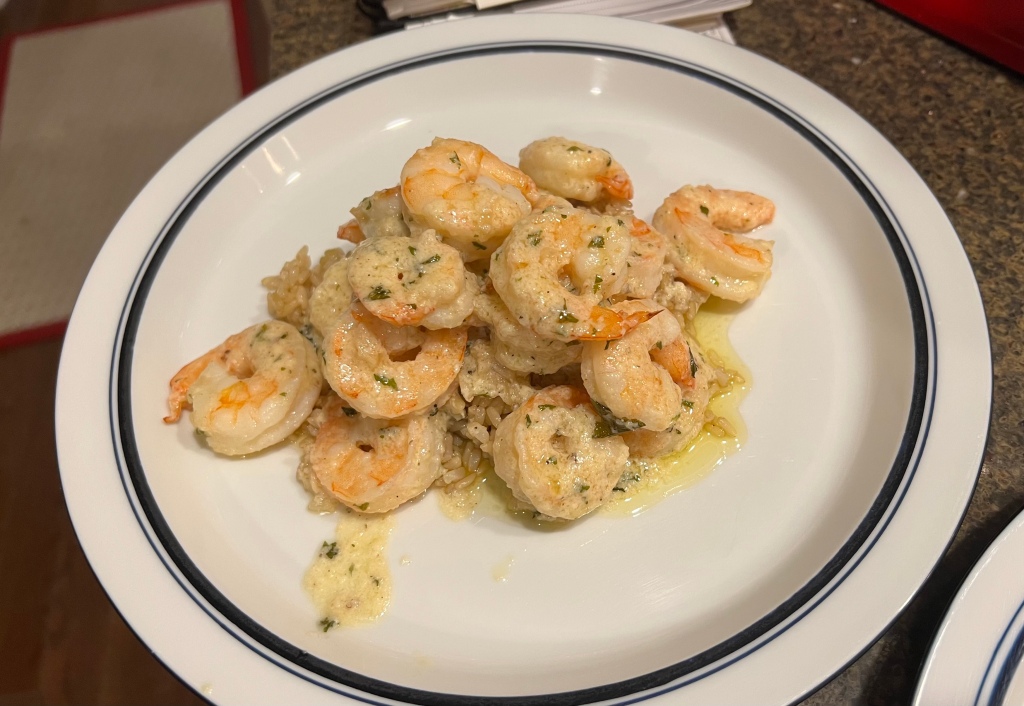
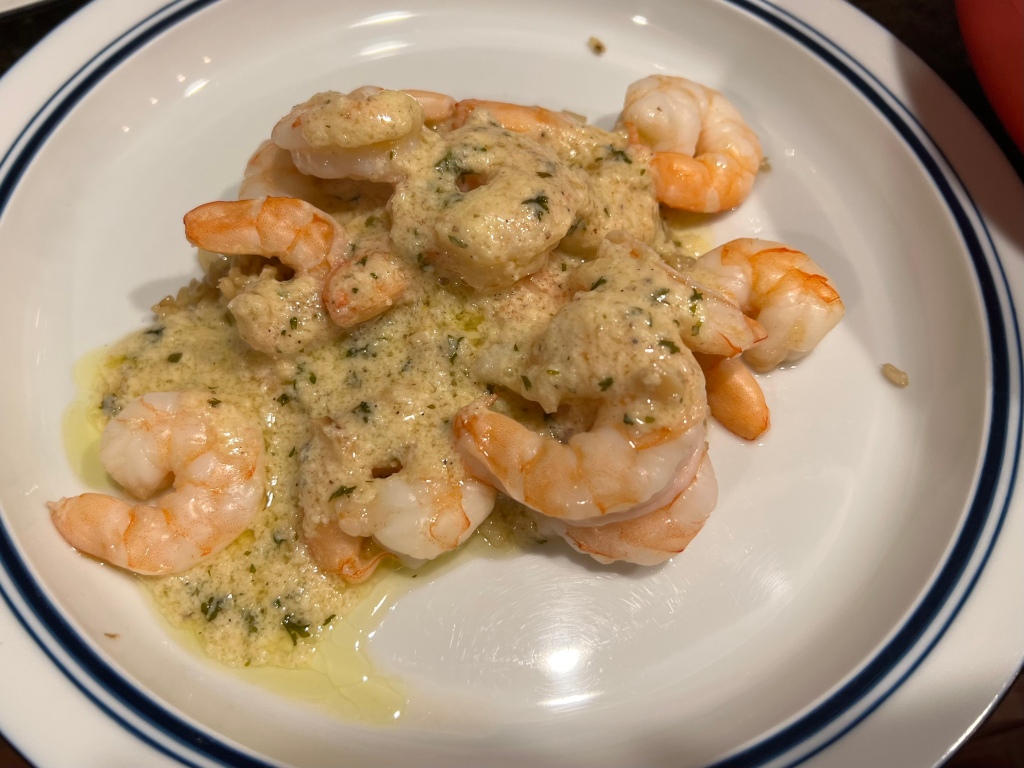
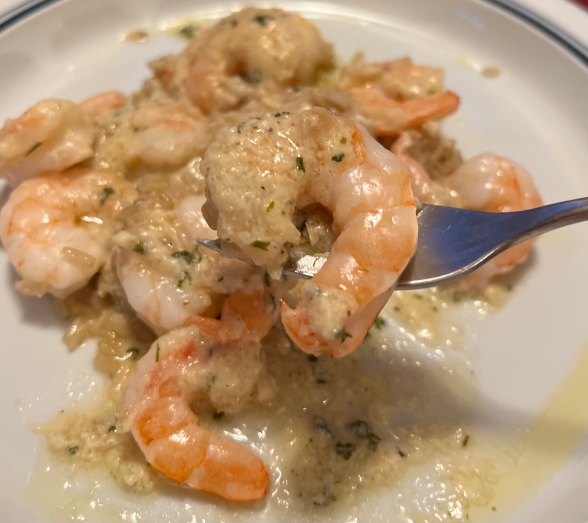
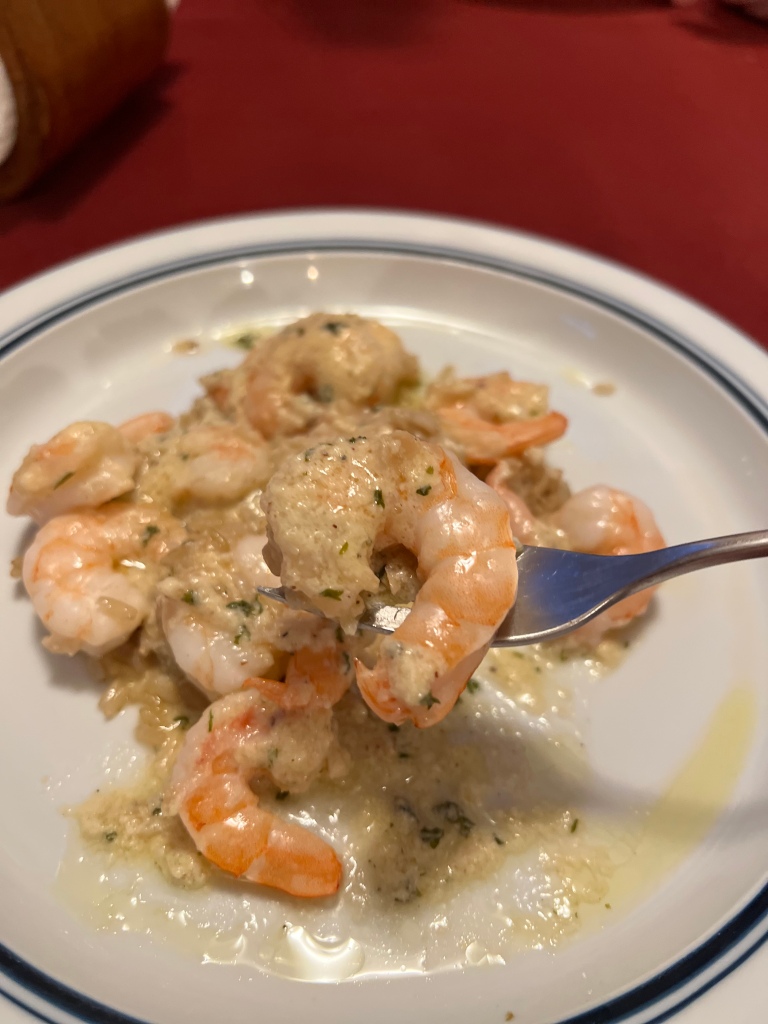
You can either fold shrimp into the sauce (I do this with my husband’s shrimp) or place shrimp on rice and spoon sauce over top.

My husband’s shrimp, tossed with the sauce.
My shrimp, with sauce spooned over top.

ENJOY!

Easy Pulled Pork

Ingredients:

My favorite thing to make, when friends come to visit, is anything that will make my house smell amazing while it’s cooking. This recipe fits the bill perfectly!
NOTE: While I roasted this pork in the oven, you could easily make this into a crock pot recipe.

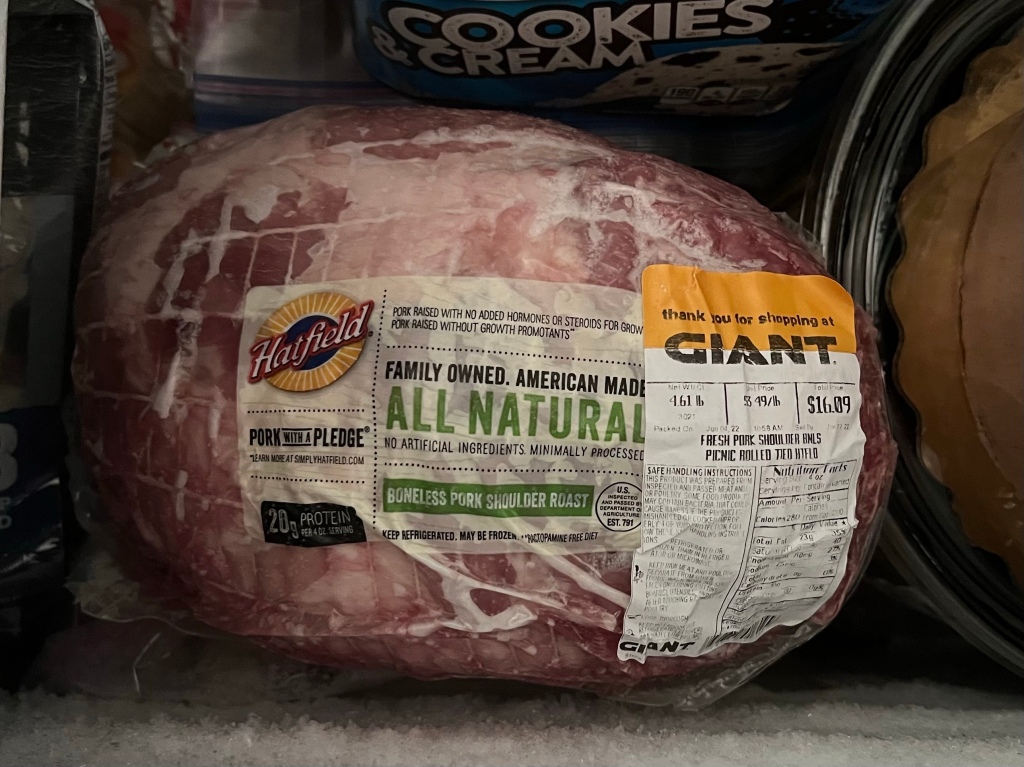
  • Boneless Pork Shoulder – Mine was just under 5 pounds
  • Dry onion soup mix
  • Red wine – I used Boordy Vineyards Cabernet
This is the pork I used for this recipe

Directions:

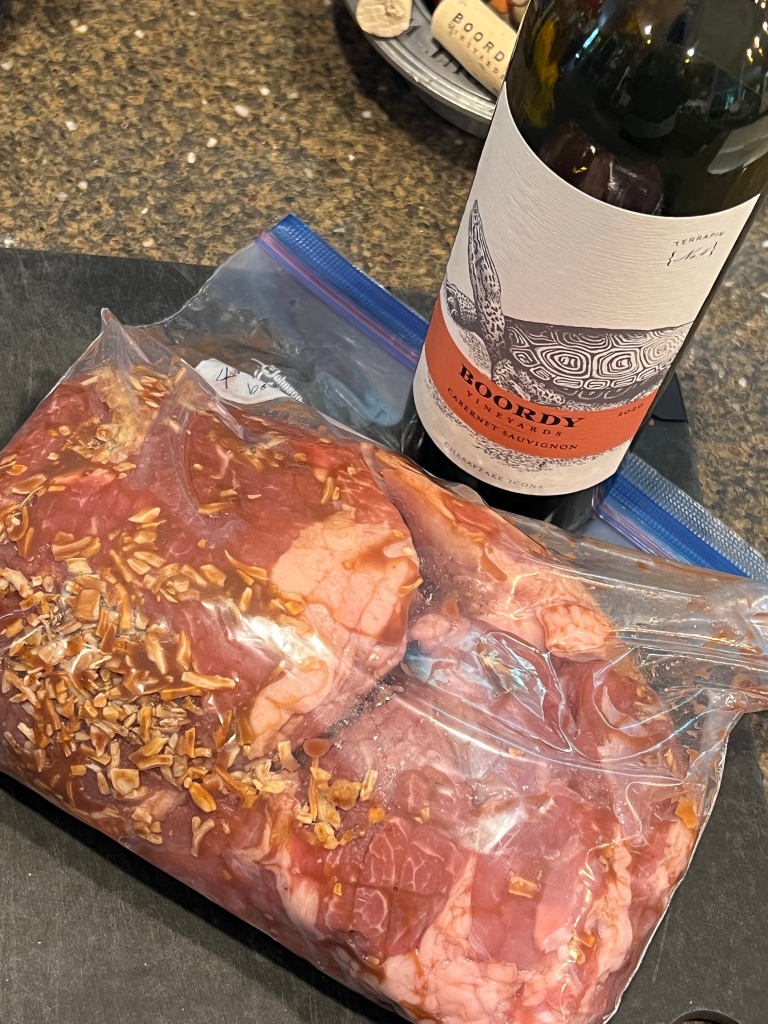
  • Remove netting from pork shoulder and toss in a gallon ziploc bag with dry onion soup mix and 1/2 cup red wine.
  • Marinate pork overnight.
Pork in marinade of onion soup mix and red wine
  • Remove pork from bag and sear on stovetop in cast iron pot.
  • Once all sides are browned, add another splash of red wine and cover.
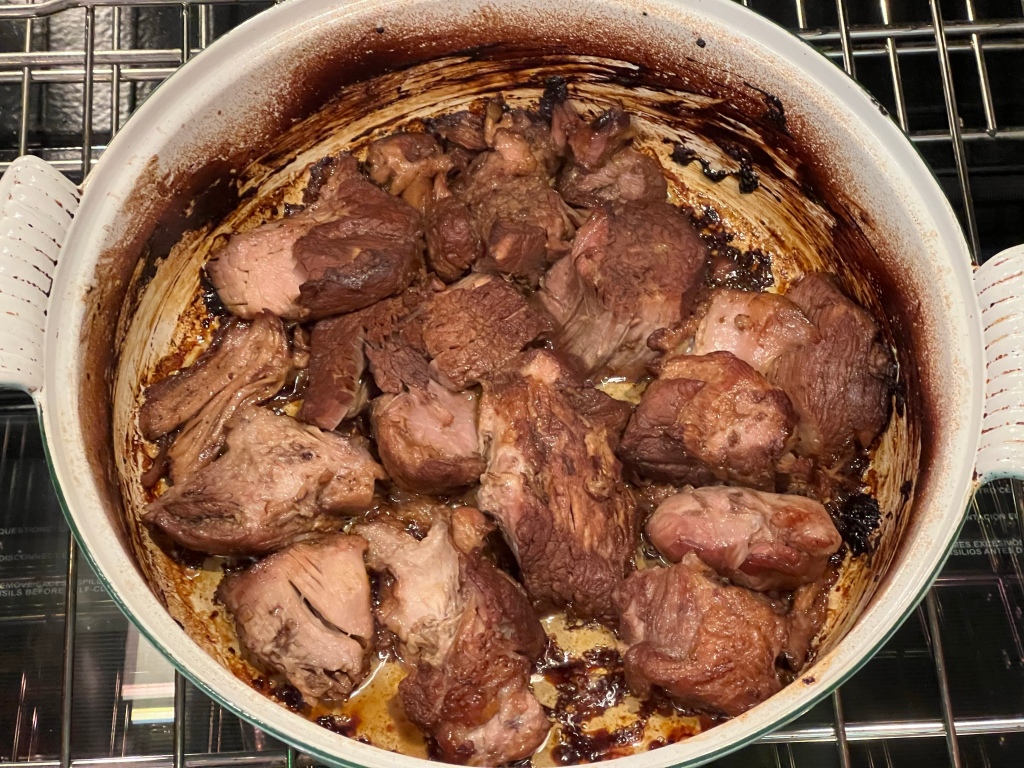
  • Place pot in 300* oven to roast.
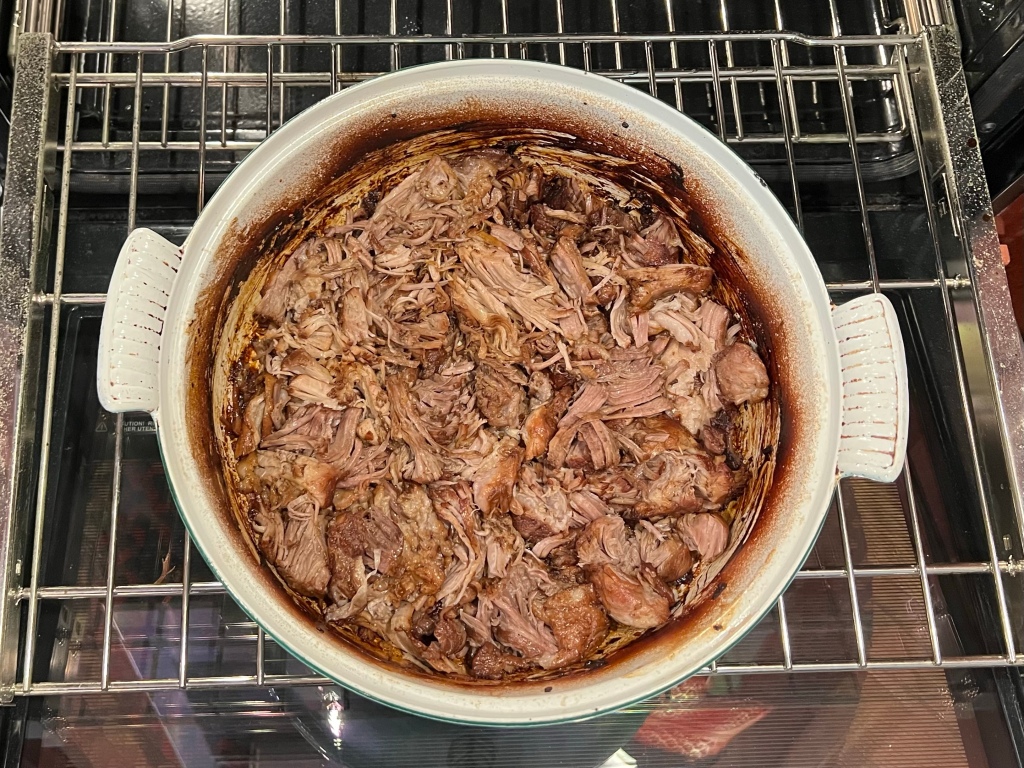
Pork, after 2 hours of roasting. This is my mother’s cast iron pot.
  • Roast, low and slow, until pork shreds easily.
  • Serve on homemade rolls for a delicious and easy dinner
Easy Pulled Pork, ready to eat!

I love to use my mom’s heavy cast iron pot. This is my favorite pot to use for low/slow cooking (pulled pork, pulled chicken, roasts of any sort) but I also love using it for soups and stews. While there are many options for a large pot, this specific one always reminds me of cooking with my mom.

This recipe is a great one to keep on hand for feeding a crowd. I’ll make it again in a few weeks when my son and his friends come for the weekend, but I’ll add a large pork butt roast so there’s enough food to go around. I like to make homemade kaiser rolls to complete the meal.

I hope you enjoy this recipe – let me know if you ever try it!

Chicken Divan Casserole

I have very fond memories of my mom making Chicken Divan casserole throughout my childhood. The recipe she used was based on one from Aunt Treva, my grandfather’s sister, and had lots of “cream of” soups included to make the sauce. It was always yummy, but I decided that I wanted to create a healthier version.

When searching for a similar recipe as the one from my childhood, I found a fabulous one created by Natasha Bull of http://www.saltandlavendar.com. Her original recipe can be found here: https://www.saltandlavender.com/chicken-divan/ but I needed to adjust the flavors to match what I was trying to recreate. If you’re looking for a cheesy, creamy chicken and broccoli casserole, look no further… this one is terrific.

For me, simply adding curry powder to the recipe above wasn’t quite what I wanted, so I played around with it until I created something that made sense for me. I also trimmed everything down to make an easy meal for two + 1 leftover serving. This recipe will make 3 servings in a 9×9 baking dish.

INGREDIENTS:

  • Broccoli florets – I used a small bag from the local store
  • Chicken Breast – I shredded two breasts from a rotisserie chicken but you can also use leftover chicken or even turkey
  • 2 T butter
  • 2 T flour
  • 3/4 c almond milk – you can use a mixture of almond milk and half & half if you prefer
  • 2 T whipped cream cheese
  • 1 tsp Dijon mustard
  • 1 tsp Worcestershire sauce
  • 1 tsp white wine – use what you have available/open but I also use this wine to thin the sauce before adding the cheese
  • 1 tsp curry powder
  • 1/4 tsp onion powder
  • 1/4 tsp garlic powder
  • 1 cup grated cheddar cheese – separate in half
  • 1/4 cup grated Parmesan
  • 10 Ritz crackers (approximate)

DIRECTIONS:

Preheat your oven to 375*F.

Prepare your broccoli for the casserole. After trimming down the broccoli into bite-size pieces, put all the florets in the bottom of the 9×9 baking dish. Lay a piece of paper towel over the broccoli and lightly dampen it with some white wine. Microwave the broccoli on HIGH for 2-3 minutes or until the broccoli is lightly cooked and still crisp. NOTE: if you’re using a metal dish, you can microwave the broccoli in the original bag and layer the cooked broccoli onto the bottom of the baking dish.

Layer your shredded chicken on top of the broccoli.

Make your sauce. Start by melting the butter in a sauce pan. Add the flour and whisk until combined and the mixture starts to bubble. Let the butter/flour mixture cook until it begins to get slightly toasty. Slowly add your milk and whisk to combine, then cook this mixture until it begins to thicken. Add the cream cheese (I like the whipped version b/c it’s light and combines fairly easily – if you use a block of cream cheese, I would decrease to 1T), whisking to combine. Add in your spices (mustard, Worcestershire, wine, curry powder, onion powder, garlic powder) and taste the sauce, adjusting as needed. Add salt and pepper if desired. NOTE: if sauce is too thick, add a splash of wine or almond milk. I have been known to add 1/4c-1/2 cup of wine to thin the sauce. Be aware that the sauce will thicken when you add the cheese. Remove the sauce from stove top and stir in 1/2 cup cheddar cheese.

Pour sauce over the chicken/broccoli mixture in your baking dish. Top with remaining cheddar cheese and Parmesan cheese then crush Ritz crackers over the entire casserole.

Bake casserole, uncovered, for 30-35 minutes. Cheese should be melted, crackers should be browned, and the sauce should be bubbling. Let casserole sit for 5 minutes before portioning out and serving.
Red Turkey Lasagna

I have a confession to make…. I love lasagna.  Rarely will I order it in a restaurant because I know that I love the taste of this recipe and can’t imagine ordering something *out* that I can make myself.  I’m sure that there are tons of variations on this recipe… with or without meat, red sauce vs white sauce, cooked noodles vs the no-bake noodles… but this is my favorite “go to” recipe to use if I’m being honest.  It originally came from a Weight Watchers cookbook but, as with most anything I make, it’s been altered and adjusted to fit our unique tastes.  Here’s how I make it:RedTurkeyLasagna (1)

Ingredients:

  • 1 package ground turkey
  • 1 large onion, diced
  • Dry red wine, about 1/2-3/4 cup
  • Spinach leaves (I used about 1 1/2 cups and sliced them fairly thin)
  • 1 large can pasta sauce (use your favorite… I like a basic meat sauce)
  • 1 16-oz container of low-fat ricotta cheese
  • 2 cups part-skim mozzarella cheese, shredded
  • 2 egg whites, lightly beaten
  • Italian seasoning (1 teaspoon or so… I simply shake it on until it “looks right”)
  • freshly grated nutmeg (don’t go crazy on this… you just want a hint)
  • 1 package lasagna noodles (you won’t use the entire package… I typically use about 9 or 10)
  • 1/4 cup Parmesan cheese

Directions:

  • Preheat oven to 375 degrees.
  • Spray large skillet with cooking spray and heat on medium high setting.  Brown ground turkey, using a potato masher to break up the meat into small pieces.  NOTE:This is the BEST way to brown meat, in my humble opinion. Add onion and red wine to the meat and cook until the wine is thoroughly incorporated.  Add spinach (or any other vegetables you care to add), cook until spinach wilts, then add pasta sauce and bring to a simmer.  Remove from heat and set aside.
  • Boil noodles, as directed on package, or immerse them in boiling water until softened.  Drain and set aside.
  • Combine the ricotta, mozzarella, egg whites, Italian seasoning, and nutmeg in a medium bowl and set aside.
  • Begin to layer your lasagna together. NOTE: I used a 9×9 pan and a 9×3 pan – normally, I’d simply use a single 9×13 pan.  This is where your noodle amounts may vary.  I used 11-12 noodles to cover these two pans, but the rest of the ingredients remained the same.  I also vary the direction of the noodle placement with each subsequent layer so the finished lasagna holds together well.  
  • Start by spooning a bit of the sauce to lightly cover the bottom of your pan(s). Place noodles over the bottom in a single layer.  Top with 1/3 sauce mixture, then dollop half of the cheese mixture over the sauce.  Repeat noodle, sauce, and cheese layers.  Top with noodles and final third of the sauce, then sprinkle with Parmesan.  NOTE: If making ahead or freezing lasagna, this is the place to stop.  Cover with foil and pop in fridge or freezer, then allow dish to thaw overnight before continuing.
  • Cover and bake lasagna for 45 minutes.  Uncover and bake until lasagna is bubbling and cheese is lightly browned.  Remove from oven and allow the lasagna to set for 5 minutes before serving.

As I mentioned, this is my favorite lasagna recipe.  Not only is it easy to make, it has delicious flavor and is a simple way of getting vegetables into your meal without much effort.  I like to add a side of garlic toasts to accompany this dish.

NOTE: To make garlic toasts, I start with a roll from the freezer (Ciabatta rolls work well for this, as do sub rolls).  Slice the frozen roll into bite sized slices and lay them on a foil-lined baking sheet.  Spray the slices with cooking spray and sprinkle with garlic salt.  When you remove the lasagna from the oven, turn oven off and pop the baking sheet into the hot oven.  The toasts will crisp as the oven cools and be ready to eat by the time you finish plating the lasagna.  I put the garlic toasts into a wooden serving bowl and pitch the foil… no messy cleanup!

I hope you’ll try this lasagna recipe sometime… it makes an amazing dinner and is always appreciated by my neighbors if I am able to share.  Enjoy!

Starter Recipe: Easy Lemon Shrimp

It’s been awhile since I last wrote… but that doesn’t mean that I’ve stopped cooking, or planning out recipes for this blog! Here’s an amazing (and easy) recipe that is sure to impress even the pickiest of guests who enjoy shrimp.  I love pulling a dinner together in under 20-30 minutes, and this recipe is one that delivers every single time.  I hope you’ll try it and make it your own!

Ingredients:EasyLemonShrimp

1 bag of frozen raw shrimp (I buy mine whenever they’re on sale at the local grocer and keep them in the freezer… anything sized large or above is worth the money, in my opinion)

1 lemon

1 jar of your favorite preserves (I happen to like using fig preserves these days, but apricot or any light colored fruit would work well)

Butter (just a pat to sear the shrimp) and olive oil (just 1T for searing shrimp)

Wine (or your preferred liquid of choice)

1 package microwave brown rice (for convenience… feel free to use the cheaper stuff if you’d prefer)

Directions:

  1. Peel shrimp and have them ready to cook.  I always remove the tails because I hate the idea of having to put the empty tail shell back on my plate.  I also like to salt/pepper my shrimp prior to cooking, but it’s up to you if you want to do this step.
  2. Put butter and olive oil into a large skillet and turn the heat on to medium high.  Allow the fats to mingle and get really hot..
  3. Sear shrimp on both sides in the hot butter/oil mixture – my husband likes them to have a bit of “crisp” to the edges, so that’s how I make it in our house.  Just make sure the shrimp is thoroughly cooked before making your sauce.
  4. In a small bowl, make your sauce using the juice of the lemon, some wine (I used a half cup of sparkling white wine that we had in the fridge, but feel free to use whatever you have), and a few spoonfuls of preserves.  Mix everything together.
  5. Add sauce to the cooked shrimp and allow to thicken.
  6. Pop brown rice in the microwave and cook on high for 90 seconds (this is why I prefer to use this type of rice… so easy and quick!)
  7. Once the sauce has thickened, plate your meal with some brown rice, spoon the shrimp evenly between the dishes, and pour over the sauce.
  8. Yes, it’s just THAT easy.  Now, enjoy the compliments that come raining your way.

I have altered this recipe in many different ways, but I really love the way that lemon compliments shrimp.  If you want, you can make a vegetable and top the veggie with some lemon zest… brings all parts of the meal together nicely.  Last time, I used a bag of green beans, tossed the cooked beans with a pat of butter, salt/pepper, and the lemon zest. It was fabulous! Using the preserves counteracts the strong tart taste of the lemon juice and really does a nice job of pulling everything together.  Enjoy!

NOTE:  If making this shrimp dish, don’t use a red or deep colored preserve as it will make the shrimp look as if it’s under cooked or raw.  Trust me… I did this once and will never forget the reaction.

Recipe: Red & White Stir Fry Salad

Here’s a recipe PLUS a bonus!  Each part of this recipe deserves it’s own post, but since they are connected, I decided to post them together.  It’s a recipe for “stir fry” AND a chicken salad recipe…in one recipe!RedNWhiteStirfrySalad

I was trying something new… I wanted to make a shrimp stir fry, but wondered how it might work if I tried to “bake” the ingredients for a stir fry.  To do this, I sliced a pound of de-shelled shrimp length-wise and used them to cover the bottom of a 9×9 pan.  I sprinkled a  package of slaw (the kind with shredded cauliflower and broccoli) over the shrimp and then made a sauce of hoisin sauce, red wine, garlic, ginger, and a little cornstarch (for thickening) to pour over the entire pan.  I covered the pan with foil and allowed it to bake at 350 degrees for 20-25 minutes.  A package of microwave brown rice finished off my first meal nicely (see top right-hand photo).  While the technique was unconventional, it was a great way to make a simple dinner without standing beside the stove top.

The second half of this recipe (the “Salad” portion) came about from my need to use up the half-cup of leftover stir fry.  I had a chicken breast in the fridge that also needed to be used, so I decided to try putting everything together to make a chicken-shrimp stir fry salad sandwich.  Weird, but it really was tasty.  I combined the following ingredients: leftover stir fry, one diced chicken breast, one diced stalk of celery, a small palmful of craisins, some mayo, white wine, salt and pepper.  I mixed everything until it was well combined, adding either mayo or white wine, depending on the desired texture, and then put the mixture on some toasted low-calorie bread to make a sandwich.  The threads of veggies from the stir-fry provided some interesting texture in the salad, but it was a great mix and the bits of leftover stir fry sauce added some zing to the flavor.  It was definitely a great way to use up leftovers in my fridge.

I hope this set of recipes gives you some ideas of ways to re-use foods in your own fridge.  Using red wine in the stir fry and white wine in the chicken salad was a fun inspiration as well… see what you can create when you go beyond the traditional and let your creative juices flow!

Crock Pot Recipe: Red Pulled Pork

If you’ve been following my blog, you may remember that I’ve already posted a recipe called “Red Wine Pulled Pork“.  That recipe is really great… but I also wanted to post this one because it is just so incredibly simple.  Simple to the point of being a “marinate, cook, shred, serve” type of recipe… how tough could that be?

I started with a large pork roast… I bought it because it was on sale that Friday and I was looking for something that could feed a crowd while watching Saturday football games in our living room.  When I got home from the store, I put the roast into a plastic storage bag and poured a mixture of smoked paprika, Montreal steak seasoning, and Lawry’s Seasoned Salt over the pork, massaging the seasonings into the meat.  I then put the bag into the fridge to marry the flavors overnight.RedPulledPork

On Saturday morning, I pulled out my crock pot and put dinner together.  I sliced two onions into thin strips (cut the onion in half, root to tip, cut off the top and slice the onion into strips the entire way down to the root, discarding the root) and put it into the bottom of the pot.  I placed the seasoned roast on top of the onions and then poured the end of a bottle of dry red wine (feel free to use as much or as little as you like) into the bottom of the pot.  I chose not to pour the wine over the roast because I really wanted the spices to have time to season the top fat layer as the meat cooked.

I set the crock pot to cook on high for 6-7 hours, but I could have easily chosen to cook it on low for 7-8 hours.  Much will depend on how comfortable you are with your crock pot.

I’m impatient when I use the crock pot, so I did check this about an hour before it was ready.  I like the feel of the meat when it falls apart, so I tend to push the envelope when I’m making this sort of dish.  I removed all the bones and then allowed it to cook until al the meat fell apart exactly as it should.  The onions were a nice addition into the meat, since they just “melted” into the pulled pork.

When I got ready to serve this dish, I sliced homemade kaiser rolls in half and spooned some meat into each roll before topping with a small bit of a jarred BBQ sauce from my fridge.  Potato rolls or chewy rolls from the store are also delicious with this meal… don’t feel that you *have* to make your own rolls for this meal to work.  This recipe was simple… the pork cooked all day and perfumed the entire house with a spicy warm smell that ushered football season into our home in the best possible way.  Enjoy playing with this recipe and making it your own… feel free to use whatever spice your family likes so your meal hits all the “high notes” for your favorite fans. Most of all… have fun!

Recipe: Beef Steak Sandwiches

Ideas for this sandwich kept popping up in my newsfeed all week, so I thought I would make my own rendition of this delicious recipe that Ree Drummond (The Pioneer Woman) calls The Marlboro Man Sandwich.  It’s a fabulous-looking steak sandwich that isn’t anywhere near as expensive as it *could* be, since it uses cube steak as the main ingredient.   While I would highly recommend checking out the original recipe on The Pioneer Woman site – she’s very entertaining and, IMHO, the sort of personality to which *I* would strive as a cooking show host – this is my own version that recipe but includes WINE (of course)BeefSteakSandwich.

Ingredients:

  • Onions (I used one and sliced it for this recipe)
  • Butter (I used 2 Tablespoons, but will try coconut oil next time to see if that would work as a substitute)
  • Cube Steak (I used just under 1 pound of meat for 2 1/2 sandwiches)
  • Red Wine (I used a Pinot Noir from my fridge, but would typically use James River Cellars Rad Red)
  • Worchestershire Sauce
  • Lawrey’s Seasoning Salt

Directions:

  1. I started by melting a tablespoon of butter in a saute pan and then browned an entire sliced onion until it was soft.  I added a bit of red wine to brown with the onion to give it a bit more flavor, then removed it from the pan once the wine was absorbed.
  2. Once the onions were cooked and the pan was empty, I added the second tablespoon of butter to melt in the pan.  While it melted, I sliced the meat across the grain and seasoned it with salt and pepper.  When the butter was hot, I placed the strips of steak in the pan and allowed them to sear well before flipping them over and doing the same thing to the other side.
  3. As the steak finished cooking, I re-added the onions and poured in about a half cup of red wine to make a base for the sauce.
  4. Using the wine to scrape up the browned bits on the bottom of the saute pan, I seasoned the meat with a bit of worchestershire and some Lawrey’s Seasoning Salt.  The sauce reduced fairly quickly and was ready for dinner soon after.
  5. To serve this lovely sandwich, I toasted two hoagie rolls and spooned the steak/onion mixture onto half of the roll.  I love cheese, so I added some shredded mozzarella cheese to my sandwich while my husband had his without cheese.  The best part of this recipe is to drizzle a bit of the sauce down over the meat once it’s on the roll… I think it’s the sauce that makes this sandwich so very salty, flavorful, and deep.

I hope you’ll try your own version of this sandwich sometime.  Add peppers to the onions if you like – that would add some great nutrition to this meal as well as a bit of a fun twist.  I used the last bits of the meat in a salad, so I can safely say that this is a recipe that you can use in most any way you can imagine.  It’d be great in wraps, salads, over noodles, or just as the original sandwich… you just can’t go wrong!

Salud!

Recipe: Chardonnay Chicken Piccata

Wow… this recipe was a huge hit last night.  It’s not a difficult recipe, but it has such huge presence and flavor that it’s quickly going to become one of my favorite recipes to make for company.  I really hope that you’ll consider making this for your family… It’s hard to imagine any chicken fan *not* enjoying this dinner!

Again, I started by using an actual recipe that I found by flipping through allrecipes.com and searching out a basic recipe that would utilize the half bottle of chardonnay that I had in my fridge.  Of course, I had to alter the recipe to fit my family’s preferences, but isn’t that what I do with every recipe I make?  NOTE: Most Piccata recipes also call for capers, but since my family isn’t big on them, I left them out of this recipe.  Here are the basics of Chicken Piccata:

Ingredients:

ChardonnayChickenPiccata

  • 3 whole chicken breasts (one package from my freezer), sliced in half, lengthwise
  • Salt and Pepper, to taste
  • Flour – enough to dredge breasts, approximately 1/2 cup
  • 2 Tablespoons Butter
  • 2 Tablespoons Olive Oil
  • 1 cup White Wine (I used a half bottle of James River Cellars Chardonnay)
  • 1/2 cup chicken stock (I didn’t have any on hand, so I used 1 packet of G.Washington Golden bouillon and a little water)
  • 2 whole lemons (I used both juice AND zest)
  • Fresh Parsley
  • 3/4 cup heavy cream (I never have cream on hand, so I used 2 Tablespoons of nonfat plain greek yogurt instead)
  • Egg noodles or your favorite pasta

Instructions:

  1. Start by simmering your water so you can drop your pasta when your dinner is almost finished.
  2. Slice chicken breasts in half, lengthwise, so they are fairly thin and each person can have two breasts per serving and still not feel like they’re over eating.
  3. Sprinkle each chicken breast piece with salt/pepper and dredge in flour.
  4. Heat one Tablespoon of butter with one Tablespoon of olive oil in a large skillet over medium high heat.  Fry each chicken breast until golden brown on both sides, in batches as needed so as not to crowd the pan.  Once breasts are golden, remove to a separate plate and keep warm.  NOTE: I did this in two batches and used another Tablespoon of butter and olive oil each for the second batch.
  5. Once the chicken is done, reduce the heat in the skillet to medium low.  Pour wine into the skillet, add the juice and zest of both lemons, and use the liquid to stir in all the bits from the bottom of the skillet.  Add chopped parsley to the sauce and allow it to cook long enough for all the flavors to combine.  Add greek yogurt (or heavy cream, if you are so inclined) and whisk in to thoroughly incorporate.  This is when I taste the sauce and adjust the seasonings – add salt/pepper as needed while it’s cooking so you don’t have to add more when you’re serving your meal.  I also add a spoonful or so of pasta water to lighten up the sauce if it seems to be thickening too quickly.
  6. While you’re making the sauce, start your pasta so you have everything done at the same time.  Drain pasta and get it ready to serve.
  7. For this meal, I added a bag of green beans, so I microwaved the bag for about 5 minutes to cook them quickly.  My favorite way to serve beans (especially for company) is to put a sliver of butter in the bottom of the serving dish, top with salt/pepper/seasonings.  I then toss the hot beans in the serving dish, distributing the butter and seasonings throughout the beans and making them look impressive!
  8. As the sauce thickens, add the cooked chicken back into the sauce and flip them so both sides get covered in the sauce.
  9. To plate your dinner, put the egg noodles on the plate, top with two chicken breasts, and spoon a bit of sauce over both.  Add a serving of green beans on the side and you’ve got a well-rounded meal that will impress your friends and any company that may happen over for a special dinner.

I really did love this dinner.  I’m a fan of anything that has a great punch of flavor and still looks pretty when plated, so this recipe really fit the bill for me.  Add capers, heavy cream, or whatever else makes this recipe taste best to you.  The idea isn’t to follow *my* recipe exactly… it’s to create a meal for those you love.  Enjoy the process… it’s what makes cooking such a fun thing to do!

Recipe: Coq au Vin (Chicken in Wine)

This classic French stewed chicken recipe (actual translation is “rooster/cock in wine”) with bacon, mushrooms, and onions is such a wonderful one to have in your arsenal of favorites.  It’s not terribly difficult to make, extremely impressive sounding, and the taste is outstanding.  These three reasons alone should have you running to your local grocery store to pick up a few fresh ingredients to make this for dinner soon.  Even better (for you), I used a “real” recipe as my starting point, so this is going to *look* like a real recipe when I finish this post.  Please know that I did use The Force when making it, so I took liberties with the recipe as I was making it for my family, but I’ll include those notes throughout the recipe for you.  I hope you’ll consider making this recipe soon… it’s absolutely delicious!

Ingredients:

  • Bacon slices (I sliced up 1/3 package into small diced pieces
  • 1 large yellow onion, sliced, or equal amount of sliced leeks (I used leeks)
  • 6 chicken breasts (skinless/boneless)CoqAuVin
  • 6 garlic cloves
  • salt and pepper to taste
  • 2 cups chicken broth
  • 2 cups red wine (pinot noir, burgundy, zinfindel – I used James River Cellars Rad Red)
  • 2 bay leaves
  • Several fresh thyme sprigs (or use dried)
  • Several fresh parsley sprigs (or use dried)
  • 1/2 lb button mushrooms, cleaned and roughly chopped
  • 2 Tablespoons butter
  • Chopped fresh parsley for garnish

Directions:

  1. Brown bacon on medium high heat in a dutch oven big enough to hold the chicken, about 10 minutes.  Remove cooked bacon, set aside.  Keep bacon fat in the pan.  NOTE:  I used a large/deep skillet, with a lid, that could go in the oven
  2. Working in batched if necessary, add onions (my leeks are shown in the middle pic on the left side of photo) and brown until slightly toasty.  Remove and then brown chicken well, on all sides, about 10 minutes.  I seasoned the chicken with salt and pepper during the browning stage to bring out the flavor of the chicken.
  3. Once chicken is all browned, return all the chicken and onions/leeks to the pot, add the garlic, chicken stock, wine, and herbs.  Add back the bacon.  Lower the heat to a simmer, cover and cook until chicken is tender and cooked through.  NOTE: at this point, I put the lid on the pan and popped it into the oven at 300 degrees until the chicken was tender.  I had started this dish much earlier in the day than was necessary, so I needed to slow down the cooking time.
  4. Once chicken is cooked through, remove the chicken and onions to a separate platter, cover and keep warm.  Remove bay leaves, herb sprigs, and discard.  I like to keep the garlic in the sauce, but you’re welcome to remove the garlic at this point if you prefer.
  5. Add mushrooms to the remaining liquid and turn the heat to high.  Boil quickly and reduce the liquid by three fourths until it becomes thick and saucy.  Lower the heat, stir in the butter, and adjust seasonings as needed.  NOTE: I added a touch of milk to tone down the seasonings.
  6. Return chicken and onions to the pan to reheat and coat with sauce.  Adjust seasonings and garnish with parsley and serve.

This should serve 6.  Serve with roasted potatoes (as seen in the photo), mashed potatoes, or over egg noodles.  My husband loved this dish and commented that “everyone would eat this”, meaning that I could serve this to my entire family and everyone would be happy.  Spices weren’t too overpowering and the flavor of the wine and stock meshed well together to create a thoroughly enjoyable meal.

Nothing could have been better to hear, in my opinion!  I hope you try it and hear the same accolades…