Shrimp in Lemon Butter

Shrimp in Lemon Butter

This recipe is a favorite of my husband and one that I love to make during the week. It’s a simple meal to pull together and doesn’t take a lot of complicated ingredients.

Ingredients:
Raw Shrimp (I use Jumbo Shrimp)
3-4T Butter
2T Garlic Confit (or 3T crushed garlic cloves + 1T olive oil)
Juice of 1/2 lemon (reserve zest)
2T Parmesan
1/4 C White Wine (Use something you love to drink)
Splash of Half & Half
Pinch of sugar (if desired)
Salt, pepper, and parsley to taste
Brown Rice (or pasta)

Sauvignon Blanc by Boordy Vineyards

COOK YOUR SHRIMP:
Cook your shrimp, however you’d like. I shell my shrimp first, then bake shrimp on a piece of parchment on a baking sheet in a 400* oven until done.
NOTE: My husband likes his shrimp cooked longer than me, so I start cooking his shrimp in a 400* oven for about 15 minutes before adding mine to the baking sheet.

My husband’s shrimp on the bottom of the pic, mine on the top.

COOK YOUR SAUCE:
In a sauté pan, melt butter with garlic confit and lemon juice. Sprinkle with Parmesan and stir to combine. Add in the wine and half & half, then simmer until sauce thickens slightly, stirring frequently. Taste and add seasonings as desired.
NOTE: If sauce gets thick, add a little liquid (wine, water, stock, or pasta water) to thin.

Stirring to incorporate the butter into the sauce is key.

MAKE RICE (OR PASTA):
I use microwaveable brown rice. If you prefer to serve this meal on pasta, make your pasta so it’s ready to be plated when your shrimp are done.

ASSEMBLE DINNER:
You can either fold shrimp into the sauce (I do this with my husband’s shrimp) or place shrimp on rice and spoon sauce over top.

My husband’s shrimp, tossed with the sauce.
My shrimp, with sauce spooned over top.

ENJOY!

Advertisement

Easy Pulled Pork

Ingredients:

My favorite thing to make, when friends come to visit, is anything that will make my house smell amazing while it’s cooking. This recipe fits the bill perfectly!
NOTE: While I roasted this pork in the oven, you could easily make this into a crock pot recipe.

  • Boneless Pork Shoulder – Mine was just under 5 pounds
  • Dry onion soup mix
  • Red wine – I used Boordy Vineyards Cabernet
This is the pork I used for this recipe

Directions:

  • Remove netting from pork shoulder and toss in a gallon ziploc bag with dry onion soup mix and 1/2 cup red wine.
  • Marinate pork overnight.
Pork in marinade of onion soup mix and red wine
  • Remove pork from bag and sear on stovetop in cast iron pot.
  • Once all sides are browned, add another splash of red wine and cover.
  • Place pot in 300* oven to roast.
Pork, after 2 hours of roasting. This is my mother’s cast iron pot.
  • Roast, low and slow, until pork shreds easily.
  • Serve on homemade rolls for a delicious and easy dinner
Easy Pulled Pork, ready to eat!

I love to use my mom’s heavy cast iron pot. This is my favorite pot to use for low/slow cooking (pulled pork, pulled chicken, roasts of any sort) but I also love using it for soups and stews. While there are many options for a large pot, this specific one always reminds me of cooking with my mom.

This recipe is a great one to keep on hand for feeding a crowd. I’ll make it again in a few weeks when my son and his friends come for the weekend, but I’ll add a large pork butt roast so there’s enough food to go around. I like to make homemade kaiser rolls to complete the meal.

I hope you enjoy this recipe – let me know if you ever try it!

Chicken Divan Casserole

I have very fond memories of my mom making Chicken Divan casserole throughout my childhood. The recipe she used was based on one from Aunt Treva, my grandfather’s sister, and had lots of “cream of” soups included to make the sauce. It was always yummy, but I decided that I wanted to create a healthier version.

When searching for a similar recipe as the one from my childhood, I found a fabulous one created by Natasha Bull of http://www.saltandlavendar.com. Her original recipe can be found here: https://www.saltandlavender.com/chicken-divan/ but I needed to adjust the flavors to match what I was trying to recreate. If you’re looking for a cheesy, creamy chicken and broccoli casserole, look no further… this one is terrific.

For me, simply adding curry powder to the recipe above wasn’t quite what I wanted, so I played around with it until I created something that made sense for me. I also trimmed everything down to make an easy meal for two + 1 leftover serving. This recipe will make 3 servings in a 9×9 baking dish.

INGREDIENTS:

  • Broccoli florets – I used a small bag from the local store
  • Chicken Breast – I shredded two breasts from a rotisserie chicken but you can also use leftover chicken or even turkey
  • 2 T butter
  • 2 T flour
  • 3/4 c almond milk – you can use a mixture of almond milk and half & half if you prefer
  • 2 T whipped cream cheese
  • 1 tsp Dijon mustard
  • 1 tsp Worcestershire sauce
  • 1 tsp white wine – use what you have available/open but I also use this wine to thin the sauce before adding the cheese
  • 1 tsp curry powder
  • 1/4 tsp onion powder
  • 1/4 tsp garlic powder
  • 1 cup grated cheddar cheese – separate in half
  • 1/4 cup grated Parmesan
  • 10 Ritz crackers (approximate)

DIRECTIONS:

Preheat your oven to 375*F.

Prepare your broccoli for the casserole. After trimming down the broccoli into bite-size pieces, put all the florets in the bottom of the 9×9 baking dish. Lay a piece of paper towel over the broccoli and lightly dampen it with some white wine. Microwave the broccoli on HIGH for 2-3 minutes or until the broccoli is lightly cooked and still crisp. NOTE: if you’re using a metal dish, you can microwave the broccoli in the original bag and layer the cooked broccoli onto the bottom of the baking dish.

Layer your shredded chicken on top of the broccoli.

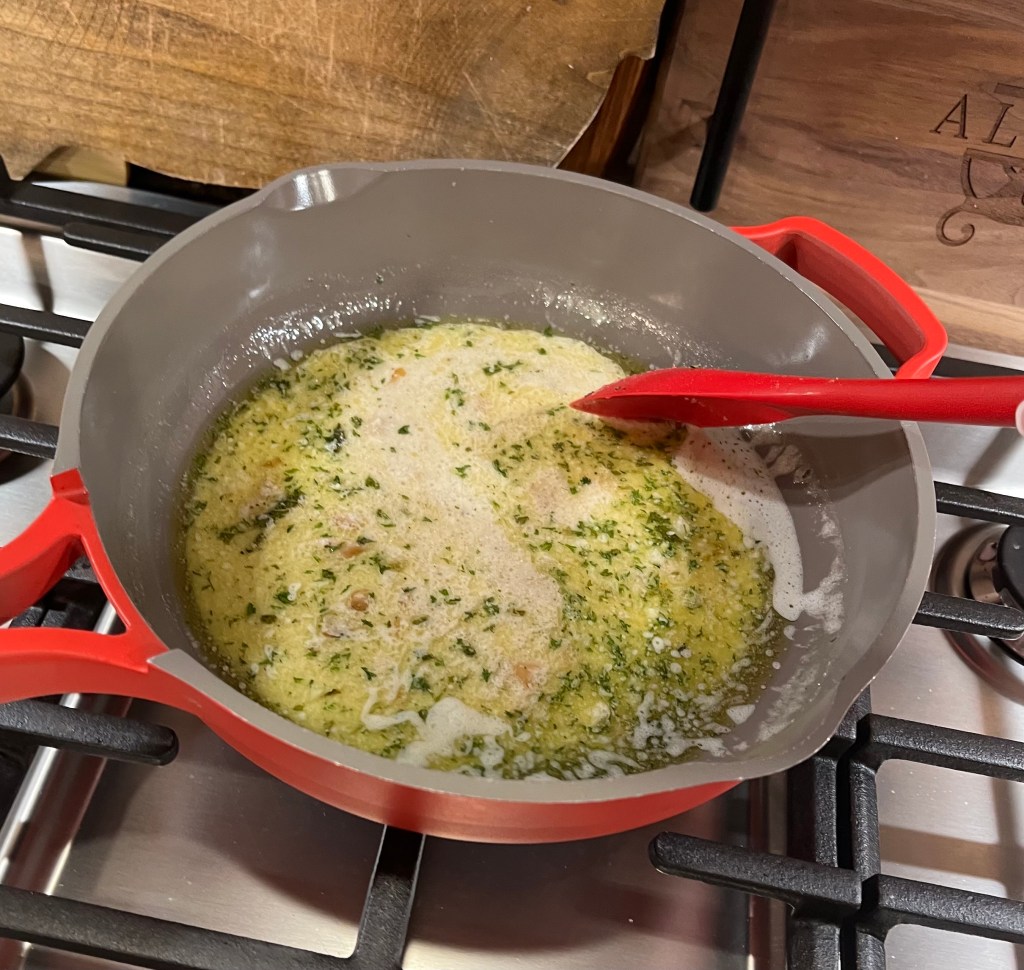
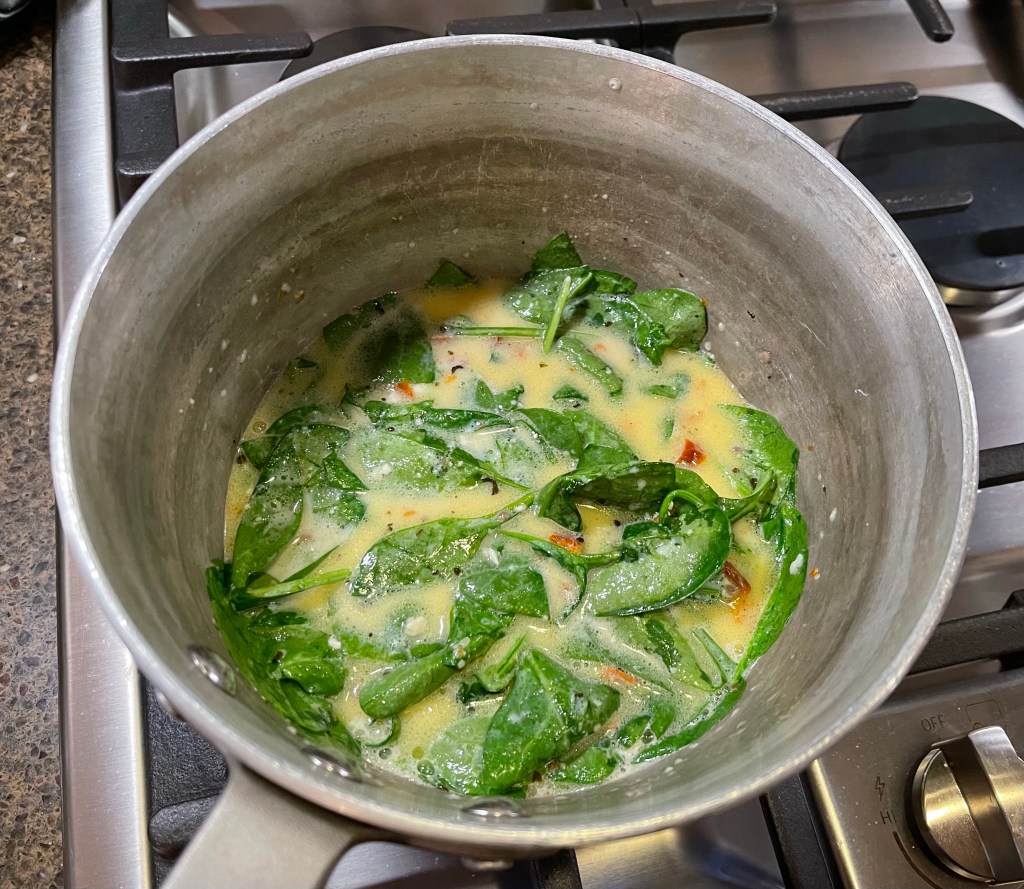
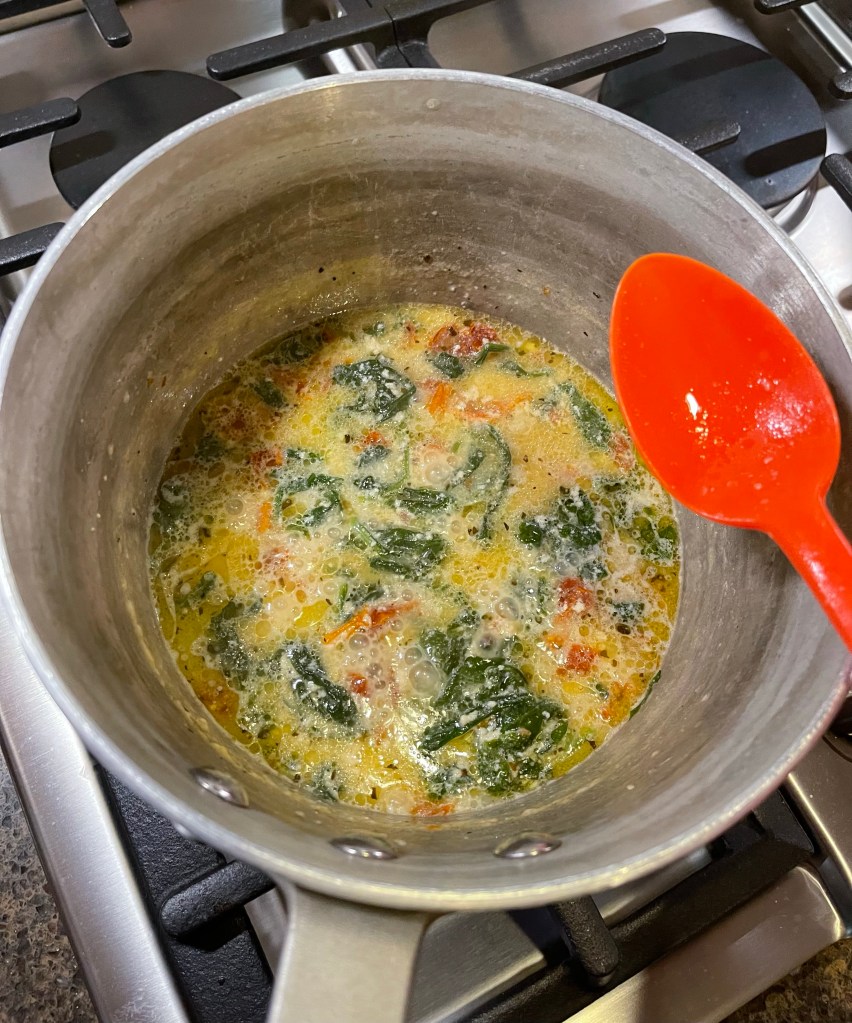
Make your sauce. Start by melting the butter in a sauce pan. Add the flour and whisk until combined and the mixture starts to bubble. Let the butter/flour mixture cook until it begins to get slightly toasty. Slowly add your milk and whisk to combine, then cook this mixture until it begins to thicken. Add the cream cheese (I like the whipped version b/c it’s light and combines fairly easily – if you use a block of cream cheese, I would decrease to 1T), whisking to combine. Add in your spices (mustard, Worcestershire, wine, curry powder, onion powder, garlic powder) and taste the sauce, adjusting as needed. Add salt and pepper if desired. NOTE: if sauce is too thick, add a splash of wine or almond milk. I have been known to add 1/4c-1/2 cup of wine to thin the sauce. Be aware that the sauce will thicken when you add the cheese. Remove the sauce from stove top and stir in 1/2 cup cheddar cheese.

Pour sauce over the chicken/broccoli mixture in your baking dish. Top with remaining cheddar cheese and Parmesan cheese then crush Ritz crackers over the entire casserole.

Bake casserole, uncovered, for 30-35 minutes. Cheese should be melted, crackers should be browned, and the sauce should be bubbling. Let casserole sit for 5 minutes before portioning out and serving.

Tuscan-style sauce

Oh, my goodness…. this sauce is so delicious! A friend recently mentioned a crock pot dinner that she’d made that sounded good, but I didn’t want to use my crock pot. I got the basics of the recipe from her, looked at a few other recipes, and went to “work”.

INGREDIENTS:

  • 2 TBSP butter
  • 1/3 cup half & half (fat-free is fine)
  • 2-3 forks of julienned sun dried tomatoes *I like to add a spoonful of the oil to this sauce as well
  • 2 handfuls of spinach
  • 1 TBSP Parmesan
  • 1 wedge Laughing Cow light cheese
  • 1-2 T white wine (I used Boordy Vineyards Vidal Blanc)
  • Salt and pepper to taste
  • Pasta water, as needed/if available, to thin or extend sauce

DIRECTIONS:

  • In a heavy sauce pan, simmer butter with half & half until butter melts.
  • Add sun dried tomato and fresh spinach, stir and allow spinach time to wilt.
  • Add Parmesan and Laughing Cow, stir to combine and allow the flavors to meld.
  • Add wine, salt & pepper, then taste sauce, adjusting flavors as needed. Add pasta water, if needed.

I typically spoon this sauce over baked chicken, pasta, and broccoli, as seen in the photo. I’ve also served this sauce over shrimp. It’s a delicious addition to enhance that plain chicken and vegetable dinner. It doesn’t take long to make this sauce and makes for a beautiful dinner plate!

Sausage Balls (Pork and Turkey)

It’s been a very long time since I’ve written a complete wine blog post – please forgive me.  We moved last year and life got more chaotic than usual.  If you ever want to see what I’m doing with wine, or have any questions, please follow me on this blog’s Facebook page (FromTheBottomOfAWineBottle).

Today, I’m sharing this recipe from my childhood.  My mom found this recipe in our church cookbook and she used to make these sausage balls all the time.  They call for three main ingredients and are easy to bake/freeze for a quick breakfast, an after school snack, or even a light dinner.  I’ve added a little white wine, simply to make the finished product slightly less dense, but you can certainly leave the wine out if you prefer.

SausageBalls

Ingredients:

1 pound bulk pork sausage (I used pork sausage, but you can easily substitute ground turkey sausage, if you can find it)

3 cups Bisquik or Jiffy baking mix (I prefer Jiffy mix since we used to live in Chelsea, MI, where the Jiffy company is located)

10 oz shredded cheese (I used sharp cheddar)

White Wine (I used a white wine from Boordy Vineyard, called Rockfish, but you can use your favorite dry white wine)

Fresh Rosemary (This is one of my favorite flavors with sausage – feel free to omit if you’re not a fan)

Directions:

  1. Preheat oven to 375*.  Cover two large baking sheets with parchment paper.
  2. Blend sausage, baking mix, and cheese until it comes together thoroughly.  I use a mixer, but this can be made in the same way you would mix up a meatloaf.
  3. Using a 1/4 cup ice cream scoop, form balls of the mixture and place them on the prepared baking sheets.  They won’t spread out as they bake, but I like to spread them out on the baking sheets so air can circulate for cooking.
  4. Bake sausage balls for 15 minutes, until lightly browned.
  5. Serve warm or allow to cool and put into bags in the freezer.  These make an excellent snack or light dinner and simply need to be warmed up in the microwave.

FOR TURKEY SAUSAGE BALLS:  If you prefer to use ground turkey instead of ground pork, here are a few photos from that option.  I also adjusted them to a smaller size, using a 1/8 cup (2 Tablespoons) scoop.  Here’s a photo of them, in all their cheesy goodness:

TurkeySausageBalls

I hope you enjoy this recipe.  As an alternative, I like to make this recipe into even smaller balls for appetizers.  You can turn up the heat by using a hot sausage or you can make it even more savory by adding other herbs.  It’s a great basic recipe to have on hand to share with friends.  Have fun with it!

Easy Red Beef Stew

I was headed out to do some holiday shopping recently and decided that I wanted to make a simple crockpot dinner so that I wouldn’t feel pressured to rush home and make something that evening.  I had a nice piece of beef in the fridge and had picked up a package of baby potatoes at the store, so this was a really easy dinner to create.redbeefstew

Ingredients:

  • Beef – I don’t know much about cuts of beef, but I knew enough to get a “chuck roast”.  The one I chose was on sale, so I grabbed one that was on the smaller side so we wouldn’t have much waste.
  • Flour – I tossed some into a plastic bag to coat the beef before putting it into my crockpot.  Don’t honestly know how much… just enough to coat the meat.
  • 1+ onion – I cut this into thick chunks and used one whole vidalia onion and one half a red onion that I had in the fridge
  • 1 packet country gravy
  • 1 packet dry onion soup mix
  • 1 package (or similar amount) of baby potatoes (see photo of what I found at the store… this one included a few cloves of garlic and two sprigs of rosemary)
  • Red wine – the original recipe simply called for water, but that won’t cut it in my house.  WHY USE WATER WHEN YOU CAN USE WINE??
  • Frozen peas – I didn’t measure, but you could use whatever vegetable you like best here.  NOTE: If you’re planning to use carrots, I would allow them to cook with the beef instead of popping them in at the end.

Directions:

  1. Slice onion into chunks and put in the bottom of a large crockpot.
  2. Toss the meat in a plastic bag with some flour and then shake to cover.  Place meat on top of onions to cook.
  3. Open package of potatoes (or chop up large potatoes to fit around roast) and lay them around the meat in the crockpot.
  4. In a separate bowl, open the packets of gravy and onion soup and mix together with red wine.  I did not measure the amount of red wine used – I simply poured the wine and mixed it with the dry ingredients until it looked like enough.  I have a habit of adding too much liquid to my crockpot recipes, so I went a little lighter than I might have otherwise, which ended up working out well.
  5. Pour liquid over the roast.
  6. Cook on low for 6-8 hours or on high for 4-5 hours.
  7. During the last half hour (or 15 minutes before serving), stir the roast a bit and add your frozen peas.  These won’t take long to cook and you don’t want them to disintegrate into the gravy.
  8. Serve with some crusty bread to soak up the gravy… it’s delicious!

This was one of the most simple of meals but such a crowd pleaser.  If your family is picky about onions, feel free to slice them a bit smaller, but I liked the chunks of onion with the bites of meat and potato.  Feel free to experiment with other vegetables or seasonings… it’s your meal for your family, so use what you like!

Enjoy!

Sausage and Pepper Casserole

My neighbor had a health issue with her mom last night and I thought that the nicest thing I could do for her would be to make dinner and dessert for them tonight.  I know her mom loves sweets, so I had to make sure to have some sort of dessert included, so I made a platter of chocolate chip cookies, since I already had the dough in the fridge… the question was now “what do I make for dinner”?

I looked through my freezer and found a package of turkey kielbasa and a half package of bacon, so that became the base of my recipe.  Since I also had some green peppers and an onion in the crisper, I decided to make a turn on a “sausage and pepper sandwich” and add some linguine and a creamy cheese sauce to pull it all together.  Here’s how I went about making dinner. NOTE: Remember that I was making two dinners for two people each, so these could have easily been made into a single 9×11 casserole instead of two individual 9″ round casseroles.

I crisped up the half package of bacon and then removed the bacon to a plate, leaving the bacon drippings in the saute pan.  I diced one package of turkey kielbasa and crisped that up in the saute pan as well before removing that to a plate. I sliced one green pepper and half a large onion and sauteed these in the bacon grease until softened.  While cooking all these individual pieces, I cooked 3/4 package of linguine (broken in half) until just al dente, then drained the pasta, saving some of the water in case I needed it for the sauce that would top the entire casserole.Sausage&PepperCasserole

I then assembled the casseroles, placing a little of the bacon and half the kielbasa and half the vegetables on top before adding half the pasta.  Once this was done, I was able to turn my attention to the sauce.  I wanted something that was creamy and slightly cheesy but didn’t just want to throw cheese on top of the pasta and hope it melted correctly.

I started the sauce by simmering 2T butter and 2T flour together to make a roux.  I then added some white wine (using chardonnay was my choice this time… crisp and clean) and chicken stock to start a great tasting sauce.  To make the taste unique to this particular dish, I added half a can of cream of mushroom soup (leftover from Christmas dinner), some parmesan cheese and some cheddar cheese for creaminess and a few dashes of Worchestershire sauce for flavor.  Once the sauce tasted “right” (you HAVE to be willing to taste your sauces during the cooking phase so they balance out once they’re added to a dish), I poured half over each casserole and topped each with a sprinkling of leftover bacon.

I have no idea if my neighbors will enjoy this casserole, but I hope they feel the love that comes from wanting to do something nice for others in times of stress.  Karma is a tricky thing… but I believe that if you always reach out to others in a positive way and from a place of kindness and love, that same thing will come back to you tenfold.  I’m not expecting them to do anything in return…. I just know that they shouldn’t have to worry about feeding their family when they’re facing a difficult time.

May we all approach life in this manner… give when you can and your life will be made better for the effort.

Happy New Year Blessings to you all, my friends.  Wishing you health and happiness as 2015 begins!

Fish in a Flash

I’ve written this recipe a few times, but wanted to update it a bit for everyone.  This is one of the easiest and fastest three-course meal recipes I’ve ever written and I love that it’s also incredibly versatile.  The basic premise is the same but the specific ingredients can be adjusted, depending on your preference and what you have available.  I hope you love this recipe as much as me!fishinaflash

  • I call this recipe “Fish in a Flash” because you’re only going to need 15 minutes to make this three-course meal for your family.  It’s full of flavor, cost-effective, and adjustable… what more could you want in a recipe?

Ingredients:

  • Fish (Feel free to use whatever fish is on sale or what you happen to have in your freezer)  In this case, I used two tilapia fillets, but I’ve made this dish with flounder, haddock, or any other light, flaky fish.  I haven’t used salmon, but that doesn’t mean that you can’t!
  • Crackers (Ritz crackers, Cheese crackers, club crackers, saltines, etc) crushed
  • Salt, Pepper, and any favorite seasoning (I like Paprika)
  • White wine (use whatever you have on hand or you can substitute water)
  • Broccoli flowerettes (I used a half bag of Broccoli-Wokly from the local grocer)
  • Bag of microwave brown rice (or your favorite starch)

Directions:

  • Spray a microwavable dish with cooking spray and arrange your fish fillets on dish.
  • In a small bowl, crush the crackers and mix in your seasonings.  Sprinkle fish with seasoned cracker crumbs.
  • Using your thumb as a stopper, gently “thumb” wine over the crumbs to lightly wet them  to create a coating on the fish.  You can also spoon the wine (or water) over the fish.
  • Top fish with broccoli flowerettes – I did them in a decorative fashion for these photos, but I typically just add a layer of broccoli over the fish.
  • Wet a paper towel and lay on top of the broccoli – this will help to steam the veggies.
  • Pop your dish into the microwave and cook on high for 10-12 minutes, until the fish is flaky and well-cooked.
  • Remove the fish from the microwave and allow to sit for 2 minutes.
  • Cook the 90-second brown rice in the microwave.
  • Remove rice and divide onto individual plates.
  • Serve meal with brown rice on the plate, topped with fish and vegetables.

This has been a staple in our menu selection for most of my 28-years of marriage.  I’ve adjusted and altered the recipe to the point where this is the cleanest and most simple rendition.  The original recipe (from my first year of marriage) included a half stick of butter and lots of lemon juice… this version is much healthier and the flavors really seem to pop.

I hope you’ll try this recipe and see how your family likes our Fish in a Flash.  It might just become a favorite in your house too!

Shrimp and Peas with Pasta

We were looking for something easy and delicious for dinner tonight.  I knew I wanted to use shrimp, so I started there.  Scrounging around the fridge produced grape tomatoes and some frozen peas, so I came up with this yummy meal.

ShrimPeasPasta

Ingredients:

  • 1 bag frozen shrimp, thawed and shelled.  Salt and pepper shrimp before cooking.
  • 1/2 cup frozen peas
  • 1/2 cup grape tomatoes, sliced in half
  • Coconut oil
  • White wine
  • Savory nutritional yeast flakes
  • Parmesan cheese
  • Pasta water
  • Thin Spaghetti, cooked al dente’
  • 1 Egg yolk, whipped with a fork and tempered with a few spoons of pasta water

Directions:

  • In boiling, salted water, cook your pasta, saving 1 cup of pasta water
  • In a large saute’ pan, heat coconut oil and sear shrimp on both sides until toasty.
  • Add peas and tomatoes, saute’, then add some white wine and allow to cook through.
  • Season dish using dashes of yeast flakes, parmesan cheese, and a bit of pasta water. Taste after each addition before moving forward, adjusting as needed.  Pasta water will add a bit of thickening, so take your time with this step.
  • Drain pasta and add cooked pasta to shrimp mixture and toss to combine.
  • Remove from heat and add whipped egg yolk to add in a bit of creaminess.
  • Toss well and serve.  I like to top with parsley or minced chives.

This is one of those meals that can be thrown together fairly easily.  I like to keep bags of frozen shrimp and peas on hand.  If you don’t happen to have grape tomatoes in your fridge, you can substitute a small amount of sun-dried tomatoes (sliced thin) or leave them out altogether.  Play with your ingredients and come up with your family’s favorites. Enjoy creating your own version!

Glazed Salmon and Scalloped Potatoes

I have a confession to make… I’m usually lousy at cooking salmon.  Since I found two pieces on “mega-sale” at the store today, I thought I’d give it one more try to see if I could come up with something really yummy.  I have to say that this entire meal ended up being one of my favorites… and it was ridiculously easy!  This post isn’t just a recipe for dinner, it’s also got a great side dish (I serve these potatoes for Easter EVERY year) and a salad dressing.  If you’re looking for an easy and impressive dinner, this is it.  Yum!

GlazedSalmon_ScallopedPotatoes

Glazed Salmon

Ingredients for Salmon:

  • Salmon fillets
  • Salt/pepper
  • Coconut oil (or your favorite fat/oil)
  • Glaze
    • 2T jam (I used Loganberry jam)
    • 2t balsamic vinegar
    • 2t white wine (I used a lightly oaked chardonnay)

Salmon Directions:

Season the salmon fillets with salt and pepper.  In a hot saute’ pan, melt coconut oil and then sear the seasoned side of the salmon filets.

  • As the salmon sears in the hot oil, blend the glaze.  You’ll need to warm the jam for 10 seconds in the microwave.  You’re not trying to melt the jam… you just want it loose enough to blend with the vinegar and wine.  You’ll want to adjust the seasonings with a little salt and pepper…. make sure to taste the glaze before using it.
  • Once the one side of the salmon is nicely browned, turn the fillet over and pour the glaze over top. Since the salmon won’t be thoroughly cooked, I put the entire pan into the oven and allow the fish to roast until dinner is done.
  • NOTE:  I started the potatoes about 30-40 minutes before I began making the salmon, so the house already smelled amazing before I started on the fillets.

Scalloped Potatoes

Ingredients for Scalloped Potatoes (This recipe serves two/three.  You can add/subtract as needed to serve more people)

  • Three medium potatoes (I like to use Gold potatoes)
  • Half an onion
  • Flour (1/4-1/3 cup)
  • Salt/pepper
  • White wine
  • Shredded cheese (I used 1/2 bag of sharp cheddar)
  • Milk (I only have skim in the house, so that’s what I used)

Directions for Scalloped Potatoes

  • Slice potatoes thin (I use a mandolin, but that’s not necessary as long as the slices are all equally thin)
  • Slice onion in half (you only need 1/4 onion for each layer) and slice as thin as potatoes
  • Layer your dish:
    • Half potatoes
    • Half onions
    • Sprinkle with flour (this will ultimately thicken your cheese sauce, so don’t skimp)
    • Season lightly with salt and pepper
    • Thumb wine lightly over mixture
    • Top with a light layer of cheese
  • Repeat layer, ending with cheese
  • Bake in a preheated 375 degree oven for 45-50 minutes or until potatoes are fork-tender and the top is bubbling and browned.

This recipe showed me that, with a little ingenuity and imagination, I could create a fabulous, easy, “guest-worthy” meal that would satisfy all my expectations.  This is a starter recipe that will impress the pickiest visitor… try it and see what YOU think!

BONUS RECIPE:  I’d like to share my absolute favorite salad dressing recipe with you.  This recipe makes an impressive amount of dressing that is much lower in calorie than you’d ever imagine. I have NEVER actually measured the ingredients for this dressing, so you’ll have to forgive me for not including any.

Blend the following ingredients:

  • Balsamic Vinegar (a small puddle in the bottom of a salad bowl)
  • Mustard (I tend to use horseradish mustard or dijon mustard)
  • 1 envelope of sweetener (Equal or Splenda, depending on what’s in the house)
  • 1T of a prepared dressing (I typically use a creamy dressing of some sort)

Mix ingredients together and toss with thinly sliced romaine.  This is full of flavor and better than you’d expect!